How To Install Anaconda On Linux
This tutorial explains what is Anaconda Python distribution, the features of Anaconda, and how to install Anaconda on Linux operating system.
What is Anaconda distribution?
Anaconda is a cross-platform distribution of the Python and R programming languages. It is used for data science, machine learning, large-scale data processing and predictive analytics etc. Anaconda is available as four editions namely individual (open source) edition, commercial edition, team edition and enterprise edition. Anaconda individual edition is the world’s most popular Python distribution platform with over 20 million users worldwide. The Individual edition is free for personal use while the three other editions are commercial versions.
Anaconda ships with a command line package and virtual environment manager called Conda, which is used to manage and deploy applications, environments and packages. Conda was created for Python packages, however it can be used for other languages as well.
Using Conda utility, we can,
- Create new Conda environments,
- Install packages into specified Conda environment,
- List packages in a Conda environment,
- Update conda packages,
- Search for packages,
- Clean unused packages,
- Remove packages from environments,
- And more.
It also includes Anaconda Navigator, a graphical alternative for those who are not comfortable with the command line interface.
Anaconda features
Anaconda distribution enables the data scientists to:
- download a collection of over 1500+ Python and R data science packages,
- manage libraries, packages and virtual environments,
- develop and train machine learning and deep learning models,
- analyze data,
- and visualize results using various tools.
Install Anaconda On Linux
As stated already, Anaconda Python distribution comes as free and paid editions. The Individual edition is free for personal use and learning purposes. For the purpose of this guide, I will be using Anaconda Individual edition.
Before installing Anaconda distribution on your Linux machine, make sure you have installed all required prerequisites.
If you are using Arch Linux and its derivatives like Manjaro Linux, install the following prerequistes:
On Debian, Ubuntu and other DEB-based systems:
On Fedora, CentOS, RHEL, AlmaLinux:
On SUSE/openSUSE:
After installing the prerequisites, download the latest Anaconda installer for Linux from Anaconda official download page:
Go to the location where you downloaded the Anaconda installer and check the integrity of the downloaded file with SHA-256:
You will see an output like below:
Compare the above hash value with the official Hashes for Anaconda. If the hash value of the locally downloaded installer file matches with the official hash, you're good to go.
Now, start Anaconda installation using command:
You should include the bash command regardless of the shell you're using.
Press ENTER to continue installation:
You will now see the license agreement. Press ENTER key to scroll to the bottom of the license terms and type “Yes” and press to agree the license agreement and continue installation.
Next the installer will prompt where do you want to install Anaconda. You will be given three choices. Press ENTER to accept the default install location. Press CTRL+C to cancel the installation or mention an alternate installation directory.
I go with the default installation path, which is /home/sk/anaconda3 in my case.
If you've chosen the default location, the installer will display “PREFIX=/home/<user>/anaconda<2 or 3>” and continue the installation. It may take a few minutes to complete.
Next you will be prompted to initialize Anaconda. It is recommended to initialize it, so just type Yes and press ENTER to continue.
After a few seconds, you will see “Thank you for installing Anaconda3!” message if the installation is successful.
For the installation to take effect, close and re-open your Terminal. Alternatively, run the following command:
You will now see the prefix (base) in front of your shell prompt. It means that the conda's base environment is activated.
If you don't want the conda's base environment activated by default on system startup and wish to run conda from anywhere, run the following command:
Now you won't see the prefix (base) in your shell prompt.
Multi-user Anaconda installation on Linux
By default, Anaconda will be installed for the current user only. If you wish to install Anaconda for all system users, create a common group, for example condagroup:
Replace "condagroup" with your own.
Change the group ownership to "condagroup" on the entire directory where Anaconda is installed. In my case, Anaconda is installed in /home/sk/anaconda3 directory, so I ran the following command:
Replace /home/sk/anaconda3 with the actual path to your installed Anaconda file.
Next, set read and write permission for the owner, root, and the condagroup only using command:
Finally, add all users to the newly created "condagroup":
Here, ostechnix is the user name and condagroup is the group name.
From now on, the users added to the "condagroup" group can able to access Anaconda, install packages, and create environments etc.
We have successfully installed Anaconda on our Linux machine. Let us verify if the Anaconda is installed correctly or not.
Verify Anaconda installation
We can verify Anaconda installation from commandline and/or from Anaconda Navigator GUI.
To verify Anaconda installation from commandline, run the following command:
If Anaconda is properly installed and working, you will see list of installed packages and their versions as shown in the following output:
The another method to verify the Anaconda installation is by entering into the Python shell.
To enter into Python shell, run:
This command will launch the Python shell. If Anaconda is installed and working, it will display "Anaconda, Inc." message as shown in the below output.
To exit the Python shell and go back to your shell prompt, enter the following command:
We can also verify Anaconda installation by opening Anaconda Navigator GUI.
Launch Anaconda Navigator graphical interface
We can manage packages and environments from command line using Conda package manager. If you're a newbie and bit uncomfortable with commandline, just use Anaconda Navigator GUI.
To launch Anaconda Navigator graphical interface, run the following command from your Terminal:
The default interface of Anaconda Navigator will look like below:
As you can see, the Anaconda navigator includes many popular IDEs by default. As of writing this guide, it has the following 10 IDEs:
- Datalore,
- IBM Watson Studio Cloud,
- JupyterLab,
- Jupyter Notebook,
- Qt Console,
- Spyder,
- Glueviz,
- Orange,
- PyCharm Professional,
- RStudio.
Among the 10 IDEs, the first 6 IDEs were installed by default. You can use any IDE of your choice to write, run and debug your code.
Well, Anaconda is working!
Activate and deactivate Conda environment
By default, a Conda environment named base is created and activated.
If it is not activated by any chance, you can activate the Conda base environment using command:
To deactivate it, run:
Update Anaconda
Let first check the currently installed Conda version using command:
Sample output:
As you see, the current Conda version is 4.9.2.
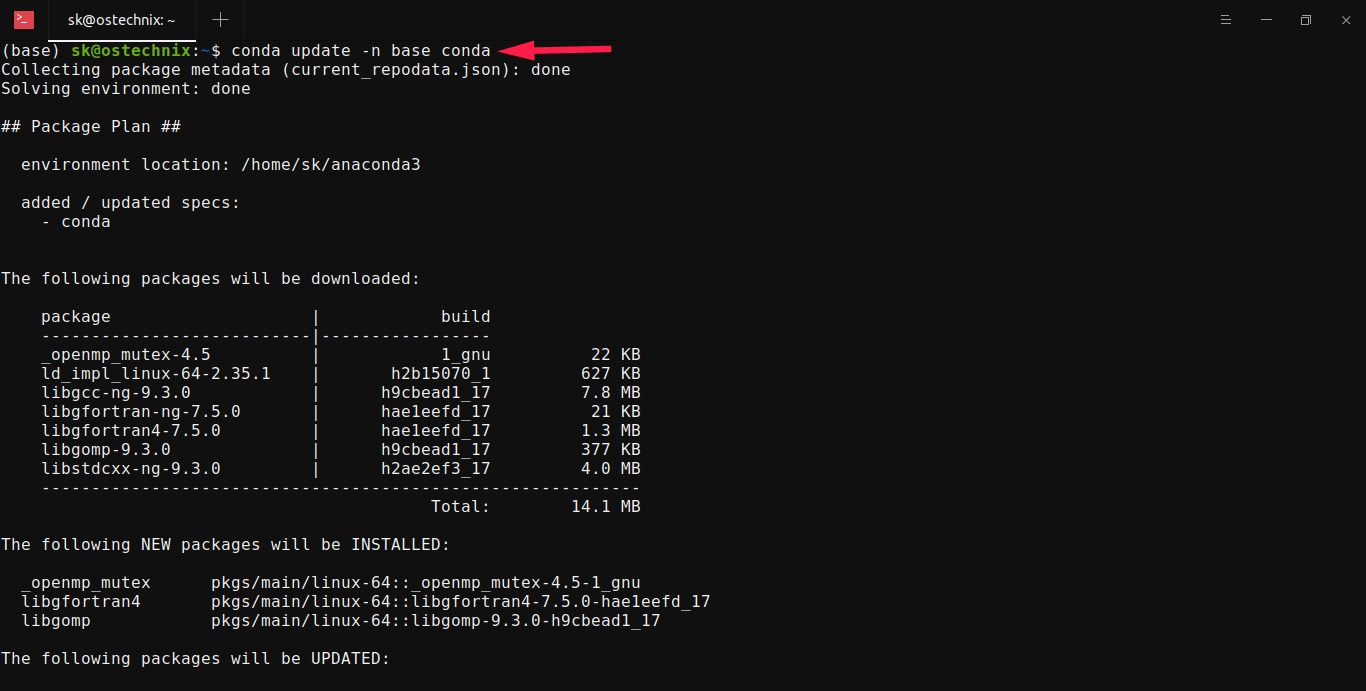
Let us run the following command to see if there is any latest Conda version available:
If there are any updates available, you will be prompted to update them. Just type y to install the updates:
To update all packages to the latest version of Anaconda, run:
Run a simple Python program from Python shell
Launch Python shell using command:
You will now see the >>> sign. It means you're in Python shell.
Inside the Python shell, type your code. For example, I type the following code:
When you hit ENTER, you will see "Welcome to OSTechNix" message.
To exit the Python shell and go back to your shell prompt, enter the following command:
All done. We have installed Anaconda on our Linux machine, verified the Anaconda installation from command line as well as from Anaconda GUI, and finally run a sample Python program from Python shell.
In our upcoming articles, we will learn more about Anaconda Navigator GUI, Python IDEs, and Conda command line interface.
If you don't use Anaconda anymore, you can remove it from your system as shown below.
Uninstall Anaconda
First, you need to Install "anaconda-clean" module which is used to completely uninstall Anaconda from your system.
Next, run the following command to remove Anaconda:
Here, the --yes flag is used to delete all config files and directories.
The above command will create a backup directory called .anaconda_backup in your $HOME directory.
And then, delete the entire Anaconda directory and the backup directory using commands:
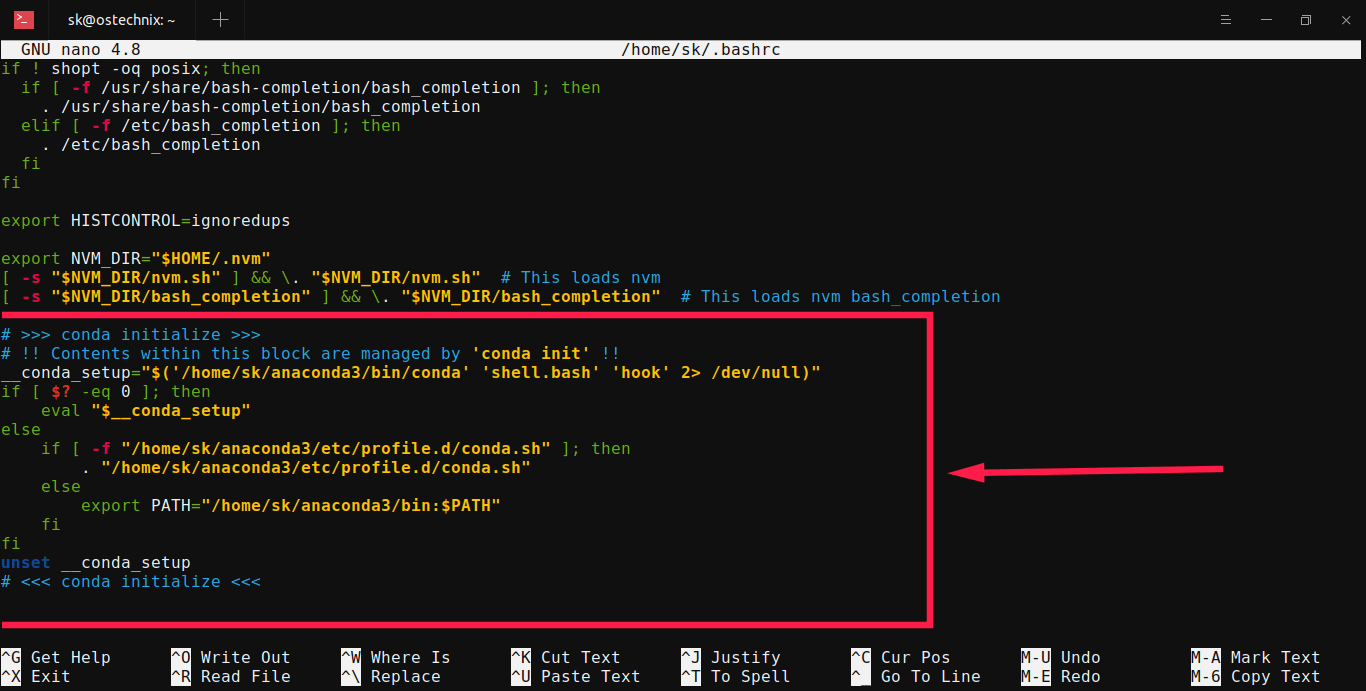
Finally, delete all Anaconda entries from your ~/.bashrc file.
Make the backup of ~/.bashrc file, just in case:
$ cp ~/.bashrc ~/.bashrc.bak
Open ~/.bashrc file using your preferred editor:
Find the following lines and delete them. Please double check the lines before deleting them.
Finally, run the following command to take effect the changes immediately:
That's it. Anaconda has been removed from your system.
Resource:


