Installing and Configuring Apache Tomcat 8.0.9
Apache Tomcat (earlier known as Jakarta Tomcat) is an open-source web server developed by Apache Foundation to provide a pure Java HTTP server, which will enable you to run Java files easily, which means that Tomcat is not a normal server like Apache or Nginx, because its main goal is to provide a good web environment to run Java applications only unlike other normal web servers.
Recently, on June 19, 2014, Apache Tomcat reached to version 8 (i.e. 8.0.9), which is the first stable release of the series 8.x.0. This Apache Tomcat 8 version comes with Java EE7, in addition to numerous improvements as compared to previous Tomcat 7 version. Some of noticeable changes included in this release are: support for Java Servlet 3.1, JavaServer Pages 2.3, Java Websocket 1.0, etc. and other numerous fixes for issues, as well as number of other enhancements and changes.
This article will walk you throughout the installation of Apache Tomcat 8 (i.e. 8.0.9) on RHEL/CentOS 7.0/6.x.
Step 1: Installing and Configuring Java 8
Before heading up for the Tomcat installation, make sure you must have JAVA installed on your Linux box to run Tomcat. If not, download and install the latest version of JAVA 8, using the following link.
Note: Please select and download the below mentioned RPM files only for your system architecture.
jdk-8u20-linux-i586.rpm  [For 32-Bit OS]

jdk-8u20-linux-x64.rpm  [For 64-Bit OS]
Once the JAVA package has been downloaded, you can install it using following ‘rpm‘ command.
# rpm -Uvh jdk-8u20-linux-i586.rpm  [For 32-Bit OS]

# rpm -Uvh jdk-8u20-linux-x64.rpm  [For 64-Bit OS]
Sample Output
Preparing...                ########################################### [100%]
   1:jdk1.8.0_20            ########################################### [100%]
Unpacking JAR files...
 rt.jar...
 jsse.jar...
 charsets.jar...
 tools.jar...
 localedata.jar...
 jfxrt.jar...
 plugin.jar...
 javaws.jar...
 deploy.jar...
Next, configure newly installed JAVA 8 files using command ‘alternatives‘, run the following series of commands on the terminal to configure Java.
# alternatives --install /usr/bin/java java /usr/java/jdk1.8.0_20/jre/bin/java 20000
# alternatives --install /usr/bin/jar jar /usr/java/jdk1.8.0_20/bin/jar 20000
# alternatives --install /usr/bin/javac javac /usr/java/jdk1.8.0_20/bin/javac 20000
# alternatives --install /usr/bin/javaws javaws /usr/java/jdk1.8.0_20/jre/bin/javaws 20000
# alternatives --set java /usr/java/jdk1.8.0_20/jre/bin/java
# alternatives --set javaws /usr/java/jdk1.8.0_20/jre/bin/javaws
# alternatives --set javac /usr/java/jdk1.8.0_20/bin/javac
# alternatives --set jar /usr/java/jdk1.8.0_20/bin/jar
Once, you fired above series of commands successfully, now it’s time to verify the newly installed JAVA version running the following command on your system.
# java -version
Sample Output
java version "1.8.0_20"
Java(TM) SE Runtime Environment (build 1.8.0_20-b26)
Java HotSpot(TM) Client VM (build 25.20-b23, mixed mode, sharing)
Step 2: Installing Apache Tomcat 8
After installing and configuring JAVA on the system, now it’s time to download latest version of Apache Tomcat (i.e. 8.0.9) is the most recent stable version at the time of writing this article. If you want to make a cross check, head over to following Apache download page and check if there is a newer version available.
Now download the latest version of Apache Tomcat 8, using following wget command and extract it as shown below.
# cd /opt/
# wget http://ftp.itu.edu.tr/Mirror/Apache/tomcat/tomcat-8/v8.0.9/bin/apache-tomcat-8.0.9.tar.gz
# tar -xvf apache-tomcat-8.0.9.tar.gz
Note: Replace the version number above with the latest version available if it was different.
Now we all set to start the tomcat web server using the scripts provided by the tomcat package.
# cd /opt/apache-tomcat-8.0.9/bin
# ./startup.sh
Sample Output
Using CATALINA_BASE:   /opt/apache-tomcat-8.0.9
Using CATALINA_HOME:   /opt/apache-tomcat-8.0.9
Using CATALINA_TMPDIR: /opt/apache-tomcat-8.0.9/temp
Using JRE_HOME:        /usr
Using CLASSPATH:       /opt/apache-tomcat-8.0.9/bin/bootstrap.jar:/opt/apache-tomcat-8.0.9/bin/tomcat-juli.jar
Tomcat started.
Now to open Tomcat from your browser, go to your IP or domain with the 8080 port (because Tomcat will always run on the 8080 port) as an example: mydomain.com:8080, replace mydomain.com with your IP or domain.
http://Your-IP-Address:8080

OR

http://Your-Domain.com:8080
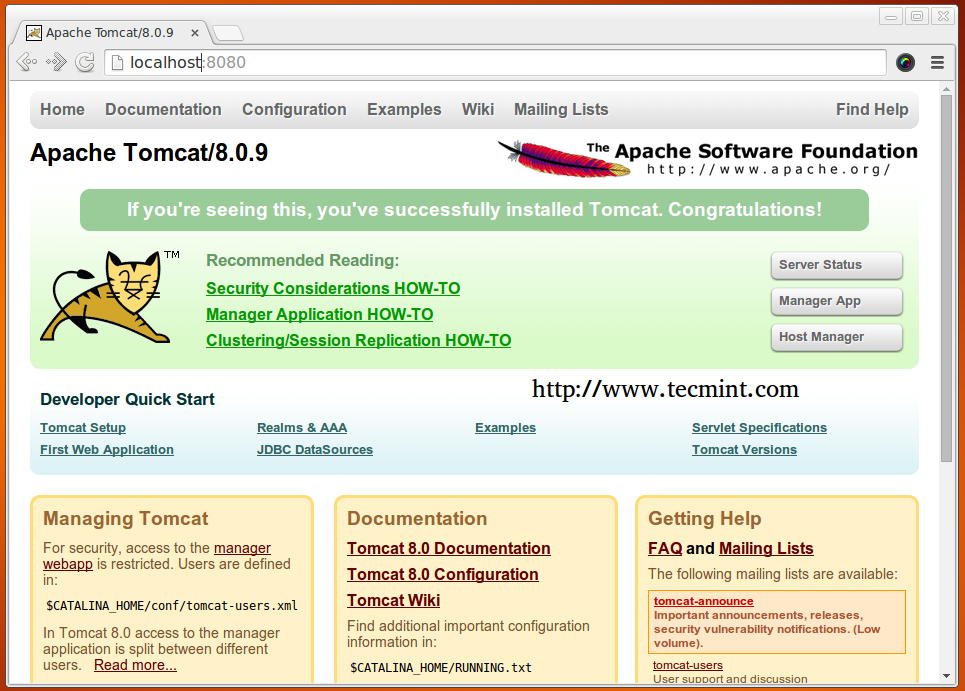
The default directory for Tomcat files will be in /opt/apache-tomcat-8.0.9, you can view the configuration files inside the conf folder, the main page that you seen above, when you open your website on the 8080 port is in /opt/apache-tomcat-8.0.9/webapps/ROOT/.
Step 3: Configuring Apache Tomcat 8
By default you only able to access default Tomcat page, to access admin and other sections like Server Status, Manager App and Host Manager. You need to configure user accounts for admins and managers. To do so, you need to edit ‘tomcat-users.xml‘ file located under/opt/apache-tomcat-8.0.9/conf directory.
Setup Tomcat User Accounts
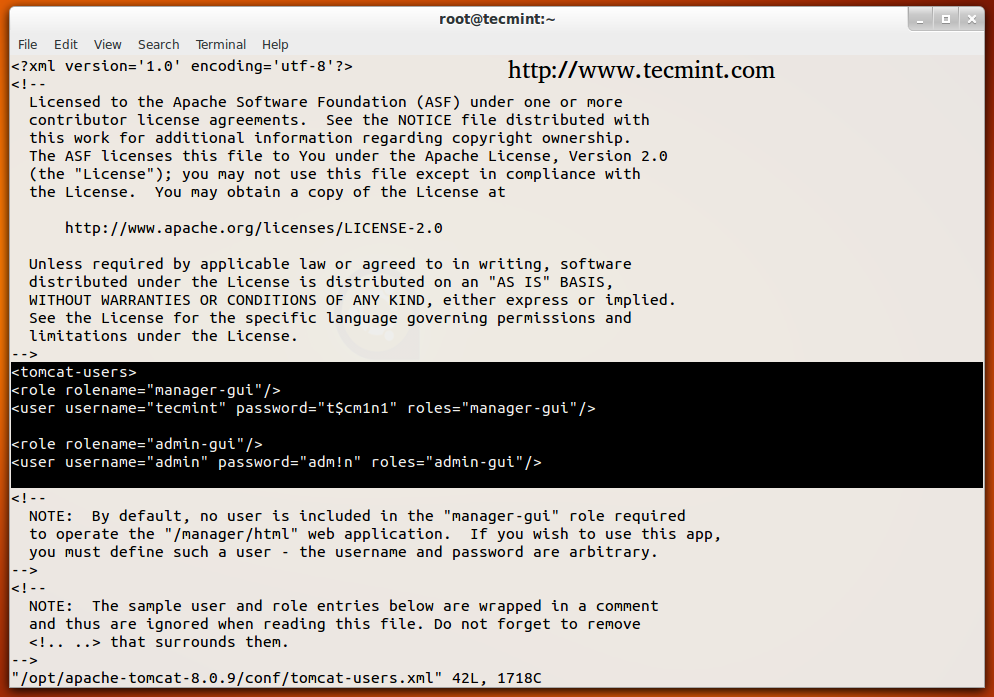
For example, to assign the manager-gui role to a user named ‘tecmint‘ with a password ‘t$cm1n1‘, add the following line of code to the config file inside the section.
# vi /opt/apache-tomcat-8.0.9/conf/tomcat-users.xml
<role rolename="manager-gui"/>
<user username="tecmint" password="t$cm1n1" roles="manager-gui"/>
Similarly, you can also add ‘admin-gui‘ role to a admin user named ‘admin‘ with a password ‘adm!n‘ as shown below.
<role rolename="admin-gui"/>
<user username="admin" password="adm!n" roles="admin-gui"/>
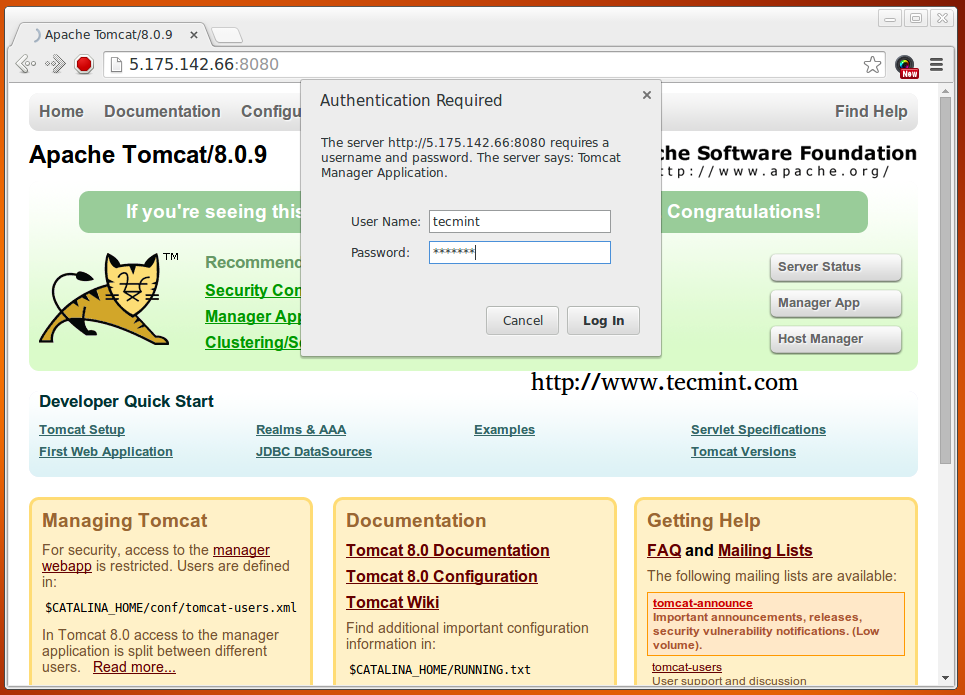
After setting up the admin and managers roles, restart the Tomcat and then try to access the admin section.
./shutdown.sh
./startup.sh
For example, click on 'Server Status' tab, it will prompt you to enter user credentials, enter username and password that you've added above in config file.
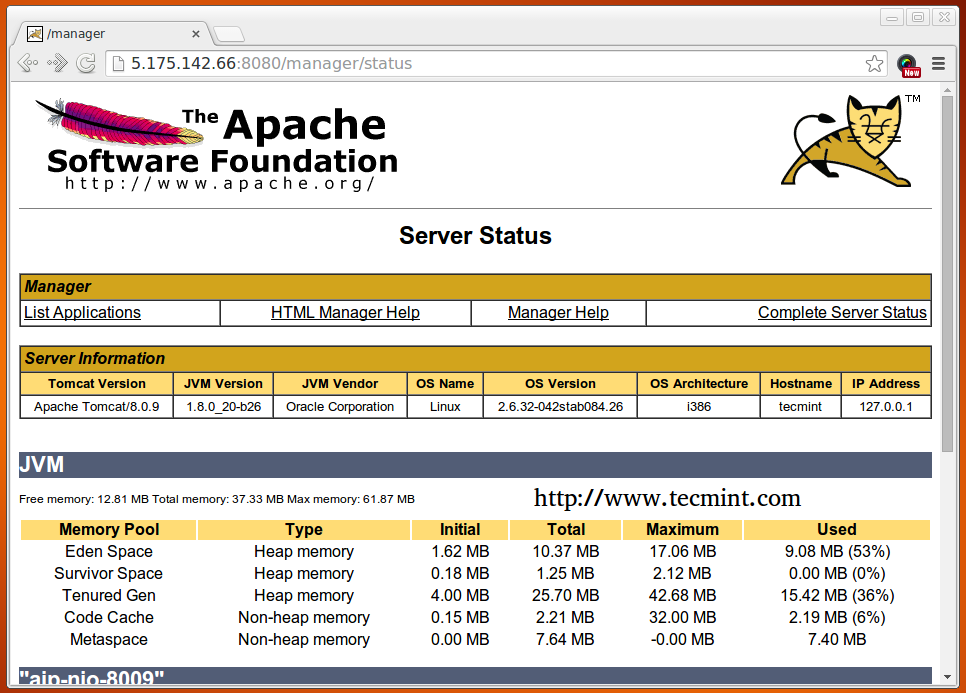
Once, you enter user credentials, you will find a page similar to below.
Changing Tomcat Port
If you want to run Tomcat on different port say 80 port. You will have to edit the ‘server.xml‘ file in ‘/opt/apache-tomcat-8.0.9/conf/‘. Before changing, port, make sure to stop the Tomcat server using.
# /opt/apache-tomcat-8.0.9/bin/shutdown.sh
Now open the server.xml file using the Vi editor.
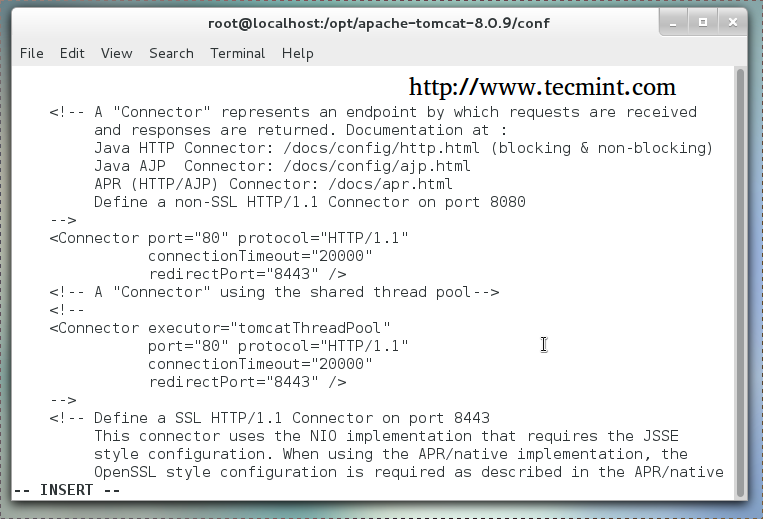
# vi /opt/apache-tomcat-8.0.9/conf/server.xml
Now search for “Connector port” and change its value from 8080 to 80 or any other port you want as it follows.
To save the file, Press the ‘ESC’ key, and write :w then :x.
Now restart the Apache Tomcat server again, using below command.
# /opt/apache-tomcat-8.0.9/bin/startup.sh
That’s it, you server will be running on the 80 port.
Of course, you have to run all the above commands as a root, if you don’t they won’t work because we are working in the ‘/opt‘ directory which is a folder owned by the root user only, if you want you can run the server as a normal user but you will have to use your HOME folder as a working area to download, extract and run the Apache Tomcat server.
To get some information about your running Tomcat server and your computer, run.
/opt/apache-tomcat-8.0.9/bin/version.sh
Sample Output
Using CATALINA_BASE:   /opt/apache-tomcat-8.0.9
Using CATALINA_HOME:   /opt/apache-tomcat-8.0.9
Using CATALINA_TMPDIR: /opt/apache-tomcat-8.0.9/temp
Using JRE_HOME:        /usr
Using CLASSPATH:       /opt/apache-tomcat-8.0.9/bin/bootstrap.jar:/opt/apache-tomcat-8.0.9/bin/tomcat-juli.jar
Server version: Apache Tomcat/8.0.9
Server built:   Jun 19 2014 01:54:25
Server number:  8.0.9.0
OS Name:        Linux
OS Version:     2.6.32-042stab084.26
Architecture:   i386
JVM Version:    1.8.0_20-b26
JVM Vendor:     Oracle Corporation
That’s it! Now you can start deploying JAVA based applications under Apache Tomcat 8. For more about on how to deploy applications and create virtual hosts, check out the official Tomcat documentation at.
No comments:
Post a Comment