Install Zimbra Collaboration Suite 8.7 in Ubuntu 14.04 LTS
Zimbra collaboration suite, shortly ZCS, is a free, open source software suite that can be used for messaging and collaboration. It comes with two editions, open source edition which is free to use, and network edition which is commercial version, consists of some closed-source components. Zimbra supports Emails, Calendar, and contacts, and document sharing. For ore details, visit the official website, link given at the end of this article, to know more about Zimbra.
This tutorial describes how to install Zimbra collaboration suite in Ubuntu 14.04 LTS server. For the purpose of this guide, I will be using the two test boxes, running with Ubuntu 16.04 LTS and Ubuntu 14.04 LTS. Here is the details of each test box.
Zimbra server:
- Operating System : Ubuntu 14.04 LTS
- Hostname : zimbra.ostechnix.lan
- IP address : 192.168.1.105/24
DNS server:
- Operating system : Ubuntu 16.04 LTS
- Hostname : pri.ostechnix.lan
- IP address : 192.168.1.200/24
You should use separate systems for Zimbra and DNS servers. Here is the minimum requirement for Zimbra deployment.
- Quad core or higher configuration CPU
- 8GB RAM or more
- 50GB hard disk
- Fast Internet connectivity
- A perfect DNS configuration
- Firewall should be disabled
Let us get started.
First things first
Before installing Zimbra, you need to do the following prerequisites steps.
First of all, update the Ubuntu server:
Install necessary dependencies:
Edit /etc/hosts/ file, and add FQDN (fully qualified domain name) of your Ubuntu server as shown below.
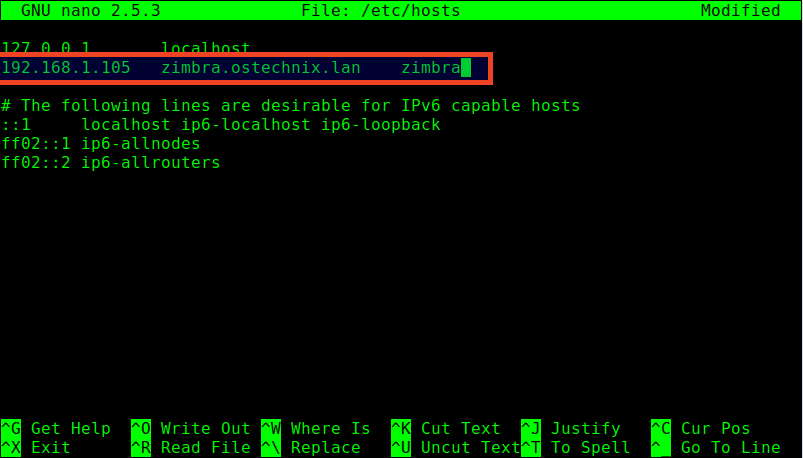
Save and close the file.
Then, we must add the DNS server IP address in your Ubuntu server’s network configuration file.
To do so, edit /etc/network/interfaces file:
Add DNS server IP address as shown below.

Then, edit /etc/resolv.conf file, and add DNS server IP address.
Then, add the proper MX records in your DNS server. Go to your DNS server and add the Ubuntu server details as shown below. Please note that a separate DNS server is mandatory. You shouldn’t use single system for both DNS and Zimbra servers.


Reboot your system once to take effect the saved changes.
Edit the forward and reverse zone files, and add your Zimbra server’s details.
Add the following lines. Replace the IP address and FQDN with your own values.

Then, open the reverse zone files and add the same lines.

Save and close the file. Restart DNS service to take effect the changes.
Go back to your Zimbra server and test the DNS server settings using command:

If you an output something like above, it’s good to go.
Install Zimbra
Go to the Zimbra download page and download the latest version using command:
As of writing this, Zimbra 8.7.0 stable version is not yet available for Ubuntu 16.04 LTS. Installing beta version in production would be a bad idea. If you still want to deploy Zimbra in Ubuntu 16.04 LTS, you can go ahead. The installation instructions are same for all versions.
Download the latest ZCS from the following location depending upon the distribution you use. As of writing this guide, the latest stable version was 8.7.
Once downloaded, extract it suing command:
Go to the extracted folder:
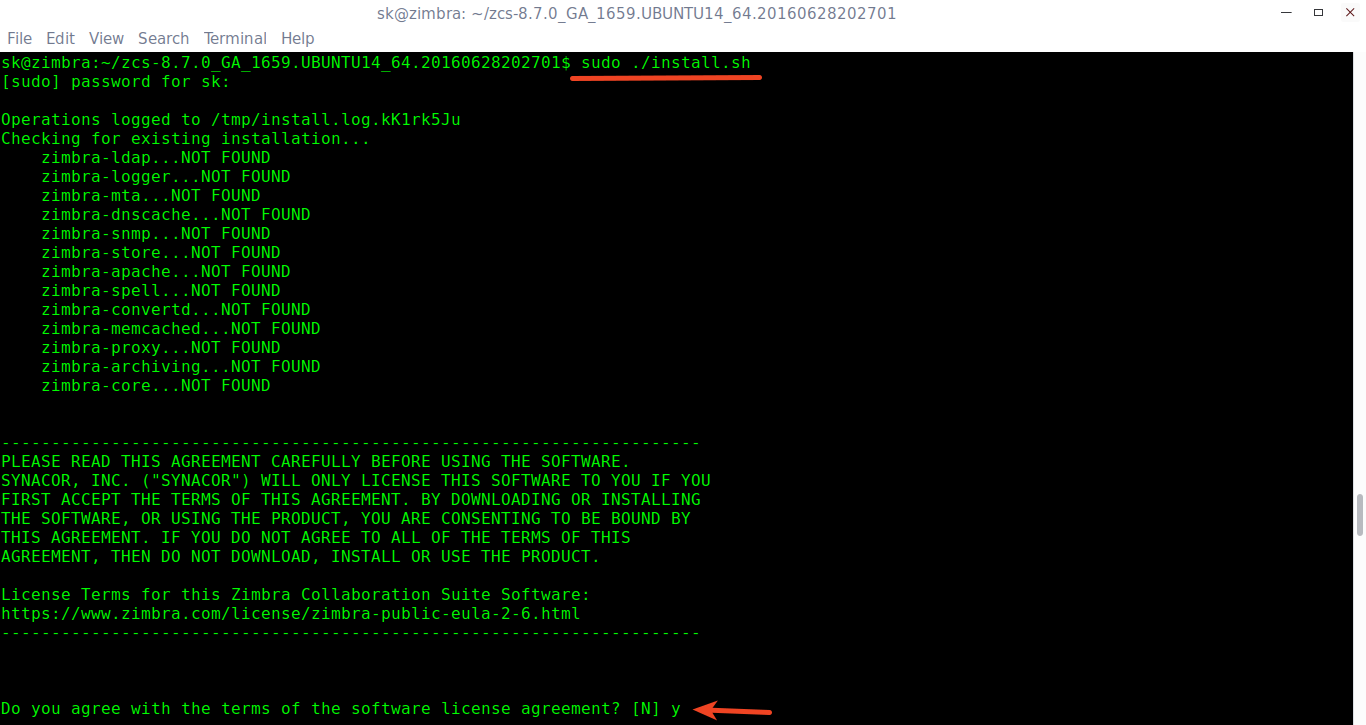
Now, start the deploying Zimbra collaboration suite using command:
Type “Y” and press ENTER to accept the license agreement.

Install Zimbra
Zimbra installer will ask you a series of yes or no type questions throughout the installation. Just read and answer them accordingly.
Press Y to add Zimbra package repository.

Next, you need to select Zimbra Packages you want to install. The installer will display the packages one by one. Just press ENTER to install the package of your choice.
For the purpose of this tutorial, I am going to install all components.
Type “Y” and press ENTER to install the selected packages.

The installer will start to download and install the packages .
After few minutes, the Zimbra main menu will appear.

As you can see in the above output, It is obvious that I didn’t set password for the Zimbra admin account. So let us configure the unconfigured items. In this case, the unconfigured item (Admin password) is available under 7thsection, i.e under Zimbra Store section. So just type number 7 to configure this item.
A sub-menu will appear which shows the unconfigured item. As you see here, the unconfigured item no is 4. So, let us 4 to address this item.

Next, enter a password to the Zimbra admin account. Make sure the password is very strong.
Set password for the admin user. Use any strong password. Press enter to update the password.

Then, type “r” to return back to main menu.
The unconfigured item is addressed and configured now.
Type a to apply the changes, and press ENTER to save the configuration file. Finally, type yes to continue and finish the installation.
Congratulations!
At this stage, you will have a working Zimbra collaboration suite in your Ubuntu server.
Log in to Zimbra Admin dashboard
Open your web browser and the URL: https://IP-Address:7071/ or https://domain-name:7071
Enter the user name and password. The default username is admin, and the password is the one that you created earlier while installing Zimbra.

Here it is how Zimbra admin dashboard looks like.

From here, you can do all kind of administration tasks, such as creating, editing and deleting users, domains, monitoring the zimbra server, managing Email accounts, and so on.
Creating new domain
Let us create a new domain. To do so, click on the Configure -> Domain button on the left menu bar. The list of available domains, including the default domain, will be found in this section.
To create a new domain, just click on the gear button on the top right side and click New.

Fill up the domain details and click Finish.

Creating new users
Click Manage button on the left menu bar. Then, click on the gear button on the top right corner and select New.

In the next screen, Enter the user details, such as first name, last name, and click Finish.
Similarly, you can create as many users as you want. Also, you can edit the user details, or delete them from here.
Log in to Zimbra Web client
Zimbra web client is the user’s personal mailbox where users can send, receive, delete mails, organize taks, manage their calendars etc.
To access, the Zimbra web console, just type https://IP-address or https://domain-name in the address bar.
The following screen should appear. Enter the user name and its password that we created earlier from the Admin console.

Here it is how each user’s mailbox looks like.

From here, the user can send, receive mails to the other users.
Remove Zimbra Collaboration Suite
Not happy with ZCS? I hope you will like it. In case you don’t want to use ZCS remove it from your Ubuntu server as shown below.
Go the Zimbra directory:
Enter the following command to completely remove it:
Finally, delete Zimbra directory:
That’s all for now guys. ZCS is one of the cool and worthy collaboration platform ever I have I tested. ZCS installation, configuration, and usage is absolutely easy. Anyone can easily install it with little Linux knowledge. If you ever wanted to setup a messaging and collaboration platform for your office, give ZCS a try. You will find it worth.
Further reading:
No comments:
Post a Comment