Beginner’s Guide to LVM (Logical Volume Management)
In this tutorial, we will discuss about Logical Volume Management. LVM or Logical Volume Management is a disk management tool that makes it easier to manage disk space. With the help of LVM, we can easily manage our partitions, we can extend our partitions, reduce them, replace a failing disk or adding new disk to increase the capacity. It is one of the important skill that you need to acquire if you are working as a System Administrator.
How does LVM work ?
Before we learn to create LVMs , we will briefly discuss how does it work & will learn some of the terms associated with LVM.
- To create LVM, we will have to first create simple partition with partition ID 8e using fdisk command. For this tutorial, we are using two disks i.e. /dev/sdb & /dev/sdc,
- Next, we will create Physical Volumes (aka PV) of these newly partitioned disks. Each physical volume can be a disk partition or even a whole disk.
- After creation of PVs, we will create Volumes Groups or VGs from the Physical volumes. VGs are collection of partitions into an administrative unit,
- Lastly, Logical Volumes or LVs will be created from Volume Groups. LV is equivalent to a disk partition.
Now that we have some idea about LVM, we will now move onto creating a LVM.
Creating a LVM
As mentioned above we will firstly create partitions of disks /dev/sdb & /dev/sdc with partition id 8e. Process to do that is as follows
- Firstly we will prepare /dev/sdb disk for LVM, start by
$ fdisk /dev/sdb
- Type ‘n’ for creating new partition,
- Next type ‘p’ for creating the primary partition (since this is new disk, partition number will be 1 )
- Nest for First cylinder value & last cylinder value, press enter to use default values i.e. full hdd space
- Type ‘t’ for accessing the partition followed by ‘1’ (partition number)
- Now this is the part where we will enter the partition id for creating LVM i.e. 8e. Type ‘8e’ now & press ‘w’ to write changes.
We have partitioned /dev/sdb for LVM-creation, same steps are to be repeated for /dev/sdc. Once both the disks have been prepared, we will move on to next step ie. Creating physical volume,
Creating Physical Volume
To create PV, we will use ‘pvcreate’ command,
$ pvcreate /dev/sdb /dev/sdc
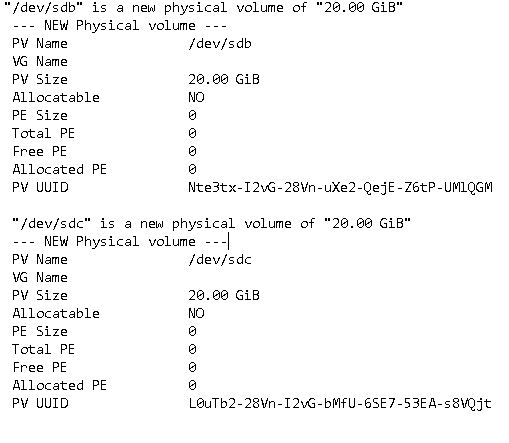
You will get confirmation that Physical Volume has been created. We can see & confirm the newly created Physical volume using ‘pvdisplay’

Creating Volume Group
Next we will create a VG of the PVs using ‘vgcreate’ command,
$ vgcreate vg01 /dev/sdb /dev/sdc
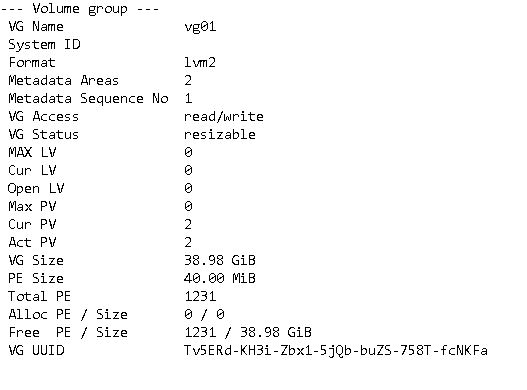
Here, ‘vg01’ is the name of volume group. To confirm the creation of VG, we will use ‘vgdisplay’ command
$ vgdisplay vg01

Creating Logical Volume
Lastly we will create Logical Volume from Volume group ‘vg01’ using ‘lvcreate’ command
$ lvcreate –l 25G –n lv01 vg01
Here, ‘-l 25G’ means size of logical volume, ‘-n lv01’ means the name of LV is lv01 & ‘vg01’ is the name of Volume Group. To see the information about the new LV, use ‘lvdisplay’ command
$ lvdsplay /dev/vg01/lv01

Now our LV has been created but before we can use it we need to assign it a file system & mount it to a point.
Assigning Filesystem & Mounting LV
We are now going to assign a filesystem to LV ‘lvo1’. We will assigning ‘ext4’ to it using ‘mkfs’,
$ mkfs.ext4 /dev/vg01/lv01
Our LV is now formatted with ext4 filesystem. Next we will create a mounting point for mounting lv01,
$ mkdir /data
& now we will mount the lv01 to /data
$ mount /dev/vg01/lv01 /data
But this is a temporary mount & will be unmounted if our system reboots. To permanently mount it, we need to append the /etc/fstab file with the following entry
$ vim /etc/fstab
/dev/vg01/lv01 /data ext4 defaults 0 0
Save & exit the file. Our lv is now ready to be used, we can add, delete files to it.
No comments:
Post a Comment