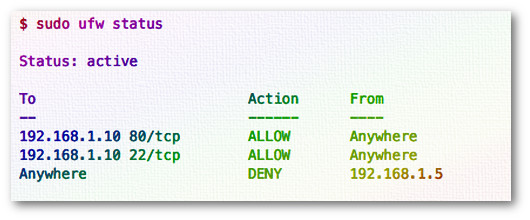
How to setup a UFW firewall on Ubuntu 16.04 LTS server
How do I setup a firewall with UFW (uncomplicated firewall) on an Ubuntu Linux 16.04 LTS server to restrict traffic on my personal web-server that hosts my pictures and blogs for my family members?UFW is an acronym for uncomplicated firewall. It is used for managing a Linux firewall and aims to provide an easy to use interface for the user. In this tutorial you will learn how to use UFW a frontend to iptables for managing firewall on Ubuntu Linux 16.04 LTS server.
Installing UFW
UFW is included with Ubuntu but not with Debian Linux. Type the following
apt-get command to install UFW in Debian Linux server:
$ sudo apt-get update
$ sudo apt-get install ufw
Sample outputs:
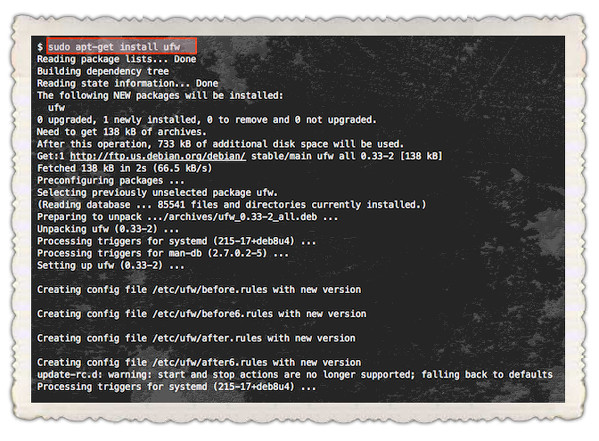
Fig.01: Installing UFW firewall on Debain or Ubuntu LInux
How do I view status of ufw?
By default ufw is inactive status i.e. no firewall rules are configured and all traffic is allowed. To see status, enter:
$ sudo ufw status
Sample outputs:
Status: inactive
Setting up default policy
By default when ufw activated it blocks all incoming traffic to the firewall/server. Only outgoing traffic allowed. You can view UFW’s defaults by typing the following command:
$ grep 'DEFAULT_' /etc/default/ufw
Sample outputs:
DEFAULT_INPUT_POLICY="DROP"
DEFAULT_OUTPUT_POLICY="ACCEPT"
DEFAULT_FORWARD_POLICY="DROP"
DEFAULT_APPLICATION_POLICY="SKIP"
The default policy works out well for both the servers and laptop/workstation as you only need to open a limited number of incoming ports. It is a good policy as it closes all ports on the server/firewall and you need to only open ports one by one. You can run the following commands to set policy to block all incoming connection and only allow outgoing connections from the server/firewall:
$ sudo ufw default allow outgoing
$ sudo ufw default deny incoming
Writing your first firewall rule to allow connection to ssh (tcp port 22)
Type the following command to allow SSH connections to your server:
$ sudo ufw allow ssh
OR
sudo ufw allow 22/tcp
Say if you are running ssh on port 2020, enter:
$ sudo ufw allow 2020/tcp
The following rules allow access to tcp ssh port 22 only on 10.8.0.1 (i.e. your ssh server is listing on 10.8.0.1 port 22) from anywhere:
$ sudo ufw allow proto tcp from any to 10.8.0.1 port 22
How do I add a comment for the rule?
Use the following syntax
$ sudo ufw rule comment 'my cool comment here'
Open port 53 and write a comment about rule too:
ufw allow 53 comment 'open tcp and udp port 53 for dns'
Another example:
$ sudo ufw allow proto tcp from any to any port 80,443 comment 'my cool web app ports'
OR
$ sudo ufw allow proto tcp from any to 10.8.0.1 port 22 'SSHD port 22 for private lan'
Enable the UFW based firewall
Now you have default policy and ssh port allowed. It is safe to start enable the firewall, enter:
$ sudo ufw enable
Sample outputs:
Command may disrupt existing ssh connections. Proceed with operation (y|n)? y
Firewall is active and enabled on system startup
Once enabled, the firewall runs after reboots too.
Disable the UFW based firewall
If you need to stop the firewall and disable on system startup, enter:
$ sudo ufw disable
Sample outputs:
Firewall stopped and disabled on system startup
How do I check the status of my rules?
Use the status command:
$ sudo ufw status
$ sudo ufw status verbose
Sample outputs:
Status: active
Logging: on (low)
Default: deny (incoming), allow (outgoing), deny (routed)
New profiles: skip


To                         Action      From
--                         ------      ----
192.168.1.10 443/tcp       ALLOW       Anywhere
192.168.1.10 22/tcp        ALLOW       Anywhere
|
Adding more rules (open ports and allow IPs)
The syntax is as follows to open tcp port 22 and 443:
$ sudo ufw allow 80/tcp
$ sudo ufw allow 443/tcp
Open UDP/1194 (OpenVPN) server:
$ sudo ufw allow 1194/udp
Open port 25 (smtpd/email server):
$ sudo ufw allow 25
You can allow port ranges too say, tcp and udp 3000 to 5000:
$ sudo ufw allow 3000:5000/tcp
$ sudo ufw allow 3000:5000/udp
Make sure you allow connections from an IP address called 1.2.3.4, enter:
$ sudo ufw allow from 1.2.3.4
Make sure you allow connections from an IP address called 1.2.3.4 to our port 22, enter:
$ sudo ufw allow from 1.2.3.4 to any port 22 proto tcp
OR (dest 222.222.222.222 port 22)
$ sudo ufw allow from 1.2.3.4 to 222.222.222.222 port 22 proto tcp
Denying access to port or connections (close ports and block IPs)
The syntax is as follows to deny access (i.e. simply ignoring access to port 443) to port tcp port 443:
$ sudo ufw deny 443/tcp
Make sure you deny all connections from an IP address called 1.2.3.4, enter:
$ sudo ufw deny from 1.2.3.4
Make sure you deny all connections from an IP/subnet called 123.45.67.89/24, enter:
$ sudo ufw deny from 123.45.67.89/24
Make sure you deny access to 1.2.3.4 (say hackers IP) on port 22:
$ sudo ufw deny from 1.2.3.4 to any port 22 proto tcp
Rejecting access to port or connections (reject and let user know they are blocked by firewall)
The deny syntax simply ignores traffic. If you want let the sender know when traffic is being denied, rather than simply ignoring it, use reject syntax:
$ sudo ufw reject in smtp
$ sudo ufw reject out smtp
$ sudo sudo ufw reject 1194 comment 'No more vpn traffic'
$ sudo ufw reject 23 comment 'Unencrypted port not allowed'
If somebody try to connect to port 23 they will get reject message as follows:
telnet: Unable to connect to remote host: Connection refused
Deleting the UFW firewall rules
Now you know how to add, deny, and list the firewall rules. It is time to delete unwanted rules. There are two options to deleting rules. The first syntax is:
$ sudo ufw delete {rule-here}
In this example, delete HTTPS (tcp port 443) traffic rule,
$ sudo ufw delete allow 443
If you no longer wished to allow smptd/email (port 25) traffic, execute:
$ sudo ufw delete allow 25
The second option is to list list all of the current rules in a numbered list format:
$ sudo ufw status numbered
Sample outputs:
Status: active

     To                         Action      From
     --                         ------      ----
[ 1] 10.8.0.1 22/tcp            ALLOW IN    Anywhere
[ 2] Anywhere                   DENY IN     123.45.67.0/24
[ 3] 22/tcp                     DENY IN     1.2.3.4
|
To delete 2nd rule ("ufw deny from 123.45.67.89/24"), you type the command:
$ sudo ufw delete 2
Sample outputs:
Deleting:
 deny from 123.45.67.0/24
Proceed with operation (y|n)? y
Rule deleted
How do I reset the firewall?
The syntax is as follows to reset ufw rules to their factory default settings and in an inactive mode, run:
$ sudo ufw reset
Sample outputs:
Resetting all rules to installed defaults. This may disrupt existing ssh
connections. Proceed with operation (y|n)? y
Backing up 'user6.rules' to '/etc/ufw/user6.rules.20160801_121710'
Backing up 'after.rules' to '/etc/ufw/after.rules.20160801_121710'
Backing up 'before.rules' to '/etc/ufw/before.rules.20160801_121710'
Backing up 'after6.rules' to '/etc/ufw/after6.rules.20160801_121710'
Backing up 'user.rules' to '/etc/ufw/user.rules.20160801_121710'
Backing up 'before6.rules' to '/etc/ufw/before6.rules.20160801_121710'
How do I reload the firewall?
The syntax is as follows to reload firewall:
$ sudo ufw reload
When you edit UFW' configuration file, you need to run reload command. For example, you can edit /etc/ufw/before.rules, enter:
$ sudo nano /etc/ufw/before.rules
OR
$ sudo vi /etc/ufw/before.rules
To allow all traffic fro eth0 to eth0 (add after line that read as "# End required lines"), enter:
# allow all on eth0
-A ufw-before-input -i eth0 -j ACCEPT
-A ufw-before-output -o eth0 -j ACCEPT
Save and close the file. Reload the firwall:
$ sudo ufw reload
How do I see the firewall logs?
By default all UFW entries are logged into /var/log/ufw.log file:
$ sudo more /var/log/ufw.log
$ sudo tail -f /var/log/ufw.log
Sample outputs:
Aug  1 12:09:48 server2 kernel: [15727.245115] [UFW BLOCK] IN=br1 OUT= MAC=00:25:90:4f:b0:6f:44:d3:ca:5f:89:40:08:00 SRC=62.210.181.123 DST=75.xxx.yyy.zzz LEN=40 TOS=0x00 PREC=0x00 TTL=245 ID=20343 DF PROTO=TCP SPT=2328 DPT=80 WINDOW=512 RES=0x00 SYN URGP=0
Aug  1 12:09:58 server2 kernel: [15737.485726] [UFW BLOCK] IN=br1 OUT= MAC=00:25:90:4f:b0:6f:44:d3:ca:5f:89:40:08:00 SRC=187.134.225.91 DST=75.xxx.yyy.zzz  LEN=46 TOS=0x00 PREC=0x00 TTL=54 ID=0 DF PROTO=UDP SPT=54704 DPT=53413 LEN=26
Aug  1 12:09:58 server2 kernel: [15737.486102] [UFW BLOCK] IN=br1 OUT= MAC=00:25:90:4f:b0:6f:44:d3:ca:5f:89:40:08:00 SRC=187.134.225.91 DST=75.xxx.yyy.zzz  LEN=151 TOS=0x00 PREC=0x00 TTL=54 ID=0 DF PROTO=UDP SPT=54704 DPT=53413 LEN=131
You can search log file with grep command:
$ sudo grep something /var/log/ufw.log
$ sudo grep '187.134.225.91' /var/log/ufw.log
How do I see ufw reports?
The added report displays the list of rules as they were added on the command-line:
$ sudo ufw show added
Sample outputs:
Added user rules (see 'ufw status' for running firewall):
ufw allow 22
ufw reject 23
The raw report shows the complete firewall, while the others show a subset of what is in the raw report:
$ sudo ufw show raw
$ sudo ufw show raw | more
The listening report will display the ports on the live system in the listening state for tcp and the open state for udp, along with the address of the interface and the executable listening on the port. An '*' is used in place of the address of the interface when the executable is bound to all interfaces on that port. Following this information is a list of rules which may affect connections on this port. The rules are listed in the order they are evaluated by the kernel, and the first match wins. Please note that the default policy is not listed and tcp6 and udp6 are shown only if IPV6 is enabled:
$ sudo ufw show listening
$ sudo ufw show listening | more
tcp:
  22 10.86.115.66 (sshd)
   [ 1] allow 22

  22 10.8.0.1 (sshd)
   [ 1] allow 22

  443 75.xxx.yyy.zzz (openvpn)
udp:
  123 10.8.0.1 (ntpd)
  123 75.xxx.yyy.zzz (ntpd)
  123 10.86.115.66 (ntpd)
  123 * (ntpd)
udp6:
  123 * (ntpd)
|
Other possible reports are:
$ sudo ufw show builtins
$ sudo ufw show before-rules
$ sudo ufw show user-rules
$ sudo ufw show after-rules
$ sudo ufw show logging-rules