Showing posts with label RedHat. Show all posts

Monday, December 19, 2016

[Quick Tips: Centos/ RedHat7]: How to Configure PPPOE in Centos 7/RHEL 7

How to Configure PPPOE in Centos 7/RHEL 7

The Point-to-Point Protocol over Ethernet (pppoe or PPPOE) is a network protocol for encapsulating PPP frames inside Ethernet frames. It appeared shortly after the year 2000, in the context of the boom of DSL as the solution for tunneling packets over the DSL connection to the ISP’s IP network, and from there to the rest of the Internet.
A PPPoE session is initiated by using connection software on the client machine or router. PPPoE session initiation involves the identification of the Media Access Control (MAC) address of the remote device.When a PPPoE session is initiated, the destination IP address is only used when the session is active. The IP address is released after the session is closed, allowing for efficient re-use of IP addresses.
Configuring PPPOE connection in CENTOS 7
Check the package rp-pppoe installed or not by using command
#rpm -qa rp-pppoe
By Default the package is not installed in RHEL7/CentOS 7 install the Package by using the command.
#yum install rp-pppoe -y
Login as root user and Type pppoe-setup in terminal.
It prompts for user name (input the user name provided by ISP)
Then it Prompts for Interface input the interface name(check the interface name by using the nmcli con show command) and press Enter.
INTERFACE

Enter the Ethernet interface connected to the PPPoE modem
For Solaris, this is likely to be something like /dev/hme0.
For Linux, it will be ethX, where 'X' is a number.
(default eth0): enp3s0
It Prompts like Do you want the link to come up on demand, or stay up continuously?
Do you want the link to come up on demand, or stay up continuously?
If you want it to come up on demand, enter the idle time in seconds
after which the link should be dropped.  If you want the link to
stay up permanently, enter 'no' (two letters, lower-case.)
NOTE: Demand-activated links do not interact well with dynamic IP
addresses.  You may have some problems with demand-activated links.
Enter the demand value (default no): no

Give the DNS server address1(8.8.8.8)  and  DNS server address2(4.2.2.2)  and press Enter.
Please enter the IP address of your ISP's primary DNS server.
If your ISP claims that 'the server will provide dynamic DNS addresses',
enter 'server' (all lower-case) here.
If you just press enter, I will assume you know what you are
doing and not modify your DNS setup.
Enter the DNS information here: 8.8.8.8
Please enter the IP address of your ISP's secondary DNS server.
If you just press enter, I will assume there is only one DNS server.
Enter the secondary DNS server address here: 4.2.2.2
Type your password carefully and press Enter and  Retype your password.
password


USERCTRL

Please enter 'yes' (three letters, lower-case.) if you want to allow
normal user to start or stop DSL connection (default yes): yes
Choose the firewall type 0.
FIREWALLING

Please choose the firewall rules to use.  Note that these rules are
very basic.  You are strongly encouraged to use a more sophisticated
firewall setup; however, these will provide basic security.  If you
are running any servers on your machine, you must choose 'NONE' and
set up firewalling yourself.  Otherwise, the firewall rules will deny
access to all standard servers like Web, e-mail, ftp, etc.  If you
are using SSH, the rules will block outgoing SSH connections which
allocate a privileged source port.

The firewall choices are:
0 - NONE: This script will not set any firewall rules.  You are responsible
          for ensuring the security of your machine.  You are STRONGLY
          recommended to use some kind of firewall rules.
1 - STANDALONE: Appropriate for a basic stand-alone web-surfing workstation
2 - MASQUERADE: Appropriate for a machine acting as an Internet gateway
                for a LAN
Choose a type of firewall (0-2): 0
If you want this connection at boot time type Yes or don’t want to connect at boot time type no and press Enter. After completed you will the settings
pppoe
summary report
After it ask to Accept these settings and adjust configuration files (y/n)? input y and press enter.Reboot the system.

check pppoe connection ststus by using ip address show command or check configuration by using ifconfig ppp0 command
To enable the connection manually edit the  file /etc/sysconfig/network-scripts/ifcfg-ppp0 and set DEMAND=yes
To connect  it manually type #ifup ppp0
To disconnect it manually type #ifdown pppo


Thursday, October 20, 2016

[Linux Cluster: PBS/ Torque]: Installing Torque 4.2.5 on CentOS 6

Installing Torque 4.2.5 on CentOS 6

References:
Do take a look at the Torque Admin Manual
Step 1: Download the Torque Software from Adaptive Computing
Download the Torque tarball from Torque Resource Manager Site
Step 2: Ensure you have the gcc, libssl-devel, and libxml2-devel packages
# yum install libxml2-devel openssl-devel gcc gcc-c++
Step 3: Configure the Torque Server
./configure \
--prefix=/opt/torque \
--exec-prefix=/opt/torque/x86_64 \
--enable-docs \
--disable-gui \
--with-server-home=/var/spool/torque \
--enable-syslog \
--with-scp \
--disable-rpp \
--disable-spool \
--enable-gcc-warnings \
--with-pam
Step 4: Compile the Torque
# make -j8
# make install
Step 5: Configure the trqauthd daemon to start automatically at system boot for the PBS Server
# cp contrib/init.d/trqauthd /etc/init.d/
# chkconfig --add trqauthd
# echo /usr/local/lib > /etc/ld.so.conf.d/torque.conf
# ldconfig
# service trqauthd start
Step 6: Copy the pbs_server and pbs_sched daemon for the PBS Server
# cp contrib/init.d/pbs_server /etc/init.d/pbs_server
# cp contrib/init.d/pb_sched /etc/init.d/pbs_sched
Step 6: Initialize serverdb by executing the torque.setup script for the PBS Server
# ./torque.setup root
Step 7: Make self-extracting tarballs packages for Client Nodes
# make packages
Building ./torque-package-clients-linux-i686.sh ...
Building ./torque-package-mom-linux-i686.sh ...
Building ./torque-package-server-linux-i686.sh ...
Building ./torque-package-gui-linux-i686.sh ...
Building ./torque-package-devel-linux-i686.sh ...
Done
Step 7b. Run libtool –finish /opt/torque/x86_64/lib
libtool: finish: PATH="/opt/xcat/bin:/opt/xcat/sbin:/opt/xcat/share/xcat/tools:/usr/lib64/qt-3.3/bin:/usr/local/intel/composer_xe_2011_sp1.11.339/bin/intel64:/usr/local/sbin:/usr/local/bin:/sbin:/bin:/usr/sbin:/usr/bin:/opt/ibutils/bin:/usr/local/intel/composer_xe_2011_sp1.11.339/mpirt/bin/intel64:/opt/maui/bin:/opt/torque/x86_64/bin:/root/bin:/sbin" ldconfig -n /opt/torque/x86_64/lib
----------------------------------------------------------------------
Libraries have been installed in:
/opt/torque/x86_64/lib

If you ever happen to want to link against installed libraries
in a given directory, LIBDIR, you must either use libtool, and
specify the full pathname of the library, or use the `-LLIBDIR'
flag during linking and do at least one of the following:
- add LIBDIR to the `LD_LIBRARY_PATH' environment variable
during execution
- add LIBDIR to the `LD_RUN_PATH' environment variable
during linking
- use the `-Wl,-rpath -Wl,LIBDIR' linker flag
- have your system administrator add LIBDIR to `/etc/ld.so.conf'

See any operating system documentation about shared libraries for
more information, such as the ld(1) and ld.so(8) manual pages.
----------------------------------------------------------------------

Step 8a: Copy and install on the Client Nodes
for i in node01 node02 node03 node04 ; do scp torque-package-mom-linux-i686.sh ${i}:/tmp/. ; done
for i in node01 node02 node03 node04 ; do scp torque-package-clients-linux-i686.sh ${i}:/tmp/. ; done
for i in node01 node02 node03 node04 ; do ssh ${i} /tmp/torque-package-mom-linux-i686.sh --install ; done
for i in node01 node02 node03 node04 ; do ssh ${i} /tmp/torque-package-clients-linux-i686.sh --install ; done
Step 8b: Alternatively, you can use xCAT to push and run the packages from the PBS Server to the Client Node (auuming you install XCAT on the PBS Server)
# pscp  torque-package-mom-linux-i686.sh compute_noderange:/tmp
# pscp torque-package-clients-linux-i686.sh compute_noderange:/tmp
# psh compute_noderange:/tmp/torque-package-mom-linux-i686.sh
# psh compute_noderange:/tmp/torque-package-clients-linux-i686.sh
Step 9: Enabling Torque as a service for the Client Node
# cp contrib/init.d/pbs_mom /etc/init.d/pbs_mom
# chkconfig --add pbs_mom
Step 10a: Start the Services for each of the client nodes
# service pbs_mom start
Step 10b: Alternatively, Use XCAT to start the service for all the Client Node
# psh compute_noderange "/sbin/service/pbs_mom start"

Configuring the Torque Default Queue


qmgr -c "create queue dqueue"
qmgr -c "set queue dqueue queue_type = Execution"
qmgr -c "set queue dqueue resources_default.neednodes = dqueue"
qmgr -c "set queue dqueue enabled = True"
qmgr -c "set queue dqueue started = True"

qmgr -c "set server scheduling = True"
qmgr -c "set server acl_hosts = headnode.com"
qmgr -c "set server default_queue = dqueue"
qmgr -c "set server log_events = 127"
qmgr -c "set server mail_from = Cluster_Admin"
qmgr -c "set server query_other_jobs = True"
qmgr -c "set server resources_default.walltime = 240:00:00"
qmgr -c "set server resources_max.walltime = 720:00:00"
qmgr -c "set server scheduler_iteration = 60"
qmgr -c "set server node_check_rate = 150"
qmgr -c "set server tcp_timeout = 6"
qmgr -c "set server node_pack = False"
qmgr -c "set server mom_job_sync = True"
qmgr -c "set server keep_completed = 300"
qmgr -c "set server submit_hosts = headnode1.com"
qmgr -c "set server submit_hosts += headnode2.com"
qmgr -c "set server allow_node_submit = True"
qmgr -c "set server auto_node_np = True"
qmgr -c "set server next_job_number = 21293"

[Linux Cluster: PBS/ Torque]: Installing Torque 4.2.5 on CentOS 6

Installing Torque 4.2.5 on CentOS 6

References:
Do take a look at the Torque Admin Manual
Step 1: Download the Torque Software from Adaptive Computing
Download the Torque tarball from Torque Resource Manager Site
Step 2: Ensure you have the gcc, libssl-devel, and libxml2-devel packages
# yum install libxml2-devel openssl-devel gcc gcc-c++
Step 3: Configure the Torque Server
./configure \
--prefix=/opt/torque \
--exec-prefix=/opt/torque/x86_64 \
--enable-docs \
--disable-gui \
--with-server-home=/var/spool/torque \
--enable-syslog \
--with-scp \
--disable-rpp \
--disable-spool \
--enable-gcc-warnings \
--with-pam
Step 4: Compile the Torque
# make -j8
# make install
Step 5: Configure the trqauthd daemon to start automatically at system boot for the PBS Server
# cp contrib/init.d/trqauthd /etc/init.d/
# chkconfig --add trqauthd
# echo /usr/local/lib > /etc/ld.so.conf.d/torque.conf
# ldconfig
# service trqauthd start
Step 6: Copy the pbs_server and pbs_sched daemon for the PBS Server
# cp contrib/init.d/pbs_server /etc/init.d/pbs_server
# cp contrib/init.d/pb_sched /etc/init.d/pbs_sched
Step 6: Initialize serverdb by executing the torque.setup script for the PBS Server
# ./torque.setup root
Step 7: Make self-extracting tarballs packages for Client Nodes
# make packages
Building ./torque-package-clients-linux-i686.sh ...
Building ./torque-package-mom-linux-i686.sh ...
Building ./torque-package-server-linux-i686.sh ...
Building ./torque-package-gui-linux-i686.sh ...
Building ./torque-package-devel-linux-i686.sh ...
Done
Step 7b. Run libtool –finish /opt/torque/x86_64/lib
libtool: finish: PATH="/opt/xcat/bin:/opt/xcat/sbin:/opt/xcat/share/xcat/tools:/usr/lib64/qt-3.3/bin:/usr/local/intel/composer_xe_2011_sp1.11.339/bin/intel64:/usr/local/sbin:/usr/local/bin:/sbin:/bin:/usr/sbin:/usr/bin:/opt/ibutils/bin:/usr/local/intel/composer_xe_2011_sp1.11.339/mpirt/bin/intel64:/opt/maui/bin:/opt/torque/x86_64/bin:/root/bin:/sbin" ldconfig -n /opt/torque/x86_64/lib
----------------------------------------------------------------------
Libraries have been installed in:
/opt/torque/x86_64/lib

If you ever happen to want to link against installed libraries
in a given directory, LIBDIR, you must either use libtool, and
specify the full pathname of the library, or use the `-LLIBDIR'
flag during linking and do at least one of the following:
- add LIBDIR to the `LD_LIBRARY_PATH' environment variable
during execution
- add LIBDIR to the `LD_RUN_PATH' environment variable
during linking
- use the `-Wl,-rpath -Wl,LIBDIR' linker flag
- have your system administrator add LIBDIR to `/etc/ld.so.conf'

See any operating system documentation about shared libraries for
more information, such as the ld(1) and ld.so(8) manual pages.
----------------------------------------------------------------------

Step 8a: Copy and install on the Client Nodes
for i in node01 node02 node03 node04 ; do scp torque-package-mom-linux-i686.sh ${i}:/tmp/. ; done
for i in node01 node02 node03 node04 ; do scp torque-package-clients-linux-i686.sh ${i}:/tmp/. ; done
for i in node01 node02 node03 node04 ; do ssh ${i} /tmp/torque-package-mom-linux-i686.sh --install ; done
for i in node01 node02 node03 node04 ; do ssh ${i} /tmp/torque-package-clients-linux-i686.sh --install ; done
Step 8b: Alternatively, you can use xCAT to push and run the packages from the PBS Server to the Client Node (auuming you install XCAT on the PBS Server)
# pscp  torque-package-mom-linux-i686.sh compute_noderange:/tmp
# pscp torque-package-clients-linux-i686.sh compute_noderange:/tmp
# psh compute_noderange:/tmp/torque-package-mom-linux-i686.sh
# psh compute_noderange:/tmp/torque-package-clients-linux-i686.sh
Step 9: Enabling Torque as a service for the Client Node
# cp contrib/init.d/pbs_mom /etc/init.d/pbs_mom
# chkconfig --add pbs_mom
Step 10a: Start the Services for each of the client nodes
# service pbs_mom start
Step 10b: Alternatively, Use XCAT to start the service for all the Client Node
# psh compute_noderange "/sbin/service/pbs_mom start"

Configuring the Torque Default Queue


qmgr -c "create queue dqueue"
qmgr -c "set queue dqueue queue_type = Execution"
qmgr -c "set queue dqueue resources_default.neednodes = dqueue"
qmgr -c "set queue dqueue enabled = True"
qmgr -c "set queue dqueue started = True"

qmgr -c "set server scheduling = True"
qmgr -c "set server acl_hosts = headnode.com"
qmgr -c "set server default_queue = dqueue"
qmgr -c "set server log_events = 127"
qmgr -c "set server mail_from = Cluster_Admin"
qmgr -c "set server query_other_jobs = True"
qmgr -c "set server resources_default.walltime = 240:00:00"
qmgr -c "set server resources_max.walltime = 720:00:00"
qmgr -c "set server scheduler_iteration = 60"
qmgr -c "set server node_check_rate = 150"
qmgr -c "set server tcp_timeout = 6"
qmgr -c "set server node_pack = False"
qmgr -c "set server mom_job_sync = True"
qmgr -c "set server keep_completed = 300"
qmgr -c "set server submit_hosts = headnode1.com"
qmgr -c "set server submit_hosts += headnode2.com"
qmgr -c "set server allow_node_submit = True"
qmgr -c "set server auto_node_np = True"
qmgr -c "set server next_job_number = 21293"

Monday, October 3, 2016

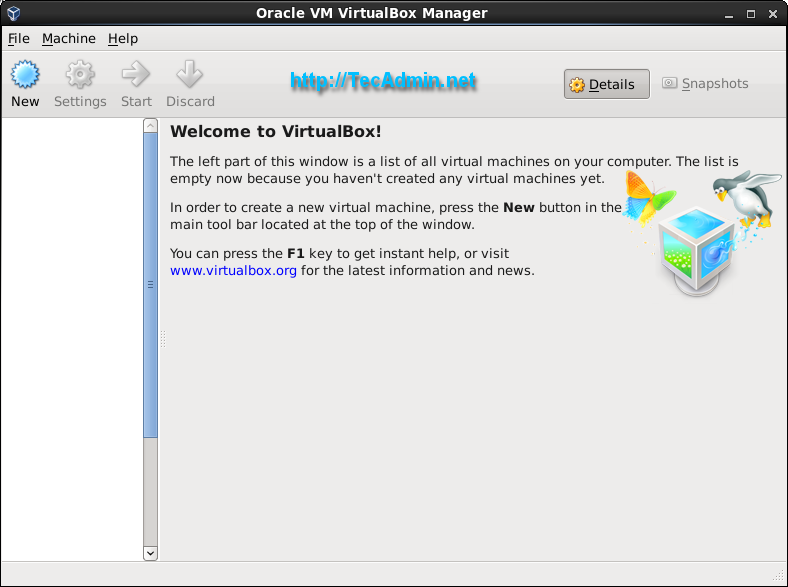
[CentOS - VirtualBox]: How to Install Oracle VirtualBox 5.1 on CentOS/RHEL 7/6 and Fedora 23/22

How to Install Oracle VirtualBox 5.1 on CentOS/RHEL 7/6 and Fedora 23/22

This article will help you to install Oracle VirtualBox 5.1 on CentOS, Redhat and Fedora systems using Yum.

Step 1 – Add Required Yum Repositories

Firstly you are required to add VirtualBox yum repository in your system. Download repository file from its official site and place it under at /etc/yum.repos.d/virtualbox.repo .First navigate to /etc/yum.repos.d/ directory and use one of below commands as per your operating system.
 
# cd /etc/yum.repos.d/

For CentOS/RHEL Systems:
# wget http://download.virtualbox.org/virtualbox/rpm/rhel/virtualbox.repo

For Fedora Systems:
# wget http://download.virtualbox.org/virtualbox/rpm/fedora/virtualbox.repo

CentOS/RHEL Users also need to add EPEL yum repository using one of following command.
 
CentOS/RHEL 7, 64 Bit (x86_64): 
 
# rpm -Uvh http://epel.mirror.net.in/epel/7/x86_64/e/epel-release-7-8.noarch.rpm

CentOS/RHEL 6, 64 Bit (x86_64): 
 
# rpm -Uvh http://epel.mirror.net.in/epel/6/x86_64/epel-release-6-8.noarch.rpm

Step 2 – Install Required Packages

Before installing VirtualBox make sure to install all required packages to run VirtualBox like kernel-headers, kernel-devels etc. Use following command to install required packages.
 
# yum install gcc make patch  dkms qt libgomp
# yum install kernel-headers kernel-devel fontforge binutils glibc-headers glibc-devel

Step 3 – Setup Environment Variable

VirtualBox installation required kernel source code to install required modules, So we need to configure environment variable KERN_DIR to which VirtualBox get kernel source code. In my case latest kernel source is available in 2.6.32-504.3.3.el6.x86_64 directory under /usr/src/kernels/ . Make sure you are using correct source path.
 
# export KERN_DIR=/usr/src/kernels/2.6.32-504.3.3.el6.x86_64

Step 4 – Install Oracle VirtualBox and Setup

Use following command to install VirtualBox 5.1 using yum command line tool. It will install latest version of VirtualBox 5.1.x on your system.
# yum install VirtualBox-5.1
After installation we need to rebuild kernel modules using following command.
# service vboxdrv setup

Step 5 – Start VirtualBox

Use following command to start VirtualBox from X windows. You can switch to GUI mode using init 5 or startx commands from terminal.
# virtualbox &
Install Oracle VirtualBox

Tuesday, August 16, 2016

[CentOS - CUPS Print Server]: How to Add printer in Linux Adding Printer to CUPS Server Procedure

How to Add printer in Linux Adding Printer to CUPS Server Procedure


In this article we are going to learn how to add printer in Linux and Adding Printer to CUPS Server procedure. Most of Linux users feel that adding / installing printer in Linux is hard, some times we have to say yes because all the printer models does not have proper drivers for Linux.
Still most of branded printers will work easily with Linux Operating System.

How to Add Printer in Linux RHEL 7 / Centos 7

Below is the process to install an printer from GUI Mode
First Step
Installing Printer in RHEL7
Sundry -> Printer Settings
Add Printer Wizard How to add printer in Linux
Adding Printer Wizard
Add Printer Device URI
Here is the main step where we can select the printer based on its connectivity.
Serial Port #1 – If your printer connected through serial / parallel cable as a local printer then select Serial Port #1 Or #2.
If your Printer is connected through Network then Select Network printer option again here Select the type which is the best for your printer. If you already have CUPS server then that CUPS server URL.
Select Printer Make
Select Printer Make
In this screen Select the option carefully, Select printer from Database is the option few of the printer drivers already available in Linux along with OS. Provide PPD is the option where we have to download driver file from vendor site and attach.
Click Forward
Select Printer Model
Click Forward
Add Printer Description and Click Apply
Provide Printer Name and Printer description then Click on Apply
How to Add printer in Linux Adding Printer to CUPS Server Procedure
Printer has been successfully

Adding Printer to CUPS Server Procedure

This procedure has been written assuming CUPS server is already exists and adding printer to CUPS server
[ravi@TechTutorials~]$ sudo /usr/sbin/lpadmin -p HYDPRINTER -v socket://192.168.2.21:9100 -D "HYD - Cannon MF220 printer" -L "HYD" -o printer-error-policy="retry-job" -u allow:all -m textonly.ppd
Let’s see options
  • -p <Printer Name>
  • -v <Device URI>
  • -D <Description>
  • -L <Location>
  • -o <Options>
  • -u <User to allow>
  • -m <Driver File Name>
Note: Before specifying driver file name we have to copy the PPD file to /usr/share/cups/model/ path
[ravi@TechTutorials~]$ sudo /usr/sbin/cupsenable HYDPRINTER
Above command will enable the printer
Verify the printer status using below command
[ravi@TechTutorials~]$ sudo /usr/bin/lpstat -p HYDPRINTER  -l
Change the printer config to yes
[ravi@TechTutorials~]$ sudo /bin/sed -i 's/No/Yes/g' /etc/cups/printers.conf
Restart CUPS Service to effect the changes
[ravi@TechTutorials~]$ sudo /sbin/service cups restart
[ravi@TechTutorials~]$ sudo lpstat -o -t |grep HYDPRINTER
That’s it your printer is added successfully to CUPS Server.

Monday, July 18, 2016

[Quick info: Kill Sessions]: how do I kill another login session remotely?

How do I kill another login session remotely?

You can kill a Unix login session remotely by sending a hangup signal (SIGHUP) to the process running the login session. To do this, follow the steps below:
  1. Identify the shell you want to kill. To determine your current tty, from your Unix shell prompt, enter:
      tty
  2. To show all of your running processes, enter:
      ps -fu username
    Replace username with your username.
  3. You should see something like this:
      PID    TT  STAT   TIME COMMAND
      13964  v5   I      0:00 elm
      13126  ue   S      0:00 -bash (bash)
      13133  ue   R      0:00 ps x
      13335  v5   S      0:00 -bash (bash)
    In the first column, "PID" stands for "process ID". The second column shows the tty to which your processes are connected. The dash (-) before a process name shows that the process is a login shell.
  4. To remove the remote shell, look for the processes with a dash and choose the process number that is not for your current tty. Then issue the following command:
      kill -HUP processid
    Replace processid with the process ID number you identified.
When you send a SIGHUP (by entering kill -HUP or kill -1) to a login shell, all the processes that were started in the shell will be killed as well (unless they were in the background). SIGHUP is good because it allows applications like Elm and Emacs to exit gracefully, leaving your files intact.
Note: You cannot kill processes that are running on a computer different from the one you are logged into. This rule extends to individual nodes within clusters of Unix systems as well.
++++++++=======================================+++++++++++++++++++

Howto: Linux Kill and Logout Users

There is a package called procps. It includes various useful (nifty) utilities. One of such utility is skill which is responsible to send a signal to users and process such as:
  • Halt user terminal
  • Kill user and logout

The procps package contains utilities to browse the /proc filesystem, which is not a real file system but a way for the kernel to provide information about the status of entries in its process table. Procps includes ps, free, skill, pkill, pgrep, snice, tload, top, uptime, vmstat, w, watch and pdwx commands.

Task: How To Halt/Stop a User Called vivek

Open a command-line terminal (select Applications > Accessories > Terminal), and then type the following commands. First, switch to the root user by typing su – and entering the root password, when prompted (you can also use sudo if configured). Type the skill command as follows:
# skill -STOP -u vivek
The skill command sends a terminate command (or another specified signal) to a specified set of processes.

Task: Resume Halted User Called vivek

Send CONT single to user vivek, type the following command:
# skill -CONT -u vivek

Task: Kill and Logout a User Called vivek

You can send KILL single, type the following command:
# skill -KILL -u vivek

Task: Kill and Logout All Users

The ultimate command to kill and logout all users is as follows:
# skill -KILL -v /dev/pts/*
WARNING! These tools are obsolete, unportable and it is here due to historical reasons. Consider using the killall, pkill, and pgrep commands instead as follows.

pkill command

To halt or stop a user called vivek, enter:
# pkill -STOP -u vivek
To resume a user called vivek, enter:
# pkill -CONT -u vivek
To kill all php-cgi process owned by vivek user, enter:
# pkill -KILL -u vivek php-cgi

Other useful nifty utilities provided by procps package

  • w command : Show who is logged on and what they are doing.
  • kill command : Send signal to a process (explains how to kill process under Linux)
  • top command : Display Linux tasks and other important stuff
  • vmstat command : Display virtual memory statistics.
  • free command : Display free and used memory (RAM) statistics.
  • slabtop command : Display kernel slab cache information in real time.

[CentOS: gFTP]: How To Use Gftp In CentOS?

How To Use Gftp In CentOS?


Read details from the below url:
http://www.gftp.org/faq.html


to Download it from:
http://pkgs.repoforge.org/gftp/

1.1. What are the requirements to run gFTP?


  • GTK+ 1.2.3 or higher. GTK+/Glib is included with most systems now. If you don't have it installed, you may want to check to see if your vendor has a package available. If not, you can download the latest version of GTK+ and Glib from ftp://ftp.gtk.org/pub/gtk. gFTP will work with either version 1.2 or 2.x of GTK+, but I would recommend using GTK+ 2.x.
  • pthread libraries. Most systems already satisfy this requirement. If you are on a platform other than Linux, you may want to take a look at the FSU Pthreads library at http://www.informatik.hu-berlin.de/~mueller/pthreads.

1.2. How do I install gFTP?


  • If you do not want to compile gFTP yourself, you can check my webpage. I have DEBs for Debian and RPMs for RedHat available. If you're looking for Solaris binaries, check out http://www.sunfreeware.com.
  • If you are compiling gFTP yourself, extract the files from the distribution with tar -zxvf gftp-<version>.tar.gz
  • Go to the gftp-<version> directory and type
    ./configure
    make
    The configure script will generate a Makefile for your machine, and make will compile a binary for your machine. By default, when you run configure, it will install gFTP with the prefix /usr/local, so the gFTP binary will be /usr/local/bin/gftp. You can change this by typing configure --prefix=/usr, and it will then install the gFTP binary to /usr/bin/gftp.
  • If the compile suceeds without any errors, you can type make install to install the binary. This will also copy some necessary files to <install prefix>/share/gftp. If you do not have root on your machine to install these files, copy the contents of the docs/sample.gftp/ directory to ~/.gftp.
  • You may want to glance at the USERS-GUIDE file that comes with this distribution. It contains a little bit of information about how to use it.

1.3. What systems is gFTP known to run on?

I develop gFTP on a Debian GNU/Linux machine. It should run under any other Linux distributions. Here is a list of other platforms I have received successful compile reports:

  • FreeBSD/NetBSD/OpenBSD/BSDI
  • Solaris
  • IRIX
  • Digital UNIX
  • HP/UX 11
If gFTP compiles and runs on a platform not listed here, please email me about it and I'll add it to this list. If you are having problems compiling GTK+ or gFTP on another platform, try using GNU make instead of your vendor supplied make.

1.4. Does gFTP have a SVN repository?

gFTP is stored in GNOME's SVN repository. For instructions on how to setup your subversion client, visit the website http://developer.gnome.org/tools/svn.html. In a nutshell, you will need to run the following command to download the latest code:

svn co http://svn.gnome.org/svn/gftp/trunk gftp

To compile the SVN code, you will need autoconf, automake and gettext installed on your system. Once you have those packages installed, run the following series of commands:

  • Run ./autogen.sh to generate the configure scripts.
  • If that is successful, run ./configure to generate the Makefiles. By default, the binaries will be installed in /usr/local/bin. You can change the install location by passing the --prefix argument to configure. For example, let's say you want to install the binaries in /usr/bin. Run configure --prefix=/usr.
  • If that is successful, run make to build the source.
  • Optional: If that is successful, run make install to install the binary on your computer.

1.5. How do I report bugs in gFTP?

If you find ANY bugs in gFTP, please check to make sure that you are using the latest version of gFTP. If you are, please submit all bug reports to GNOME's Bugzilla. When sending in bug reports, please try to be as descriptive as possible. Send me what OS/version you are running, what compiler you are compiling with, the output of gftp --info and any other important information. If you get gFTP to crash, it would be very helpful if you could send me a backtrace. If you do not know how to do a backtrace, download the source code from my website. Edit the Makefile, and make sure that -g appears in the CFLAGS variable. Then recompile gFTP, but do NOT run make install because it will install a stripped binary in $PREFIX/bin. Then type gdb ./gftp. Once you have a (gdb) prompt, type r. When gFTP crashes, go back to that terminal window, and type bt, and put that output in the bug that you file with bugzilla.
I also have a gftp-users mailinglist setup. I have a link to the archives on my main webpage. If it is strictly a bug report, please submit it to Bugzilla instead of the mailinglist. Bugs that are submitted to bugzilla are much easier for me to track.
Also, if you do not get a response back from me immediately, that is not uncommon. I usually stay very busy and I don't get to work on gFTP all of the time.

1.6. How do I force running the text or gtk+ version of gFTP?

To run the text port, you can type gftp-text or to run the gtk+ port, you can run the gftp-gtk. The gftp command is just a shell script that checks if your DISPLAY variable is set, and if so it'll run the appropriate version.

1.7. Is there a way for gFTP to download a bunch of files/directories and then exit when it's completed?

Yes, the text port of gFTP supports this well. You can type:

gftp-text -d ftp://ftp.somesite.com/someplace

If someplace is a directory, it'll automatically download all of its subdirectories as well. If you want to transfer a file through ssh instead of ftp, just change the ftp:// to ssh://.

1.8. In the GTK+ version of gFTP, do I have to enter a port, username and password to connect to a ftp server?

No you don't. If you leave the port blank, it'll default to the default port for the protocol you selected (port 21 for FTP). If you leave the username blank, it will default to logging in as anonymous.

1.9. Where does gFTP store it's options?

gFTP will automatically create a ~/.gftp directory when it is first run. Your config file is ~/.gftp/gftprc, and this is where all of gFTP's settings are stored. The config file is well commented, so take a glance at it and see if there is anything you want to change. Your bookmarks are stored in the file ~/.gftp/bookmarks.
Every time gFTP is run, it will log the contents of the log window to ~/.gftp/gftp.log. The contents of this file will be automatically purged this file when gFTP is started up.

1.10. Why aren't the file sizes comma separated?

If gFTP was compiled with _GNU_SOURCE defined (run gftp --info), then gFTP will use the printf() modifier %'ld. If your LANG environment is set to C, then no commas will be inserted. If you are in the US, change your LANG environment variable to en_US.

1.11. When using an external editor, gFTP does not detect changes that are being made to the file.

Look at the man page for the editor you are using and see if there is a command line argument to have the editor run in the foreground (it won't fork to detact from the current terminal). If you are using one of the graphical VIM editors, you can add the --nofork argument.

1.12. How can I increase the size of the fonts in gFTP?

You can use the gnome-font-properties program to change the fonts used by all GTK+ 2.x applications.

1.13. I can't transfer certain file types in binary mode using the FTP protocol.

Edit your ~/.gftp/gftprc file and look at the ext= lines towards the bottom of the file. These lines control what icon is used for each file type. It also controls what mode is used for the file transfer. For example, to transfer all HTML files as binary, change the following two lines:

ext=.htm:world.xpm:A:
ext=.html:world.xpm:A:

to the following:

ext=.htm:world.xpm:B:
ext=.html:world.xpm:B:

Chapter 2. FTP Protocol

2.1. When gFTP tries to get the remote directory listing, the remote server complains about either the -a or -L argument to LIST.

If the server is complaining about the -L option, go under FTP->Options->FTP and disable resolve remote symlinks. If it is complaining about the -a option, go to FTP->Options->General and disable show hidden files.

2.2. When gFTP tries to get the remote directory listing, I receive the error: Cannot create a data connection: Connection refused

Go under FTP->Options->FTP and turn off passive file transfers. Instead of sending the PASV command to open up the data connection on the server side, the data connection will be opened up on the client side, and the PORT command will be sent to the server instead.

Chapter 3. HTTP Protocol

3.1. How do I set up my HTTP Proxy server?

Go under FTP->Options and hit the FTP tab. Enter HTTP as the proxy type and fill in your proxy server info on that screen. Then hit the HTTP tab and enter your same proxy server info there.

Chapter 4. SSH Protocol

4.1. gFTP will not log into the remote SSH server when using a non-English locale.

Note: This answer only applies to versions of gFTP >= 2.0.18
You will need to download the source code to gFTP and edit the appropriate po/<lang>.po file. You will need to make sure the following strings are translated exactly as they appear in the SSH client.

  • Enter passphrase for RSA key
  • Enter passphrase for key
  • Password
  • password
Please upload the changes to the PO file to GNOME's SVN or email me the updated PO file. If you email me the updates, please make sure that you grab the latest PO file from SVN.

4.2. I'm having problems getting SSH2 transfers to work. I keep getting the error: Error: Message size XXXXXXXX too big from server

Note: This answer only applies to versions of gFTP <= 2.0.17
What probably is the problem, sftp-server isn't in your path on the remote server. When you try to connect to the remote server, you'll see the command gFTP is trying to run, and it'll look something like:

ssh -e none -l username hostname "echo -n xsftp ; sftp-server"

Try running this command. If you get a prompt asking:

The authenticity of host 'hostname (###.###.###.###)' can't be established.
RSA key fingerprint is xx:xx:xx:xx:xx:xx:xx:xx:xx:xx:xx:xx:xx:xx:xx:xx.
Are you sure you want to continue connecting (yes/no)?

Tell it yes. gFTP won't even try to answer this question for you at the moment. Then, if you get the following output:

Enter passphrase for key '/home/brian/.ssh/id_dsa':
xsftp
bash: sftp-server: command not found

You'll have to set the path to the sftp-server program. Alternatively you could go under FTP->Options->SSH and enable Use sftp subsys. If you enable this, then you don't have to know the remote path to your sftp executable. But if you enable this, gFTP won't be able to send your password over to the ssh client. So if you're not using ssh-agent, then ssh will spawn the ssh-askpass program to grab your password.

4.3. What is the difference between the SSH and SSH2 protocols?

Note: This answer only applies to versions of gFTP <= 2.0.15
The SSH protocol uses sftp >= 0.7 from http://www.xbill.org/sftp. SSH2 uses the native file transfers found in the commercial SSH2 and in later versions of OpenSSH. The SSH2 protocol uses the sftp-server executable on the remote host and the SSH protocol uses the sftpserv executable.
Note: Due to confusion, the origional SSH protocol was removed in gFTP 2.0.15. It is not shown in gFTP 2.0.14, but there is a config option called enable_old_ssh to enable this protocol.

Chapter 5. SSL Issues

5.1. When using the FTPS or HTTPS protocol, gFTP cannot connect if the remote server uses a self signed certificate.

You must add the public key of your self signed CA to your OpenSSL certs directory. On my Debian box, the OpenSSL certs are installed in /usr/lib/ssl/certs.

Chapter 6. Compiling Problems

6.1. When I try to compile gFTP, I see undefined symbol libintl_gettext. Or, another error is undefined symbol LC_ALL.

Try running

make distclean ; configure --with-included-gettext.

You could alternatively pass
--disable-nls
to configure, and internationalization support will not be compiled in.


[CentOS: gFTP]: How To Use Gftp In CentOS?

How To Use Gftp In CentOS?


Read details from the below url:
http://www.gftp.org/faq.html


to Download it from:
http://pkgs.repoforge.org/gftp/

1.1. What are the requirements to run gFTP?


  • GTK+ 1.2.3 or higher. GTK+/Glib is included with most systems now. If you don't have it installed, you may want to check to see if your vendor has a package available. If not, you can download the latest version of GTK+ and Glib from ftp://ftp.gtk.org/pub/gtk. gFTP will work with either version 1.2 or 2.x of GTK+, but I would recommend using GTK+ 2.x.
  • pthread libraries. Most systems already satisfy this requirement. If you are on a platform other than Linux, you may want to take a look at the FSU Pthreads library at http://www.informatik.hu-berlin.de/~mueller/pthreads.

1.2. How do I install gFTP?


  • If you do not want to compile gFTP yourself, you can check my webpage. I have DEBs for Debian and RPMs for RedHat available. If you're looking for Solaris binaries, check out http://www.sunfreeware.com.
  • If you are compiling gFTP yourself, extract the files from the distribution with tar -zxvf gftp-<version>.tar.gz
  • Go to the gftp-<version> directory and type
    ./configure
    make
    The configure script will generate a Makefile for your machine, and make will compile a binary for your machine. By default, when you run configure, it will install gFTP with the prefix /usr/local, so the gFTP binary will be /usr/local/bin/gftp. You can change this by typing configure --prefix=/usr, and it will then install the gFTP binary to /usr/bin/gftp.
  • If the compile suceeds without any errors, you can type make install to install the binary. This will also copy some necessary files to <install prefix>/share/gftp. If you do not have root on your machine to install these files, copy the contents of the docs/sample.gftp/ directory to ~/.gftp.
  • You may want to glance at the USERS-GUIDE file that comes with this distribution. It contains a little bit of information about how to use it.

1.3. What systems is gFTP known to run on?

I develop gFTP on a Debian GNU/Linux machine. It should run under any other Linux distributions. Here is a list of other platforms I have received successful compile reports:

  • FreeBSD/NetBSD/OpenBSD/BSDI
  • Solaris
  • IRIX
  • Digital UNIX
  • HP/UX 11
If gFTP compiles and runs on a platform not listed here, please email me about it and I'll add it to this list. If you are having problems compiling GTK+ or gFTP on another platform, try using GNU make instead of your vendor supplied make.

1.4. Does gFTP have a SVN repository?

gFTP is stored in GNOME's SVN repository. For instructions on how to setup your subversion client, visit the website http://developer.gnome.org/tools/svn.html. In a nutshell, you will need to run the following command to download the latest code:

svn co http://svn.gnome.org/svn/gftp/trunk gftp

To compile the SVN code, you will need autoconf, automake and gettext installed on your system. Once you have those packages installed, run the following series of commands:

  • Run ./autogen.sh to generate the configure scripts.
  • If that is successful, run ./configure to generate the Makefiles. By default, the binaries will be installed in /usr/local/bin. You can change the install location by passing the --prefix argument to configure. For example, let's say you want to install the binaries in /usr/bin. Run configure --prefix=/usr.
  • If that is successful, run make to build the source.
  • Optional: If that is successful, run make install to install the binary on your computer.

1.5. How do I report bugs in gFTP?

If you find ANY bugs in gFTP, please check to make sure that you are using the latest version of gFTP. If you are, please submit all bug reports to GNOME's Bugzilla. When sending in bug reports, please try to be as descriptive as possible. Send me what OS/version you are running, what compiler you are compiling with, the output of gftp --info and any other important information. If you get gFTP to crash, it would be very helpful if you could send me a backtrace. If you do not know how to do a backtrace, download the source code from my website. Edit the Makefile, and make sure that -g appears in the CFLAGS variable. Then recompile gFTP, but do NOT run make install because it will install a stripped binary in $PREFIX/bin. Then type gdb ./gftp. Once you have a (gdb) prompt, type r. When gFTP crashes, go back to that terminal window, and type bt, and put that output in the bug that you file with bugzilla.
I also have a gftp-users mailinglist setup. I have a link to the archives on my main webpage. If it is strictly a bug report, please submit it to Bugzilla instead of the mailinglist. Bugs that are submitted to bugzilla are much easier for me to track.
Also, if you do not get a response back from me immediately, that is not uncommon. I usually stay very busy and I don't get to work on gFTP all of the time.

1.6. How do I force running the text or gtk+ version of gFTP?

To run the text port, you can type gftp-text or to run the gtk+ port, you can run the gftp-gtk. The gftp command is just a shell script that checks if your DISPLAY variable is set, and if so it'll run the appropriate version.

1.7. Is there a way for gFTP to download a bunch of files/directories and then exit when it's completed?

Yes, the text port of gFTP supports this well. You can type:

gftp-text -d ftp://ftp.somesite.com/someplace

If someplace is a directory, it'll automatically download all of its subdirectories as well. If you want to transfer a file through ssh instead of ftp, just change the ftp:// to ssh://.

1.8. In the GTK+ version of gFTP, do I have to enter a port, username and password to connect to a ftp server?

No you don't. If you leave the port blank, it'll default to the default port for the protocol you selected (port 21 for FTP). If you leave the username blank, it will default to logging in as anonymous.

1.9. Where does gFTP store it's options?

gFTP will automatically create a ~/.gftp directory when it is first run. Your config file is ~/.gftp/gftprc, and this is where all of gFTP's settings are stored. The config file is well commented, so take a glance at it and see if there is anything you want to change. Your bookmarks are stored in the file ~/.gftp/bookmarks.
Every time gFTP is run, it will log the contents of the log window to ~/.gftp/gftp.log. The contents of this file will be automatically purged this file when gFTP is started up.

1.10. Why aren't the file sizes comma separated?

If gFTP was compiled with _GNU_SOURCE defined (run gftp --info), then gFTP will use the printf() modifier %'ld. If your LANG environment is set to C, then no commas will be inserted. If you are in the US, change your LANG environment variable to en_US.

1.11. When using an external editor, gFTP does not detect changes that are being made to the file.

Look at the man page for the editor you are using and see if there is a command line argument to have the editor run in the foreground (it won't fork to detact from the current terminal). If you are using one of the graphical VIM editors, you can add the --nofork argument.

1.12. How can I increase the size of the fonts in gFTP?

You can use the gnome-font-properties program to change the fonts used by all GTK+ 2.x applications.

1.13. I can't transfer certain file types in binary mode using the FTP protocol.

Edit your ~/.gftp/gftprc file and look at the ext= lines towards the bottom of the file. These lines control what icon is used for each file type. It also controls what mode is used for the file transfer. For example, to transfer all HTML files as binary, change the following two lines:

ext=.htm:world.xpm:A:
ext=.html:world.xpm:A:

to the following:

ext=.htm:world.xpm:B:
ext=.html:world.xpm:B:

Chapter 2. FTP Protocol

2.1. When gFTP tries to get the remote directory listing, the remote server complains about either the -a or -L argument to LIST.

If the server is complaining about the -L option, go under FTP->Options->FTP and disable resolve remote symlinks. If it is complaining about the -a option, go to FTP->Options->General and disable show hidden files.

2.2. When gFTP tries to get the remote directory listing, I receive the error: Cannot create a data connection: Connection refused

Go under FTP->Options->FTP and turn off passive file transfers. Instead of sending the PASV command to open up the data connection on the server side, the data connection will be opened up on the client side, and the PORT command will be sent to the server instead.

Chapter 3. HTTP Protocol

3.1. How do I set up my HTTP Proxy server?

Go under FTP->Options and hit the FTP tab. Enter HTTP as the proxy type and fill in your proxy server info on that screen. Then hit the HTTP tab and enter your same proxy server info there.

Chapter 4. SSH Protocol

4.1. gFTP will not log into the remote SSH server when using a non-English locale.

Note: This answer only applies to versions of gFTP >= 2.0.18
You will need to download the source code to gFTP and edit the appropriate po/<lang>.po file. You will need to make sure the following strings are translated exactly as they appear in the SSH client.

  • Enter passphrase for RSA key
  • Enter passphrase for key
  • Password
  • password
Please upload the changes to the PO file to GNOME's SVN or email me the updated PO file. If you email me the updates, please make sure that you grab the latest PO file from SVN.

4.2. I'm having problems getting SSH2 transfers to work. I keep getting the error: Error: Message size XXXXXXXX too big from server

Note: This answer only applies to versions of gFTP <= 2.0.17
What probably is the problem, sftp-server isn't in your path on the remote server. When you try to connect to the remote server, you'll see the command gFTP is trying to run, and it'll look something like:

ssh -e none -l username hostname "echo -n xsftp ; sftp-server"

Try running this command. If you get a prompt asking:

The authenticity of host 'hostname (###.###.###.###)' can't be established.
RSA key fingerprint is xx:xx:xx:xx:xx:xx:xx:xx:xx:xx:xx:xx:xx:xx:xx:xx.
Are you sure you want to continue connecting (yes/no)?

Tell it yes. gFTP won't even try to answer this question for you at the moment. Then, if you get the following output:

Enter passphrase for key '/home/brian/.ssh/id_dsa':
xsftp
bash: sftp-server: command not found

You'll have to set the path to the sftp-server program. Alternatively you could go under FTP->Options->SSH and enable Use sftp subsys. If you enable this, then you don't have to know the remote path to your sftp executable. But if you enable this, gFTP won't be able to send your password over to the ssh client. So if you're not using ssh-agent, then ssh will spawn the ssh-askpass program to grab your password.

4.3. What is the difference between the SSH and SSH2 protocols?

Note: This answer only applies to versions of gFTP <= 2.0.15
The SSH protocol uses sftp >= 0.7 from http://www.xbill.org/sftp. SSH2 uses the native file transfers found in the commercial SSH2 and in later versions of OpenSSH. The SSH2 protocol uses the sftp-server executable on the remote host and the SSH protocol uses the sftpserv executable.
Note: Due to confusion, the origional SSH protocol was removed in gFTP 2.0.15. It is not shown in gFTP 2.0.14, but there is a config option called enable_old_ssh to enable this protocol.

Chapter 5. SSL Issues

5.1. When using the FTPS or HTTPS protocol, gFTP cannot connect if the remote server uses a self signed certificate.

You must add the public key of your self signed CA to your OpenSSL certs directory. On my Debian box, the OpenSSL certs are installed in /usr/lib/ssl/certs.

Chapter 6. Compiling Problems

6.1. When I try to compile gFTP, I see undefined symbol libintl_gettext. Or, another error is undefined symbol LC_ALL.

Try running

make distclean ; configure --with-included-gettext.

You could alternatively pass
--disable-nls
to configure, and internationalization support will not be compiled in.