Whether you want to manipulate images, edit audio, or animate stories, there's a free and open source tool to do the trick.
Open source tools have evolved a lot in the past few years, so let's take a tour of 2016 landscape.
Core applications
These six applications are the juggernauts of open source design tools.
They are well-established, mature projects with full feature sets,
stable releases, and active development communities. All six
applications are cross-platform; each is available on Linux, OS X, and
Windows, although in some cases the Linux versions are the most quickly
updated. These applications are so widely known, I've also included
highlights of the latest features available that you may have missed if
you don't closely follow their development.
If you'd like to follow new developments more closely, and perhaps even
help out by testing the latest development versions of the first four of
these applications—GIMP, Inkscape, Scribus, and MyPaint—you can install
them easily on Linux using
Flatpak. Nightly builds of each of these applications are available via Flatpak by
following the instructions for
Nightly Graphics Apps.
One thing to note: If you'd like to install brushes or other extensions
to each Flatpak version of the app, the directory to drop the
extensions in will be under the directory corresponding to the
application inside the
~/.var/app directory.
GIMP
GIMP celebrated its 20th anniversary in 2015,
making it one of the oldest open source creative applications out
there. GIMP is a solid program for photo manipulation, basic graphic
creation, and illustration. You can start using GIMP by trying simple
tasks, such as cropping and resizing images, and over time work into a
deep set of functionality. Available for Linux, Mac OS X, and Windows,
GIMP is cross-platform and can open and export to a wide breadth of file
formats, including those popularized by its proprietary analogue,
Photoshop.
The GIMP team is currently working toward the 2.10 release;
2.8.18 is the latest stable version. More exciting is the unstable version,
2.9.4,
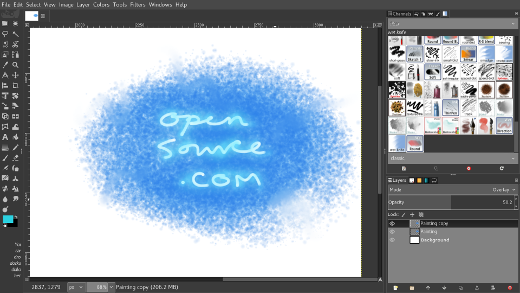
with a revamped user interface featuring space-saving symbolic icons
and dark themes, improved color management, more GEGL-based filters with
split-preview, MyPaint brush support (shown in screenshot below),
symmetrical drawing, and command-line batch processing. For more
details, check out
the full release notes.
Inkscape
Inkscape is a richly featured vector-based graphic design workhorse. Use it to create simple graphics, diagrams, layouts, or icon art.
The latest stable version is
0.91;
similarly to GIMP, more excitement can be found in a pre-release
version, 0.92pre3, which was released November 2016. The premiere
feature of the latest pre-release is the
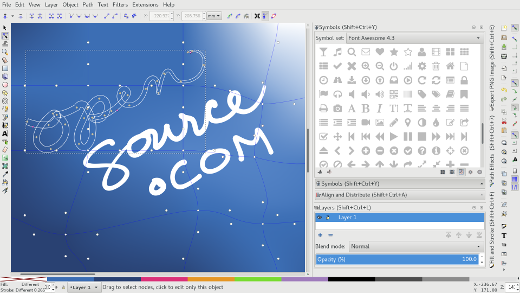
gradient mesh feature (demonstrated in screenshot below); new features introduce in the 0.91 release include
power stroke for
fully configurable calligraphic strokes (the "open" in "opensource.com"
in the screenshot below uses powerstroke), the on-canvas measure tool,
and
the new symbols dialog (shown in the right side of the screenshot below). (Many symbol libraries for Inkscape are available on GitHub;
Xaviju's inkscape-open-symbols set is fantastic.) A new feature available in development/nightly builds is the
Objects dialog that catalogs all objects in a document and provides tools to manage them.
Scribus
Scribus is
a powerful desktop publishing and page layout tool. Scribus enables you
to create sophisticated and beautiful items, including newsletters,
books, and magazines, as well as other print pieces. Scribus has color
management tools that can handle and output CMYK and spot colors for
files that are ready for reliable reproduction at print shops.
1.4.6 is the latest stable release of Scribus; the
1.5.x series
of releases is the most exciting as they serve as a preview to the
upcoming 1.6.0 release. Version 1.5.3 features a Krita file (*.KRA) file
import tool; other developments in the 1.5.x series include the
Table tool,
text frame welding, footnotes, additional PDF formats for export,
improved dictionary support, dockable palettes, a symbols tool, and
expanded file format support.
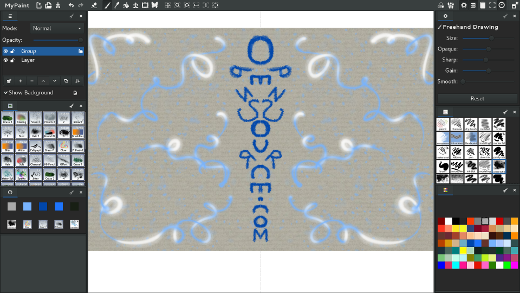
MyPaint
MyPaint is
a drawing tablet-centric expressive drawing and illustration tool. It's
lightweight and has a minimal interface with a rich set of keyboard
shortcuts so that you can focus on your drawing without having to drop
your pen.
MyPaint 1.2.0 is the latest stable release and includes new features, such as the
intuitive inking tool for
tracing over pencil drawings, new flood fill tool, layer groups, brush
and color history panel, user interface revamp including a dark theme
and small symbolic icons, and editable vector layers. To try out the
latest developments in MyPaint, I recommend installing the nightly
Flatpak build, although there have not been significant feature
additions since the 1.2.0 release.
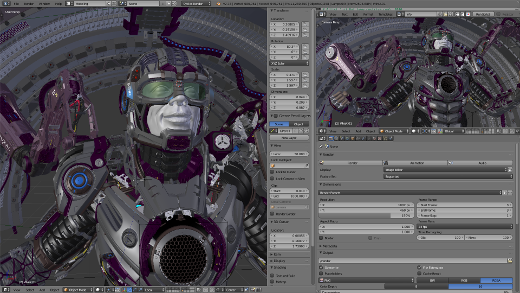
Blender
Initially released in January 1995,
Blender,
like GIMP, has been around for more than 20 years. Blender is a
powerful open source 3D creation suite that includes tools for modeling,
sculpting, rendering, realistic materials, rigging, animation,
compositing, video editing, game creation, and simulation.
The latest stable Blender release is
2.78a. The 2.78 release was a large one and includes features such as the revamped
Grease Pencil 2D animation tool; VR rendering support for spherical stereo images; and a new drawing tool for freehand curves.
To try out the latest exciting Blender developments, you have many options, including:
- The Blender Foundation makes unstable daily builds available on the official Blender website.
- If you're looking for builds that include particular in-development features, graphicall.org is
a community-moderated site that provides special versions of Blender
(and occasionally other open source creative apps) to enable artists to
try out the latest available code and experiments.
- Mathieu Bridon has made development versions of Blender available via Flatpak. See his blog post for details: Blender nightly in Flatpak.
Krita
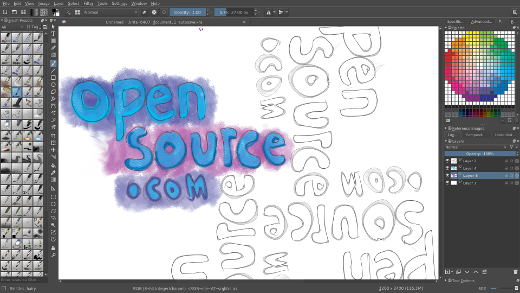
Krita is
a digital drawing application with a deep set of capabilities. The
application is geared toward illustrators, concept artists, and comic
artists and is fully loaded with extras, such as brushes, palettes,
patterns, and templates.
The latest stable version is
Krita 3.0.1,
released in September 2016. Features new to the 3.0.x series include 2D
frame-by-frame animation; improved layer management and functionality;
expanded and more usable shortcuts; improvements to grids, guides, and
snapping; and soft-proofing.
Video tools
There are many, many options for open source video editing tools. Of the members of the pack,
Flowblade is
a newcomer and Kdenlive is the established, newbie-friendly, and most
fully featured contender. The main criteria that may help you eliminate
some of this array of options is supported platforms—some of these only
support Linux. These all have active upstreams and the latest stable
versions of each have been released recently, within weeks of each
other.
Kdenlive
Kdenlive,
which was initially released back in 2002, is a powerful non-linear
video editor available for Linux and OS X (although the OS X version is
out-of-date). Kdenlive has a user-friendly drag-and-drop-based user
interface that accommodates beginners, and with the depth experts need.
- Latest Stable: 16.08.2 (October 2016)
Flowblade
Released in 2012,
Flowblade, a Linux-only video editor, is a relative newcomer.
- Latest Stable: 1.8 (September 2016)
Pitivi
Pitivi is a user-friendly free and open source video editor. Pitivi is written in
Python (the "Pi" in Pitivi), uses the
GStreamer multimedia framework, and has an active community.
Shotcut
- Latest stable: 16.11 (November 2016)
- 4K resolution support
- Ships as a tarballed binary
OpenShot Video Editor
- Latest stable: 2.1 (August 2016)
Utilities
SwatchBooker
SwatchBooker is
a handy utility, and although it hasn't been updated in a few years,
it's still useful. SwatchBooker helps users legally obtain color
swatches from various manufacturers in a format that you can use with
other free and open source tools, including Scribus.
GNOME Color Manager
GNOME Color Manager is
the built-in color management system for the GNOME desktop environment,
the default desktop for a bunch of Linux distros. The tool allows you
to create profiles for your display devices using a colorimeter, and
also allows you to load/managed ICC color profiles for those devices.
GNOME Wacom Control
The GNOME Wacom controls allow
you to configure your Wacom tablet in the GNOME desktop environment;
you can modify various options for interacting with the tablet,
including customizing the sensitivity of the tablet and which monitors
the tablet maps to.
Xournal
Xournal is
a humble but solid app that allows you to hand write/doodle notes using
a tablet. Xournal is a useful tool for signing or otherwise annotating
PDF documents.
PDF Mod
PDF Mod is
a handy utility for editing PDFs. PDF Mod lets users remove pages, add
pages, bind multiple single PDFs together into a single PDF, reorder the
pages, and rotate the pages.
SparkleShare
SparkleShare is
a git-backed file-sharing tool artists use to collaborate and share
assets. Hook it up to a GitLab repo and you've got a nice open source
infrastructure for asset management. The SparkleShare front end
nullifies the inscrutability of git by providing a dropbox-like
interface on top of it.
Photography
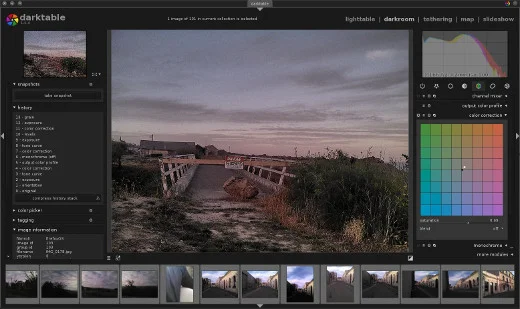
Darktable
Darktable is
an application that allows you to develop digital RAW files and has a
rich set of tools for the workflow management and non-destructive
editing of photographic images. Darktable includes support for an
extensive range of popular cameras and lenses.
Entangle
Entangle allows you to tether your digital camera to your computer and enables you to control your camera completely from the computer.
Hugin
Hugin is a tool that allows you to stitch together photos in order to create panoramic photos.
2D animation
Synfig Studio
Synfig Studio is a vector-based 2D animation suite that also supports bitmap artwork and is tablet-friendly.
Blender Grease Pencil
Krita
Krita also now provides 2D animation functionality.
Music and audio editing
Audacity
Audacity is popular, user-friendly tool for editing audio files and recording sound.
Ardour
Ardour is
a digital audio workstation with an interface centered around a record,
edit, and mix workflow. It's a little more complicated than Audacity to
use but allows for automation and is generally more sophisticated.
(Available for Linux, Mac OS X, and Windows.)
Hydrogen
Hydrogen is
an open source drum machine with an intuitive interface. It provides
the ability to create and arrange various patterns using synthesized
instruments.
Mixxx
Mixxx is
a four-deck DJ suite that allows you to DJ and mix songs together with
powerful controls, including beat looping, time stretching, and pitch
bending, as well as live broadcast your mixes and interface with DJ
hardware controllers.
Rosegarden
Rosegarden is
a music composition suite that includes tools for score writing and
music composition/editing and provides an audio and MIDI sequencer.
MuseScore
MuseScore is a music score creation, notation, and editing tool with a community of musical score contributors.
Additional creative tools
MakeHuman
MakeHuman is a 3D graphical tool for creating photorealistic models of humanoid forms.
Natron
Natron is a node-based compositor tool used for video post-production and motion graphic and special effect design.
FontForge
FontForge is
a typeface creation and editing tool. It allows you to edit letter
forms in a typeface as well as generate fonts for using those typeface
designs.
Valentina
Valentina is an application for drafting sewing patterns.
Calligra Flow
Calligra Flow is a Visio-like diagramming tool. (Available for Linux, Mac OS X, and Windows.)
Resources
There are a lot of toys and goodies to try out there. Need some
inspiration to start your exploration? These websites and conference are
chock-full of tutorials and beautiful creative works to inspire you get
you going:
- pixls.us: Blog hosted by photographer Pat David that focuses on free and open source tools and workflow for professional photographers.
- David Revoy's Blog The
blog of David Revoy, an immensely talented free and open source
illustrator, concept artist, and advocate, with credits on several of
the Blender Foundation films.
- The Open Source Creative Podcast: Hosted by Opensource.com community moderator and columnist Jason van Gumster, who is a Blender and GIMP expert, and author of Blender for Dummies, this podcast is directed squarely at those of us who enjoy open source creative tools and the culture around them.
- Libre Graphics Meeting:
Annual conference for free and open source creative software developers
and the creatives who use the software. This is the place to find out
about what cool features are coming down the pipeline in your favorite
open source creative tools, and to enjoy what their users are creating
with them.
