How to Install and Enable OpenSSH on Ubuntu 17.04, Ubuntu 16.04
Before we proceed on how to install and
enable OpenSSH on Ubuntu 17.04, Ubuntu 16.04, first we need to
understand what OpenSSH (a fork of free SSH) is.
OpenSSH
(also known as OpenBSD Secure Shell) is a connectivity tool that
enables remote login via the SSH protocol, hence eliminating
eavesdropping, connection hijacking, and other attacks. It helps to
secure all network communications by encrypting all network traffic over
multiple authentication methods through a secured tunnel.
The OpenSSH suite consists of the following tools:
- Remote operations are done using ssh, scp, and sftp.
- Key management with ssh-add, ssh-keysign, ssh-keyscan, and ssh-keygen.
- The service side consists of sshd, sftp-server, and ssh-agent.

OpenSSH Key Features
- Offers strong cryptography (AES, ChaCha20, RSA, ECDSA, Ed25519…)
- Supports X11 forwarding (which also encrypts X Window System traffic)
- Port forwarding (encrypted channels for legacy protocols)
- Strong authentication (public keys, one-time passwords)
- Agent forwarding
- Interoperability
- SFTP client and server support in both SSH1 and SSH2 protocols
- Optional data compression
- See list for full details
The most recent release is OpenSSH 7.5 and its mainly bugfix release
Install OpenSSH on Ubuntu 17.04, Ubuntu 16.04
Now lets proceed with how to install and enable OpenSSHHow to enable root password
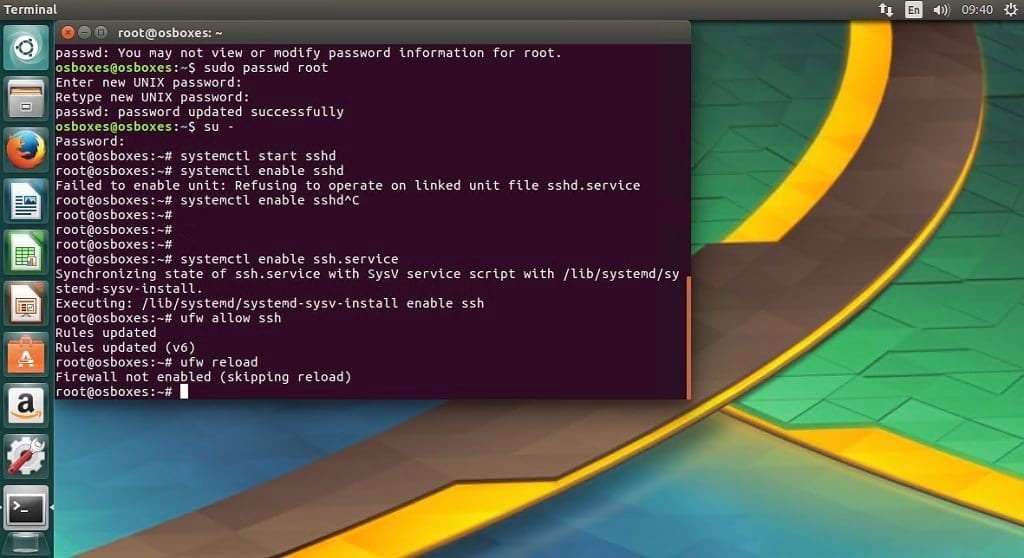
- First you need to ensure the root password is enabled if not already done, by running the following commands
sudo passwd root
Enter new UNIX password:
Retype new UNIX password:
passwd: password updated successfully
Install OpenSSH on Ubuntu
- Next we need to install openssh server / client on ubuntu by running the following commands on terminal
su - #enter your root password
sudo apt-get install openssh-server openssh-client
- Now start and enable SSH service by running following commands
systemctl start sshd
systemctl enable ssh.service
- Last step is to open up the ssh firewall port
ufw allow ssh
ufw reload
Configure OpenSSH Server
- To configure OpenSSH, you need to edit the file “sshd_config” located in “/etc/ssh”
sudo gedit /etc/ssh/sshd_config
- There are quite a few config settings in there but for the purpose of this tutorial, we will enable the following settings for a basic setup
 Port 22                    # Tells sshd on what port to listen on
 AddressFamily any          # sshd listens on either IPv4 or IPv6 or both interface
 ListenAddress 0.0.0.0      # Tells sshd to listen on all ip address
 PermitRootLogin no         # For security, allows set this to no
 MaxAuthTries 6             # To prevent DDOS attack, set the desired value to restrict the number of tries allowed during login
 MaxSessions 10             # This sets the maximum number of simultaneous connections
 PasswordAuthentication yes # This will enforce key-based if set to no and ask passwords if set to yes
- Save changes and reload sshd for changes to take effect
systemctl reload sshd
Test run OpenSSH setup
- For purpose of testing to see if this works as expected, we will enable ssh root access temporary but in a production setup, DO NOT enable it.
- Edit the file “sshd_config” located in “/etc/ssh” and change “PermitRootLogin without-password” to “PermitRootLogin yes“
- Restart the SSH server
sudo service ssh restart


or
systemctl reload sshd
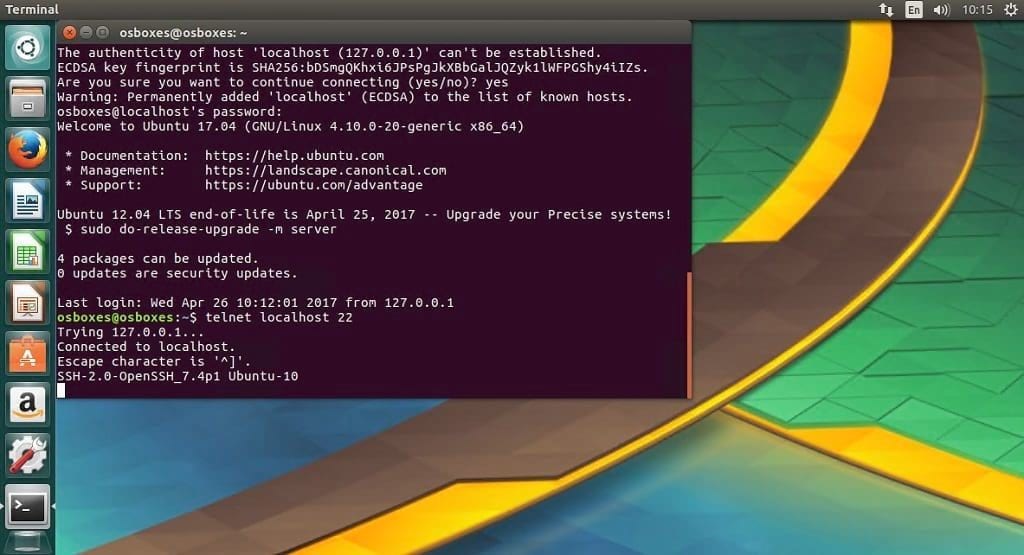
- Run the command to connect to it
ssh root@localhost


No comments:
Post a Comment