Setting Up Multiple Isolated Linux Systems (Containers) Using LXC On Ubuntu 14.04
LXC, Linux Containers,
is a fast, lightweight, and operating system-level virtualization
technology that allows us to host multiple isolated Linux systems
(Containers) in a single host. Unlike other virtualization methods such
as VirtualBox, KVM, and Vmware, the guest systems uses the same kernel
of the host system. All guests will efficiently shares the resources
such as CPU, RAM, Hard disk, and network etc of your original host
computer. The main goal of LXC is to create a Linux environment as close
as a standard Linux installation, but without the need for a separate
kernel.
Install LXC On Ubuntu
LXC is available on Ubuntu default repositories. So, Run the following command to install it on Ubuntu, and its derivatives.
sudo apt-get install lxc lxctl lxc-templates
The above command will install LXC, and everything needed by LXC.
Now, enter the following command to check everything OK.
sudo lxc-checkconfig
Sample output:
Kernel configuration not found at /proc/config.gz; searching...
Kernel configuration found at /boot/config-3.13.0-32-generic
--- Namespaces ---
Namespaces: enabled
Utsname namespace: enabled
Ipc namespace: enabled
Pid namespace: enabled
User namespace: enabled
Network namespace: enabled
Multiple /dev/pts instances: enabled

--- Control groups ---
Cgroup: enabled
Cgroup clone_children flag: enabled
Cgroup device: enabled
Cgroup sched: enabled
Cgroup cpu account: enabled
Cgroup memory controller: enabled
Cgroup cpuset: enabled

--- Misc ---
Veth pair device: enabled
Macvlan: enabled
Vlan: enabled
File capabilities: enabled

Note : Before booting a new kernel, you can check its configuration
usage : CONFIG=/path/to/config /usr/bin/lxc-checkconfig
Creating Containers (Virtual Units)
LXC
is usage very simple, and easy. By default, LXC has many ready made
templates. To list all available templates, enter the following command:
sudo su
ls /usr/share/lxc/templates/
Sample output:
lxc-alpine  lxc-archlinux  lxc-centos  lxc-debian   lxc-fedora  lxc-openmandriva  lxc-oracle  lxc-sshd  lxc-ubuntu-cloud
lxc-altlinux  lxc-busybox  lxc-cirros  lxc-download  lxc-gentoo  lxc-opensuse  lxc-plamo  lxc-ubuntu
To create a new Container, the command should be as below.
Syntax:
lxc-create -n <container-name> -t <template>
Example:
lxc-create -n ubuntu01 -t ubuntu
The above command will create a ubuntu container with name “ubuntu01″.
Sample output:
Checking cache download in /var/cache/lxc/trusty/rootfs-amd64 ...
Installing packages in template: ssh,vim,language-pack-en
Downloading ubuntu trusty minimal ...
I: Retrieving Release
I: Retrieving Release.gpg
I: Checking Release signature
I: Valid Release signature (key id 790BC7277767219C42C86F933B4FE6ACC0B21F32)
I: Retrieving Packages
.
.
.
Generation complete.
Creating SSH2 RSA key; this may take some time ...
Creating SSH2 DSA key; this may take some time ...
Creating SSH2 ECDSA key; this may take some time ...
Creating SSH2 ED25519 key; this may take some time ...
update-rc.d: warning: default stop runlevel arguments (0 1 6) do not match ssh Default-Stop values (none)
invoke-rc.d: policy-rc.d denied execution of start.

Current default time zone: 'Asia/Kolkata'
Local time is now:      Mon Jul 28 15:32:15 IST 2014.
Universal Time is now:  Mon Jul 28 10:02:15 UTC 2014.

##
# The default user is 'ubuntu' with password 'ubuntu'!
# Use the 'sudo' command to run tasks as root in the container.
##

The new Ubuntu container has been created now. Note that the default username and its password of the Container at the last line of the above output. This will be needed while you logging into the virtual host.
Starting Containers
After creating the containers, start it using the following command.
lxc-start -n ubuntu01 -d
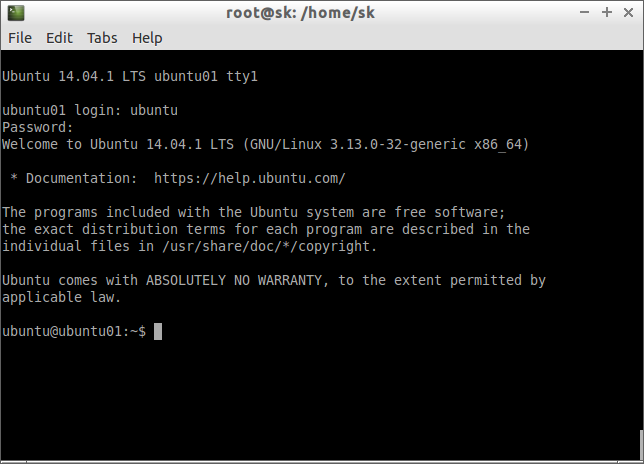
now, log in to the container with command:
lxc-console -n ubuntu01
Enter
the username and password of the container. As you know, the default
username and password will be generated while creating new containers.
In my case, the default username is ubuntu, and password is ubuntu.
Sample output:
Now,
start using the new virtual unit (container). You can now install,
remove, configure packages in this new container as the way you do in a
normal physical machine.
Just like
above, you can create virtual hosts as many as you want to. For example,
to create a centos container, enter the following command. Be mindful
that you should install “yum” package in order to create RPM based
virtual units.
apt-get install yum
lxc-create -n centos01 -t centos
To create, opensuse container:
lxc-create -n opensuse1 -t opensuse
To
exit from the container, and return back to your original host
computer, press “ctrl+a” followed by the letter “a” from your keyboard.
Now, you’ll be returned back to the original host computer.
Viewing the list of newly created containers
To view the list of newly generated containers, enter the following command from your original computer.
lxc-ls
Sample output:
ubuntu01
As you see above, I have only one virtual unit in my host computer.
Viewing the complete details of a Container
lxc-info -n ubuntu01
Sample output:
Name:           ubuntu01
State:          RUNNING
PID:            10919
IP:             10.0.3.86
CPU use:        1.55 seconds
BlkIO use:      176.00 KiB
Memory use:     7.84 MiB
KMem use:       0 bytes
Link:           veth8JVPSJ
 TX bytes:      1.44 KiB
 RX bytes:      3.02 KiB
 Total bytes:   4.46 KiB
The above command shows the name, State, CPU usage, Memory usage of the container “ubuntu01″.
Viewing the IP address and state of a particular Container
To view the ip address, and state of a container, use the following command.
For example, here I am going to view my “ubuntu01″ container’s ip address and running state.
lxc-ls --fancy ubuntu01
Sample output:
NAME      STATE    IPV4       IPV6  AUTOSTART
---------------------------------------------
ubuntu01  RUNNING  10.0.3.86  -     NO
As you see above, the “ubuntu01″ container is currently running, and its ip address is 10.0.3.86.
Stopping Containers
You
can stop a running container using “lxc-stop” command. For example, to
stop a ubuntu01 container, enter the following command:
lxc-stop -n ubuntu01
Now, check the state of the ubuntu01 container.
lxc-ls --fancy ubuntu01
Sample output:
NAME      STATE    IPV4  IPV6  AUTOSTART
----------------------------------------
ubuntu01  STOPPED  -     -     NO
As you see above, the ubuntu01 container has stopped.
Cloning Containers
It’s
possible to clone a new container from an existing container. For
example, to clone a new container called “ubuntu02″ from an existing
container “ubuntu01″, use the following command:
lxc-stop -n ubuntu01
lxc-clone ubuntu01 ubuntu02
Sample output:
Created container ubuntu02 as copy of ubuntu01
Now, you can start and use “ubuntu02″ container as usual.
lxc-start -n ubuntu02
Sample output:
<4>init: plymouth-upstart-bridge main process (5) terminated with status 1
<4>init: plymouth-upstart-bridge main process ended, respawning
<4>init: hwclock main process (7) terminated with status 77
<4>init: plymouth-upstart-bridge main process (16) terminated with status 1
<4>init: plymouth-upstart-bridge main process ended, respawning
<4>init: ureadahead main process (8) terminated with status 5
 * Stopping Send an event to indicate plymouth is up   ...done.
 * Starting Mount filesystems on boot   ...done.
 * Starting Signal sysvinit that the rootfs is mounted   ...done.
 * Starting Clean /tmp directory   ...done.
 * Starting Populate and link to /run filesystem   ...done.
 * Stopping Clean /tmp directory   ...done.
 * Starting Track if upstart is running in a container   ...done.
 * Stopping Populate and link to /run filesystem   ...done.
 * Starting load fallback graphics devices   ...done.
 * Starting workaround for missing events in container   ...done.
<4>init: udev-fallback-graphics main process (80) terminated with status 1
 * Starting load fallback graphics devices   ...fail!
 * Stopping workaround for missing events in container   ...done.
<4>init: console-font main process (107) terminated with status 1
 * Starting set console font   ...done.
 * Starting set console font   ...fail!
 * Starting userspace bootsplash   ...done.
<4>init: setvtrgb main process (119) terminated with status 1
 * Starting Initialize or finalize resolvconf   ...done.
 * Starting configure network device security   ...done.
 * Stopping userspace bootsplash   ...done.
 * Starting Send an event to indicate plymouth is up   ...done.
<4>init: console-setup main process (134) terminated with status 1
 * Stopping Send an event to indicate plymouth is up   ...done.
 * Starting Signal sysvinit that virtual filesystems are mounted   ...done.
 * Starting Signal sysvinit that virtual filesystems are mounted   ...done.
 * Starting Signal sysvinit that local filesystems are mounted   ...done.
 * Starting configure network device security   ...done.
 * Starting Bridge udev events into upstart   ...done.
 * Starting Mount network filesystems   ...done.
 * Starting Signal sysvinit that remote filesystems are mounted   ...done.
 * Stopping Mount filesystems on boot   ...done.
<30>systemd-udevd[187]: starting version 204

Ubuntu 14.04.1 LTS ubuntu02 console

ubuntu02 login: <4>init: plymouth-upstart-bridge main process ended, respawning
<4>init: setvtrgb main process (428) terminated with status 1

Ubuntu 14.04.1 LTS ubuntu02 console

ubuntu02 login: ubuntu
Password:
Last login: Mon Jul 28 15:40:56 IST 2014 on lxc/tty1
Welcome to Ubuntu 14.04.1 LTS (GNU/Linux 3.13.0-32-generic x86_64)

 * Documentation:  https://help.ubuntu.com/
ubuntu@ubuntu02:~$
To power off this container, simply enter the following command:
sudo poweroff
Take snapshot of a container
It’s also possible to take snapshot of a container. To take snapshot of the container ubuntu01, enter the following command:
lxc-stop -n ubuntu01
lxc-snapshot -n ubuntu01
Sample output:
lxc-snapshot -n ubuntu01
lxc_container: Snapshot of directory-backed container requested.
lxc_container: Making a copy-clone.  If you do want snapshots, then
lxc_container: please create an aufs or overlayfs clone first, snapshot that
lxc_container: and keep the original container pristine.
The snapshots will be stored in /var/lib/lxcsnaps/ directory of your original host computer.
ls /var/lib/lxcsnaps/
ubuntu01
Restoring Snapshots
To restore a container from the snapshot, use the following command.
lxc-snapshot -n ubuntu01 -r snap0
Deleting Containers
To destroy a container completely from you original host, enter the following command:
lxc-destroy -n ubuntu01
Managing Containers using LXC web console
If you not happy with LXC command line console, you can use LXC web panel to manage containers easily through your web browser.
To install LXC web panel, run the following command:
wget http://lxc-webpanel.github.io/tools/install.sh -O - | bash
Then, access the LXC web panel using URL: http://ip-address:5000. The default username/password is admin/admin.
 LXC Web panel Dashboard:
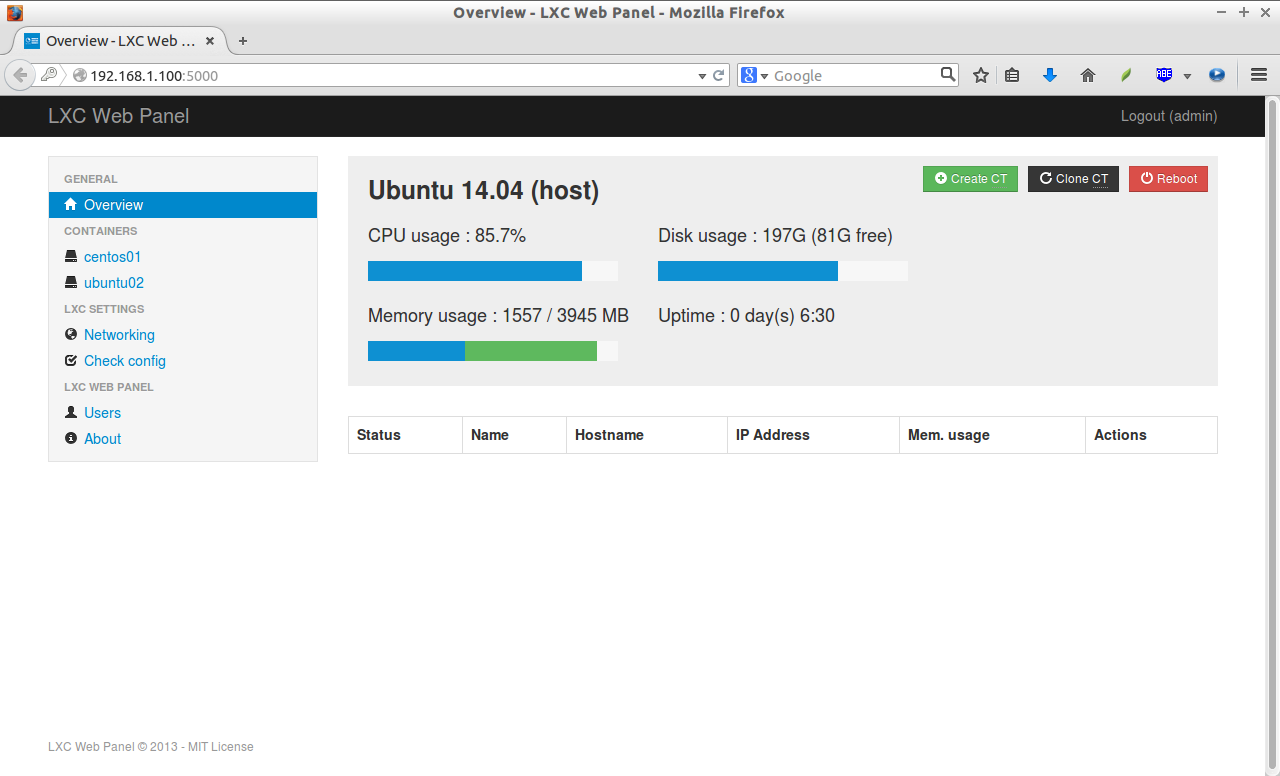
From
now on, you can create/clone/edit containers from the LXC web console.
Also, you can view the list of existing containers, and edit network
settings of a containers and so on.
This tutorial only shows the basic installation, and usage part of the LXC. If you want to know about LXC, refer the LXC comprehensive guide
from Ubuntu Community portal. This guide has everything you need to
know about LXC including installation, configuration, and
troubleshooting LXC.
That’s all for now. Enjoy!
Reference Links:
No comments:
Post a Comment