Cronopete – An Apple’s Time Machine Clone For Linux
If you use Mac OS, you certainly have known about or used Time machine. It is a backup software application distributed with the Apple’s Mac OS X. It is used to backup your data to an external drive, so that you can restore them later from the backup. If you are a fan boy/girl of Time Machine, you need to check out “Cronopete”. It is the clone of Time Machine for Linux operating systems. Using Cronopete, we can easily create periodic backups of a Linux system. It supports popular Linux distributions, including Arch Linux, Debian, Fedora, and Ubuntu.Cronopete – An Apple’s Time Machine Clone For Linux
Install Cronopete
On Arch Linux:
Cronopete is available in AUR, so you can install it using AUR helper programs such as Yaourt or Packer.
Or,
On Debian, Ubuntu:
Download the latest version from here depending upon the distribution you use.
For 64bit Debian:
For 32bit Debian:
For 64bit Ubuntu:
For 32bit Ubuntu:
Once downloaded the .DEB file, you can install it as shown below:
On Fedora:
Download the RPM file given in the above link.
64bit:
32bit:
Then, install it using command:
Cronopete Usage
Backup data
Once Cronopete installed, start it by typing the following command from the Terminal:
At first launch, you will see the following screen:

Click Configure now button. The following wizard will open.

As you see in the above screenshot, there is no external drive plugged in to backup. Now, plug your external HDD or USB drive and click Change disk option.
In the next screen, Cronopete will list the available disks. Choose your USB disk and click “Select” option.

Just repeat these steps to add another backup disk. For example, you might use one backup disk while at home, and another backup disk while at work.
Cronopete will format the selected disks to be used for backups. Click Format disk to continue.

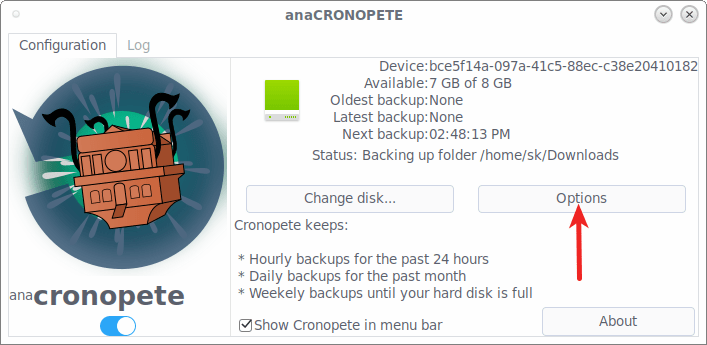
Once the format process is completed, you will be redirected to main configuration section again. You will now notice that the USB disk for backups is available.
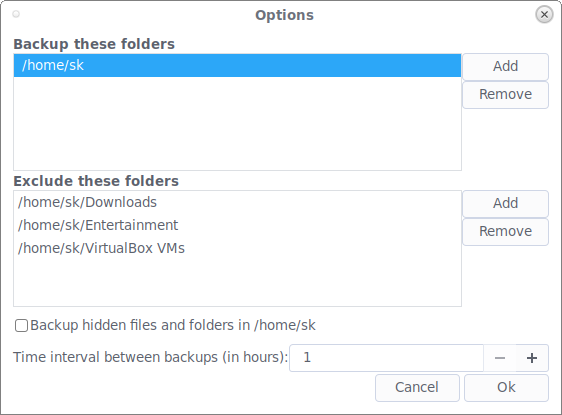
Once you have selected the backup disk, Cronopete will immediately start to backup your data. By default, it will backup the entire $HOME directory. You can define which folders or files should be backed up from the Options section. Choose Optionsto define the backup parameters.
Choose what do you want to include or exclude in your backup. Also, you choose the time interval between backups in hours. Default value is 1 hour.
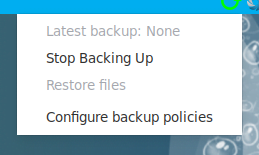
Once you launched Cronopete, you will it on your menu bar (task bar). You can define backup policies or stop the backup process by right clicking on the Cronopete icon in the menu bar.
Cronopete usually keeps:
- Hourly backups for past 24 hours,
- Daily backups for the past month,
- Weekly backups until your hard disk is full.
Restore data
To restore the data, right click on the Cronopete icon on the menu bar. Choose Restore files.

Select the folder or files you want to restore from your backup USB drive and click Restore files on the top left corner.

The selected files or folders will be restored to location where you have originally selected them during backup.
Suggested Read: Systemback – Restore Ubuntu Desktop and Server to previous state
And, that’s all. Hope this helps. I will be soon here with another useful guide. If you find this guide useful, please spend a moment to share it on your social and professional networks, so that everyone can benefit.
Cheers!
Resources:
No comments:
Post a Comment