PSiTransfer – A Simple Open Source Self-hosted File Sharing Solution
Today, we are about to discuss a similar tool called PSiTransfer, which is a simple and open source file sharing utility. Using PSiTransfer, we can either share our files locally or globally. Unlike transfer.sh, it is not a website. It is actually a self-hosted file sharing platform. You can deploy it on home system to share files over local area network. Or, you can deploy it on a VPS or Cloud, so that you can access or share your files from anywhere, using any Internet-enabled device. Since, it comes with built-in web server, you don’t need to deploy any other extra softwares. All you need is a web browser to access or share your stuffs.Features
Concerning about features, we can list the following:
- Upload single or multiple files at once
- Upload very big files
- Resume upload or download
- Set an expire-time for your upload bucket
- One-time downloads
- Password protected download list
- Free and Open Source
- More yet to come.
In this brief guide, I will show you how to deploy a local file sharing solution using PSiTransfer in Unix-like operating systems.
Installing PSiTransfer
PSiTransfer requires Node >=7.4 or later version in order to function properly. To install Nodejs on your Linux box, refer the following guide.
Once Nodejs, installed, go to PSiTransfer download page, and download the latest version:
Extract it using command:
It will extract all contents in a folder called psitransfer-1.0.0-rc.1 in your current working directory. Go to the folder:
And, Install PSiTransfer using command:
Finally, run the following command to start PSiTransfer:
Sample output:
Allow port no 3000 via your firewall or router in order to access the PSiTransfer dashboard from a remote system.
Restart firewalld to apply the changes.
If you use UFW firewall, then run the following command as sudo user to allow the port 3000.
Usage
Open your web browser and navigate to http://IP-address:3000 or http://domain-name:3000.
This is how PSiTransfer web dashboard looks like
As you can see, PSiTransfer web interface is fairly simple to use. Click on the + (plus) sign to upload the files of your choice. Alternatively, just and drag and drop the files over the Files section. You can upload or multiple files at once. Also, you can upload any size file.
Once the files has been selected, choose the retention period in the Settings section.
Retention period has many options, such as,
- 1 hour
- 6 hours
- 1 day
- 3 days
- 1 week
- 2 weeks
- 4 weeks
- 8 weeks
- one time download
The uploaded files will be kept in the Server depending upon the retention period you chose.
Also, you can set the password to the uploaded files. It will add a bit security to the shared files. The users should enter the password in order to unlock and download the shared files.
Finally, click Upload button to upload your files to your server.
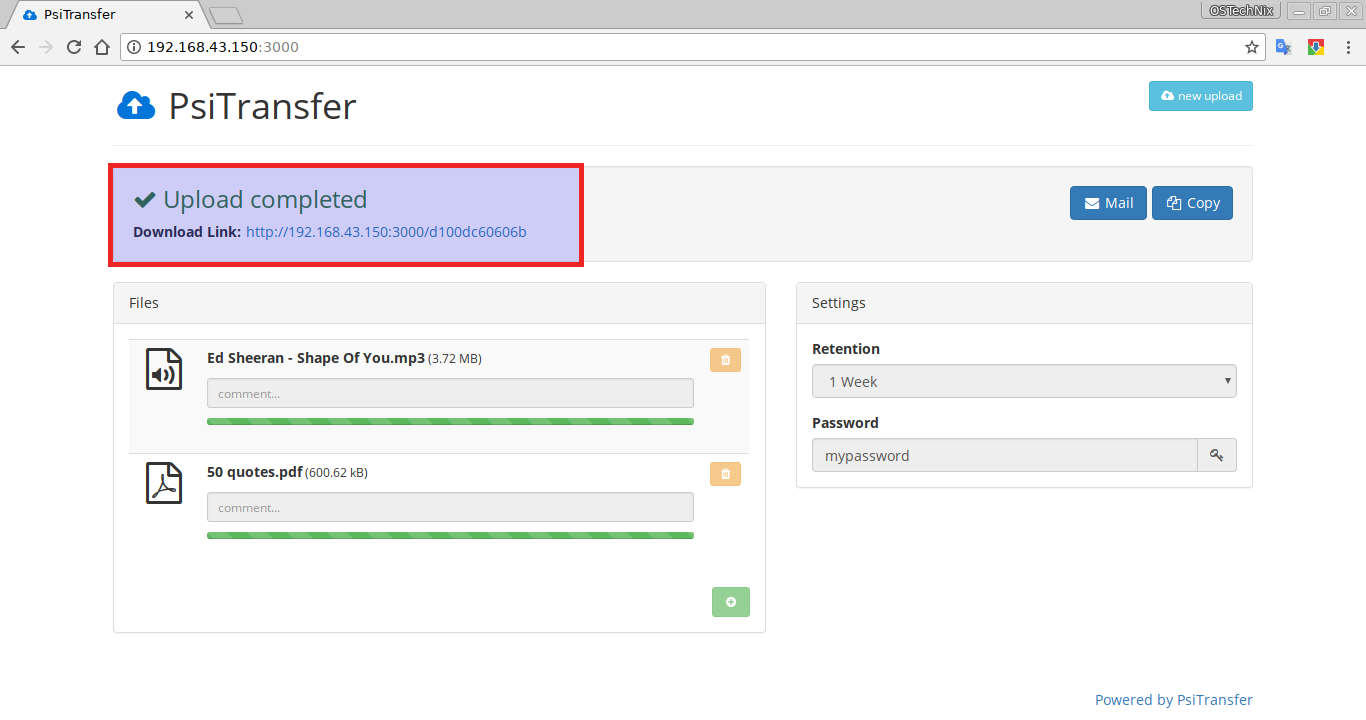
Now, you will get the download link of the uploaded files. You can pass it on to your friends, colleagues or whoever wants to download and use your stuff.
Also, you can mail the download link from the PSiTransfer dashboard itself or just copy/paste it to your mail ID or any other preferred medium (Whatsapp, messenger) and send it to your recipients.
Once the recipients click the Download link, they will be asked to enter the password to unlock the download link.
If they entered the correct password, they can have the download links for all shared files.
Very simple, isn’t it? You don’t need to be a Linux ninja to deploy a file sharing server. Any one can setup a simple file sharing environment within few minutes using PSiTransfer.
And, that’s all. I hope this helps. We will be posting simple and useful guides every day. Subscribe to our Newsletter and follow our social media links to get updates as soon as possible. If you find our guides useful, please share them on your social, professional networks and support OSTechNix.
Cheers!
Resource:


No comments:
Post a Comment