Pscp utility allows you to transfer/copy files to
multiple remote Linux servers using single terminal with one single
command, this tool is a part of
Pssh (Parallel SSH Tools), which provides parallel versions of OpenSSH and other similar tools such as:
- pscp – is utility for copying files in parallel to a number of hosts.
- prsync – is a utility for efficiently copying files to multiple hosts in parallel.
- pnuke – it helps to kills processes on multiple remote hosts in parallel.
- pslurp – it helps to copy files from multiple remote hosts to a central host in parallel.
When working in a network environment where there are multiple hosts
on the network, a System Administrator may find these tools listed above
very useful.

Pscp – Copy Files to Multiple Linux Servers
In this article, we shall look at some useful examples of
Pscp utility to transfer/copy files to multiple Linux hosts on a network.
To use the
pscp tool, you need to install the PSSH utility on your Linux system, for installation of PSSH you can read this article.
- How to Install Pssh Tool to Execute Commands on Multiple Linux Servers
Install PSSH or Parallel SSH on Linux
In this guide, we shall look at steps to install the latest version of PSSH (i.e. version
2.3.1) program on
Fedora based distributions such as
CentOS/
RedHat and
Debian derivatives such as
Ubuntu/
Mint using
pip command.
The
pip command is a small program (replacement of
easy_install script) for installing and managing Python software packages index.
On Fedora based Distributions
On
CentOS/
RHEL distributions, you need to first install pip (i.e. python-pip) package under your system, in order to install PSSH program.
# yum install python-pip
On
Fedora 21+, you need to run
dnf command instead yum (
dnf replaced yum).
# dnf install python-pip
Once you’ve install pip tool, you can install the pssh package with the help of pip command as shown.
# pip install pssh
Sample Output
/usr/lib/python2.6/site-packages/pip/_vendor/requests/packages/urllib3/util/ssl_.py:90: InsecurePlatformWarning: A true SSLContext object is not available. This prevents urllib3 from configuring SSL appropriately and may cause certain SSL connections to fail. For more information, see https://urllib3.readthedocs.org/en/latest/security.html#insecureplatformwarning.
InsecurePlatformWarning
You are using pip version 7.1.0, however version 7.1.2 is available.
You should consider upgrading via the 'pip install --upgrade pip' command.
Collecting pssh
/usr/lib/python2.6/site-packages/pip/_vendor/requests/packages/urllib3/util/ssl_.py:90: InsecurePlatformWarning: A true SSLContext object is not available. This prevents urllib3 from configuring SSL appropriately and may cause certain SSL connections to fail. For more information, see https://urllib3.readthedocs.org/en/latest/security.html#insecureplatformwarning.
InsecurePlatformWarning
Downloading pssh-2.3.1.tar.gz
Installing collected packages: pssh
Running setup.py install for pssh
Successfully installed pssh-2.3.1
On Debian Derivatives
On Debian based distributions it takes a minute to install pssh using pip command.
$ sudo apt-get install python-pip
$ sudo pip install pssh
Sample Output
Downloading/unpacking pssh
Downloading pssh-2.3.1.tar.gz
Running setup.py (path:/tmp/pip_build_root/pssh/setup.py) egg_info for package pssh
Installing collected packages: pssh
Running setup.py install for pssh
changing mode of build/scripts-2.7/pssh from 644 to 755
changing mode of build/scripts-2.7/pnuke from 644 to 755
changing mode of build/scripts-2.7/prsync from 644 to 755
changing mode of build/scripts-2.7/pslurp from 644 to 755
changing mode of build/scripts-2.7/pscp from 644 to 755
changing mode of build/scripts-2.7/pssh-askpass from 644 to 755
changing mode of /usr/local/bin/pscp to 755
changing mode of /usr/local/bin/pssh-askpass to 755
changing mode of /usr/local/bin/pssh to 755
changing mode of /usr/local/bin/prsync to 755
changing mode of /usr/local/bin/pnuke to 755
changing mode of /usr/local/bin/pslurp to 755
Successfully installed pssh
Cleaning up...
As you can see from the output above, the latest version of pssh is already installed on the system.
How do I Use pssh?
When using
pssh you need to create a host file with
the number of hosts along with IP address and port number that you need
to connect to remote systems using pssh.
The lines in the host file are in the following form and can also include blank lines and comments.
pssh hosts file
192.168.0.10:22
192.168.0.11:22
Executing single command on multiple server using pssh
You can execute any single command on different or multiple Linux hosts on a network by running a
pssh command. There are many options to use with
pssh as described below:
We shall look at a few ways of executing commands on a number of hosts using pssh with different options.
- To read hosts file, include the -h host_file-name or –hosts host_file_name option.
- To include a default username on all hosts that do not define a specific user, use the -l username or –user username option.
- You can also display standard output and standard error as each host completes. By using the -i or –inline option.
- You may wish to make connections time out after the given number of seconds by including the -t number_of_seconds option.
- To save standard output to a given directory, you can use the -o /directory/path option.
- To ask for a password and send to ssh, use the -A option.
Let’s see few examples and usage of pssh commands:
1. To execute
echo “Hello TecMint” on the terminal of the multiple Linux hosts by root user and prompt for the root user’s password, run this command below.
Important: Remember all the hosts must be included in the host file.
# pssh -h pssh-hosts -l root -A echo "Hello TecMint"
Warning: do not enter your password if anyone else has superuser
privileges or access to your account.
Password:
[1] 15:54:55 [SUCCESS] 192.168.0.10:22
[2] 15:54:56 [SUCCESS] 192.168.0.11:22
Note: In the above command “
pssh-hosts” is a file with list of remote Linux servers IP address and SSH port number that you wish to execute commands.
2. To find out the disk space usage on multiple Linux servers on your network, you can run a single command as follows.
# pssh -h pssh-hosts -l root -A -i "df -hT"
Warning: do not enter your password if anyone else has superuser
privileges or access to your account.
Password:
[1] 16:04:18 [SUCCESS] 192.168.0.10:22
Filesystem     Type   Size  Used Avail Use% Mounted on
/dev/sda3      ext4    38G  4.3G   32G  12% /
tmpfs          tmpfs  499M     0  499M   0% /dev/shm
/dev/sda1      ext4   190M   25M  156M  14% /boot
[2] 16:04:18 [SUCCESS] 192.168.0.11:22
Filesystem              Type      Size  Used Avail Use% Mounted on
/dev/mapper/centos-root xfs        30G  9.8G   20G  34% /
devtmpfs                devtmpfs  488M     0  488M   0% /dev
tmpfs                   tmpfs     497M  148K  497M   1% /dev/shm
tmpfs                   tmpfs     497M  7.0M  490M   2% /run
tmpfs                   tmpfs     497M     0  497M   0% /sys/fs/cgroup
/dev/sda1               xfs       497M  166M  332M  34% /boot
3. If you wish to know the
uptime of multiple Linux servers at one go, then you can run the following command.
# pssh -h pssh-hosts -l root -A -i "uptime"
Warning: do not enter your password if anyone else has superuser
privileges or access to your account.
Password:
[1] 16:09:03 [SUCCESS] 192.168.0.10:22
16:09:01 up  1:00,  2 users,  load average: 0.07, 0.02, 0.00
[2] 16:09:03 [SUCCESS] 192.168.0.11:22
06:39:03 up  1:00,  2 users,  load average: 0.00, 0.06, 0.09
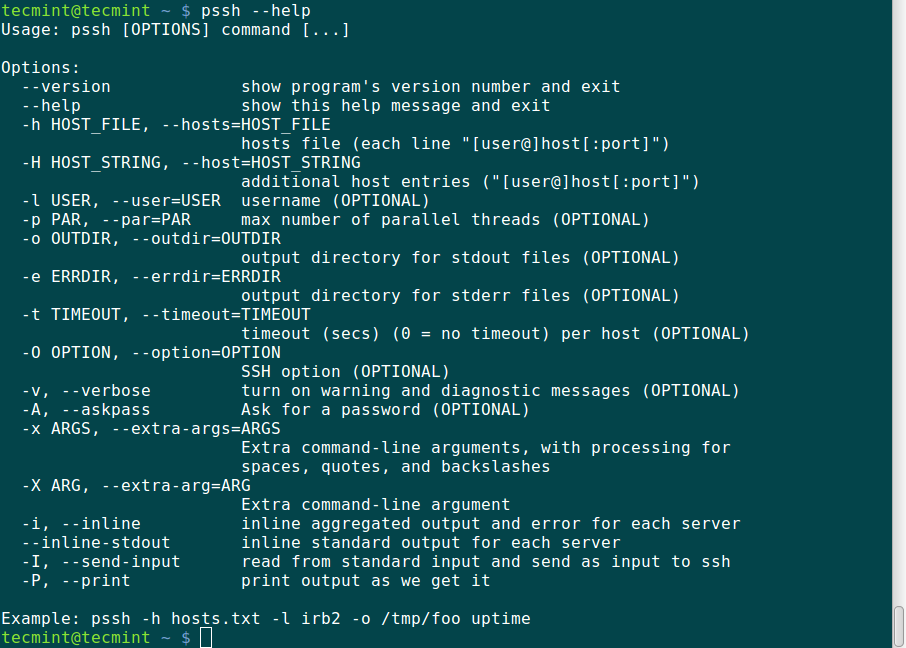
You can view the manual entry page for the
pssh command to get many other options to find out more ways of using pssh.
# pssh --help

pssh commands and usages
Summary
Parallel SSH or
PSSH is a good tool to use for executing commands in an environment where a
System Administrator
has to work with many servers on a network. It will make it easy for
commands to be executed remotely on different hosts on a network.
Almost
all the different options used with these tools are the same except for
few that are related to the specific functionality of a given utility.
How to Use Pscp to Transfer/Copy Files to Multiple Linux Servers
While using
pscp you need to create a separate file
that includes the number of Linux server IP address and SSH port number
that you need to connect to the server.
Copy Files to Multiple Linux Servers
Let’s create a new file called “
myscphosts.txt” and add the list of Linux hosts IP address and SSH port (default
22) number as shown.
192.168.0.3:22
192.168.0.9:22
Once you’ve added hosts to the file, it’s time to copy files from local machine to multiple Linux hosts under
/tmp directory with the help of following command.
# pscp -h myscphosts.txt -l tecmint -Av wine-1.7.55.tar.bz2 /tmp/
OR
# pscp.pssh -h myscphosts.txt -l tecmint -Av wine-1.7.55.tar.bz2 /tmp/
Sample Output
Warning: do not enter your password if anyone else has superuser
privileges or access to your account.
Password:
[1] 17:48:25 [SUCCESS] 192.168.0.3:22
[2] 17:48:35 [SUCCESS] 192.168.0.9:22
Explanation about the options used in the above command.
- -h switch used to read a hosts from a given file and location.
- -l switch reads a default username on all hosts that do not define a specific user.
- -A switch tells pscp ask for a password and send to ssh.
- -v switch is used to run pscp in verbose mode.
Copy Directories to Multiple Linux Servers
If you want to copy entire directory use
-r option, which will recursively copy entire directories as shown.
# pscp -h myscphosts.txt -l tecmint -Av -r Android\ Games/ /tmp/
OR
# pscp.pssh -h myscphosts.txt -l tecmint -Av -r Android\ Games/ /tmp/
Sample Output
Warning: do not enter your password if anyone else has superuser
privileges or access to your account.
Password:
[1] 17:48:25 [SUCCESS] 192.168.0.3:22
[2] 17:48:35 [SUCCESS] 192.168.0.9:22
You can view the manual entry page for the
pscp or use
pscp --help command to seek for help.
Conclusion
This tool is worth trying as if you control multiple Linux systems and already have
SSH key-based passwordless login setup.