How to Create Your Own “Home Media Streaming Server” Using Plex with FreeNAS – Part 3
Everyone have there own collections of Movies, Songs, Video Songs, Pictures etc. Many of them wonder how we can stream to all of our home devices. Here is the solution we can use Plex Media Server to stream our videos over LAN network in our home using devices such as Smart TV, iPad, Mobiles, Tablet, Laptops etc..
Plex media available for some of the smart TV’s, Xbox One too. If our home devices have the feature of Digital Living Network Alliance (DLNA) we can use Plex in it.
Home Media Streaming Using Plex with FreeNAS
In our previous articles, we’ve seen how to Install FreeNAS and how to configure Storage shares. Now in this post, we will show you how to setup a home based streaming server using Plex Media Server Plugin in FreeNAS.
Requirements
- Installing and Configuring FreeNAS 9.2.1.8 – Part 1
- Configuring and Adding ZFS Storage in FreeNAS – Part 2
My Server Setup
Step 1: Creating a Volume for Plex Installation
1. Back in part I and II we have seen how to install FreeNAS and configuring Storage. Here we can see how to install plex media server for setting up a volume.
For this setup, I have used total 3 disks in my server. My first disk holds the FreeNAS installation and other two disks are used for Storage purpose. Here I’m going to configure Plex Using RAID1 Mirror method. Data’s will be safe and performance will be good.
- Volume name I’m going to use in this article is “tecmint_vol“.
- Dataset name I have choose as “tecmedia“.
- Dataset for jails as tecmint_jails.
- Sharing name for CIFS Dataset will be tecmint_broadcast.
2. Now login into the FreeNAS Dashboard, click on Storage from the top menu, then click on ZFS Volume Manager to create a new Volume for our media server.
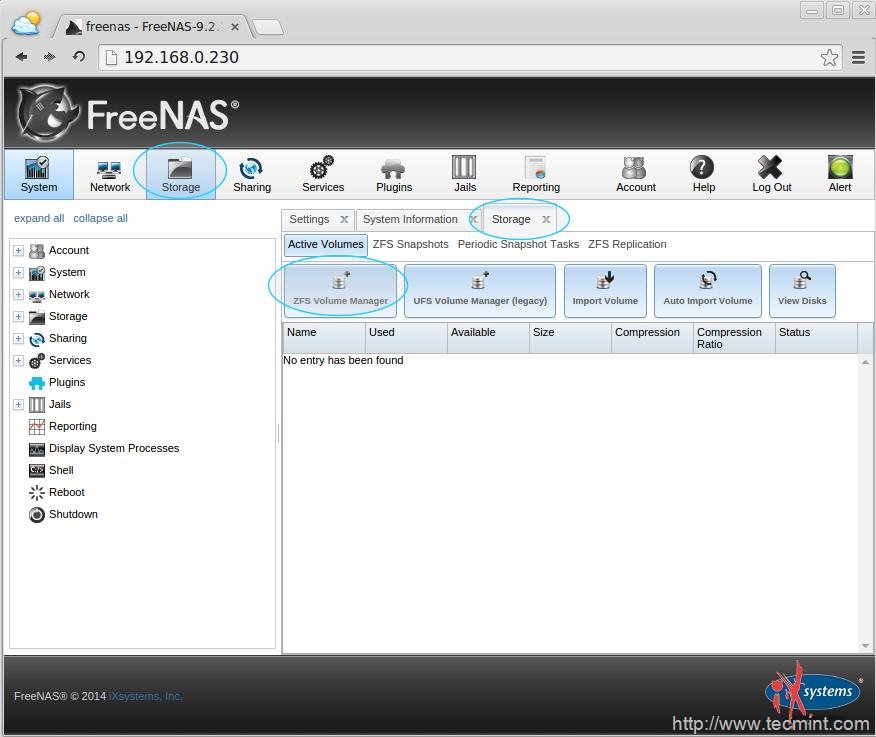
Create New Volume
3. Next, we need to define our Volume name, Here we going to use “tecmint_vol” as our volume name. Under available disks we can see + sign click it to add the available disks for our Plex storage.
While adding FreeNAS storage, it will ask you to define RAID level for our added disks, here we are using two disks for FreeNAS, so choose Mirror Option and click on Add volume to add our new volume.

Add New Volume
Step 2: Creating a Dataset for Plex Storage
4. After creating a new volume, now we need to define a dataset. Dataset it just like a folder with advance options such as compression, Quota, Share type, Reduplication, Record size and much more.
To create a Dataset in our new volume choose the volume, Now we will get the menu in bottom click on “Create ZFS dataset“. In the POPup window we have to define our dataset name as “tecmedia” don’t change any other settings than providing a name to our data-set.
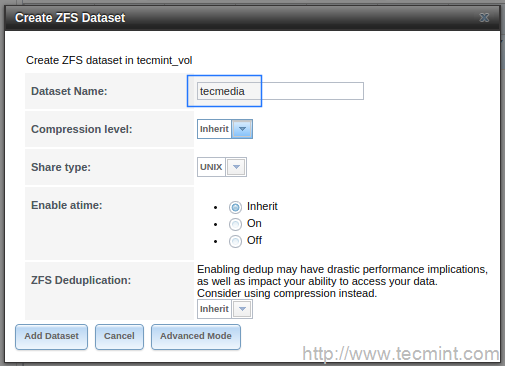
Creating Dataset for Volume
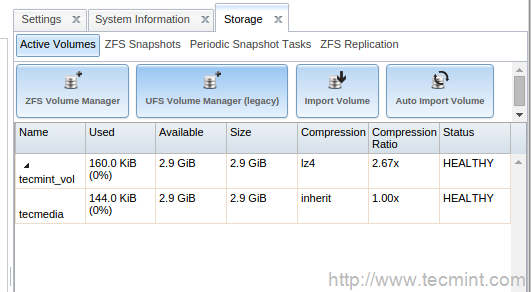
Active Volumes
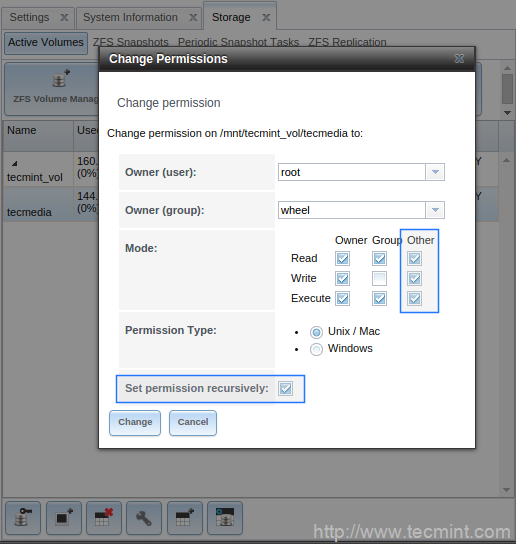
5. Now from the “Active Volumes” tab, select the tecmedia data-set to grant correct permissions. chooseChange Permission and change the permissions, Our media need to stream to every (Anonymous) user.
So, set the permissions has READ, WRITE, EXECUTE for Other. If we need to get the same privileges for every files which ever dropped into our data-set we have to choose Recursively and then click on Saveto save the changes.
Set Permissions on Volume
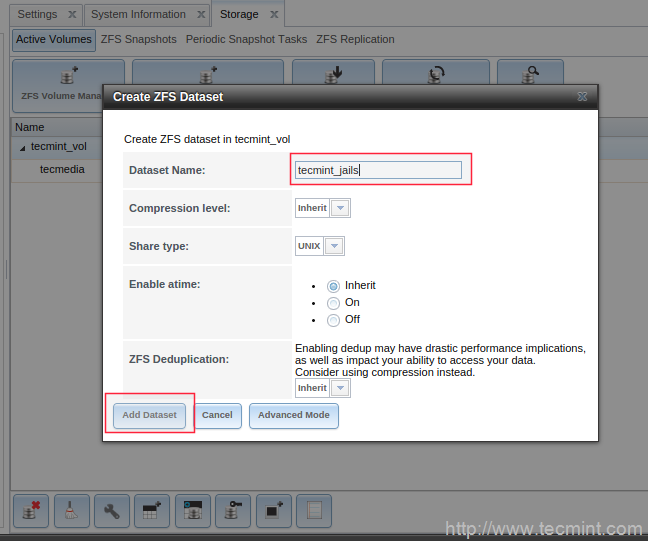
6. Next, we need to create a Dataset for Jails. Again for creating a Jails we have to choose our volume and create a Dataset. The use of this data-set is to store the plugins, So while we downloading the plugins for FreeNAS every plugins will be pulled into this data-set (Folder).
For creating a data-set, we have to choose our volume tecmint_vol and click Create ZFS data-set from bottom. Give the Dataset name as tecmint_jails and click on Add Dataset as shown in the below picture.
Create Dataset Jails for Volume
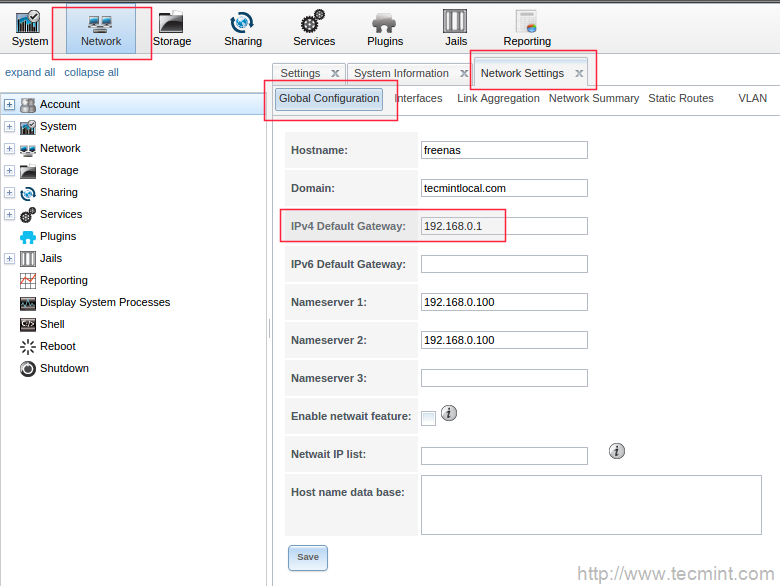
7. Before configuring Jails directory, make sure to check default network route. We need to configure the IPv4 Default Gateway under Network TOP Menu, Global Configuration. Here my default gateway is my Router IP 192.168.0.1.
Configure Network Gateway
8. Then choose Jails TAB and choose the dataset directory which we have created for Jails and save the changes.
Configure Dataset Jails
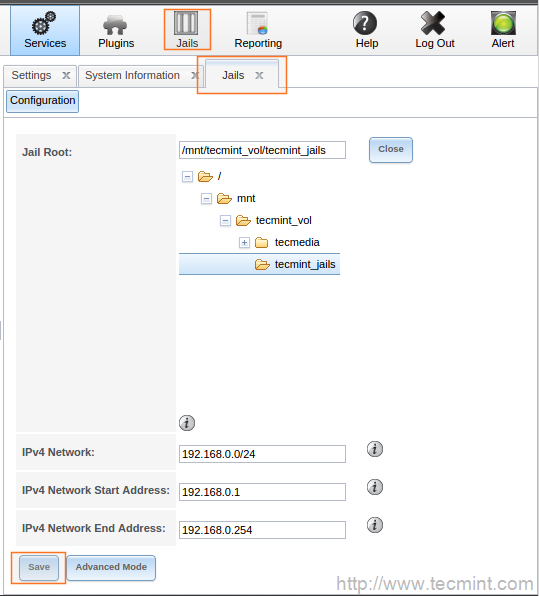
9. Next, define the Jail Root for FreeNAS to store downloaded plugins, select Jails from the top menu and then go to the Configuration under Jails Menu and add the path of dataset directory i.e. “tecmint_jails“.
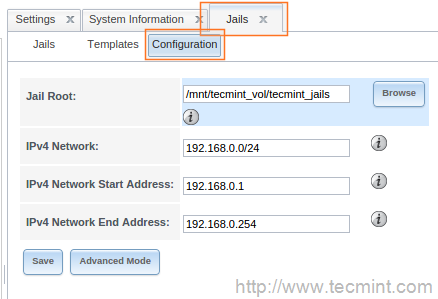
Define Jail Root Location
10. Now, it’s time to define a Share, choose Sharing from left side. Here we need to choose the common sharing method let we choose CIFS sharing it can be accessible from every operating system environments.
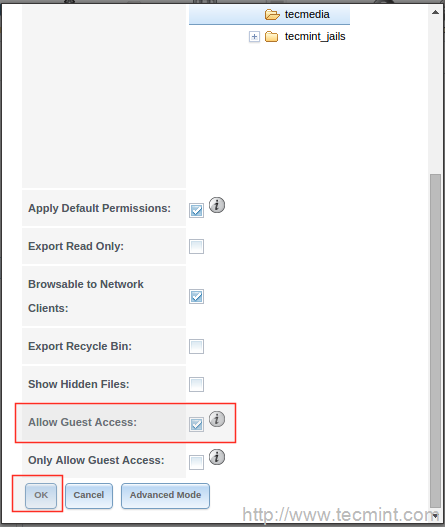
To create a CIFS (samba) sharing click on Add windows CIFS Share. In popup window give the name for share as “tecmint_broadcast” and choose the tecmedia data-set from the browse. We need to allow anonymous users to access the media files in our dataset Choose “Allow Guest Access” and click OK to save the configuration.

Add Windows Share
Allow Guest Access to Share
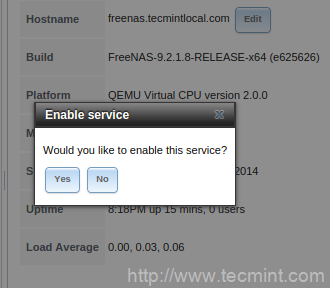
12. After saving above configuration, it will prompt you to enable service choose YES to enable the samba share.
Enable Service
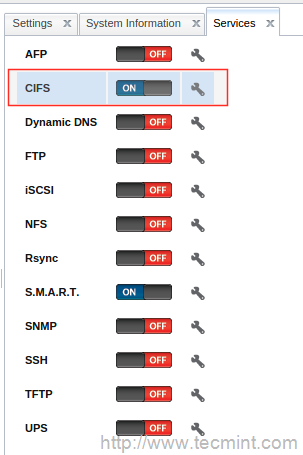
Enabled Samba Share
Step 3: Enabling Plex Media Plugins
13. To enable plugins, choose Plugins Menu from the top. By default it will list the available plugins. Choose plexmediaserver and click on install. While prompt for confirmation click on Ok to install the Plugins. The plugin installation will take some time as it downloads all plugins needed for FreeNAS.

Enable Plex Media Plugins
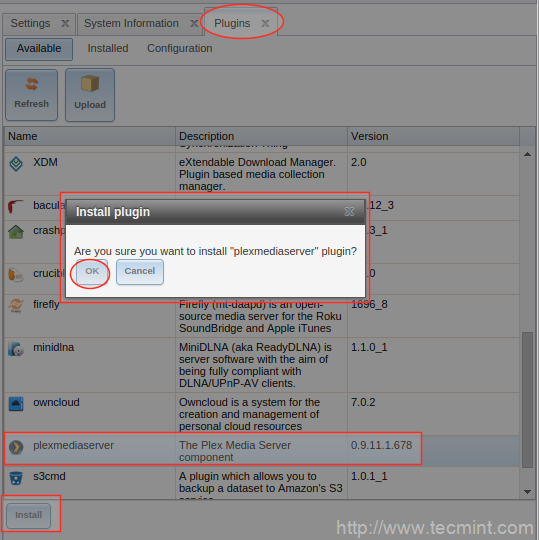
Install Plex Media Plugins
The above step will download all the packages which included in the default repository. If you wish to download only specific plugin, you can use wget. For example, here is a sample transmission plugin download using wget command from the FreeNAS Plugin Repo.
After downloading the package we can install it from the Plugins TAB by uploading the downloaded plugin. This way you can install as many as plugins or all plugins locally with the help of the following command.
Step 4: Adding Storage for Jails
14. Choose Jails Menu and select the added jails from the list, as we have added plexmediaserverchoose it and add the storage for our jails. While selecting the jails we can see the menu in the bottom.
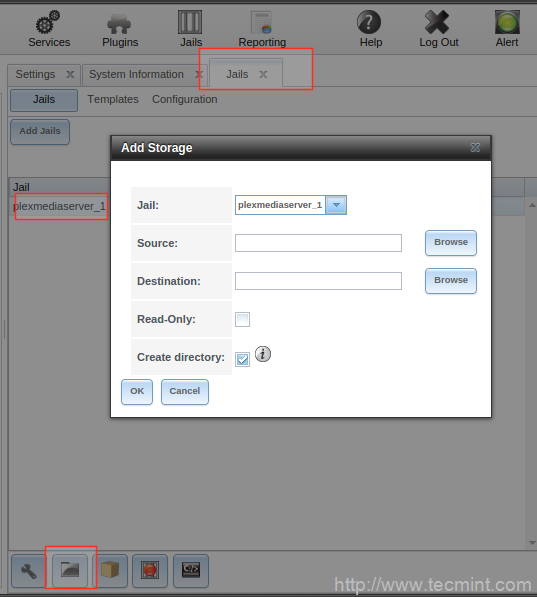
Add Storage Jails
15. Click on Add Storage and choose the source as our dataset “tecmedia” choose the destination as media by default. Click OK to add the storage.
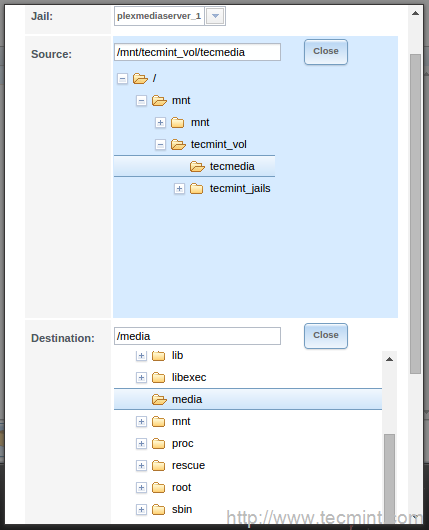
Add Storage Dataset
16. Next, we need to enable the plex media plugin, select Plugins and choose the Installed Plugins menu. Now under Service Status, we can see it’s in OFF status, Click on it to ON the plex media server.
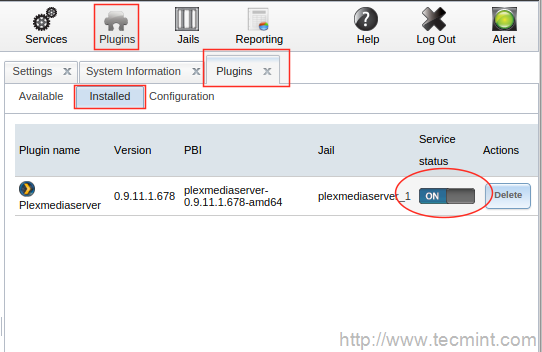
Enable Plex Media Plugin
17. Click the Plugins in left side pane and choose PlexMediaServer, then check the “Disable remote Security” and click on OK to save the changes made.
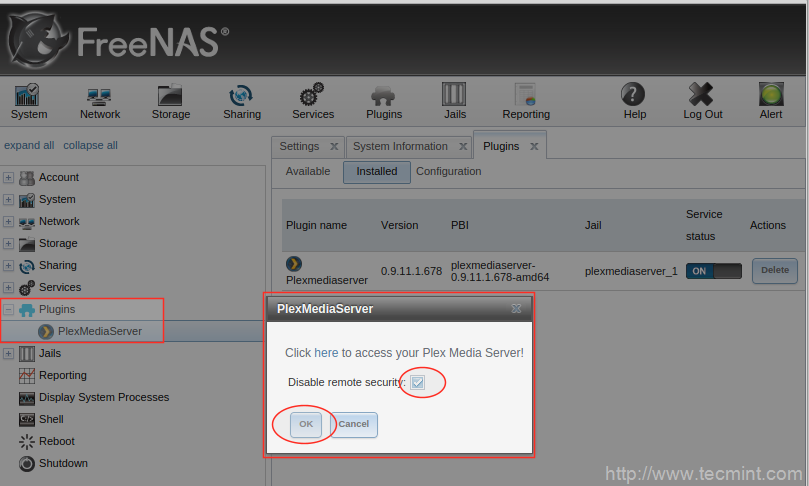
Enable Plex Media Access
Again Select the PlexmediaServer and Click on “here” It will redirect to Plex media setup screen.
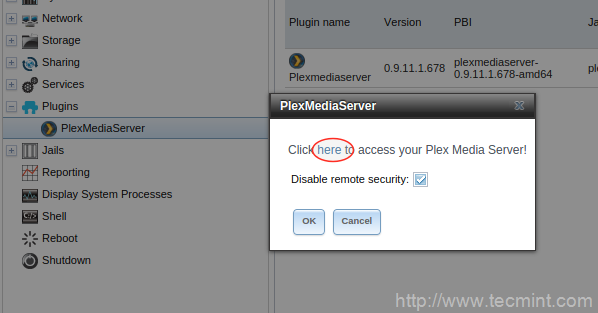
Access Plex Media Setup
Step 5: Plex Media Server UI Setup
18. From the Plex Media setup screen, you need to accept the Licence agreement.
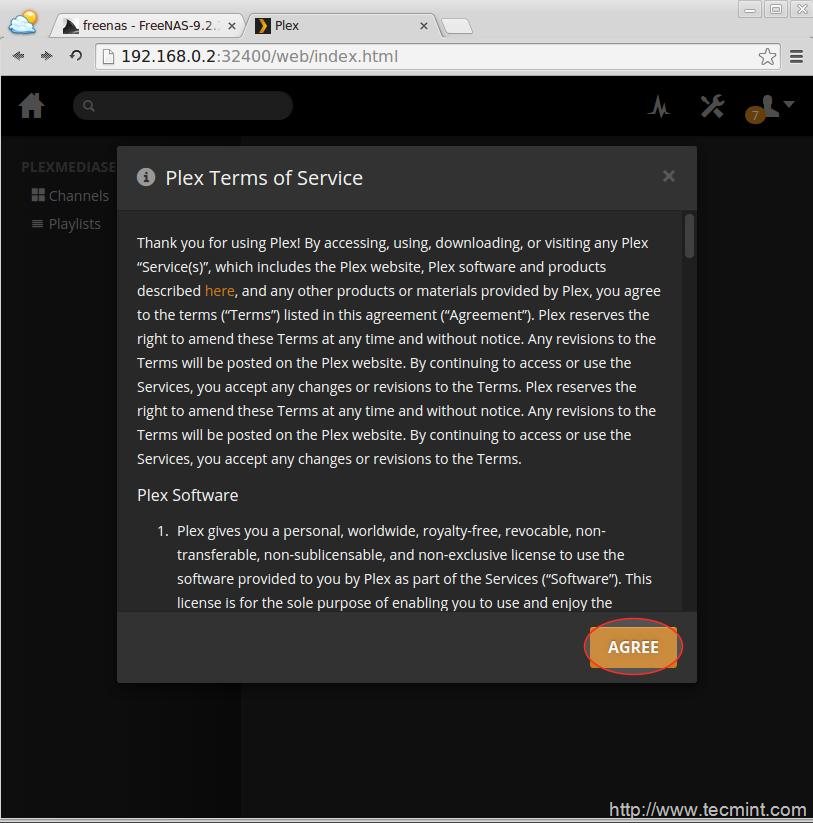
Plex Media License Agree
19. Click on + sign to add the media library.
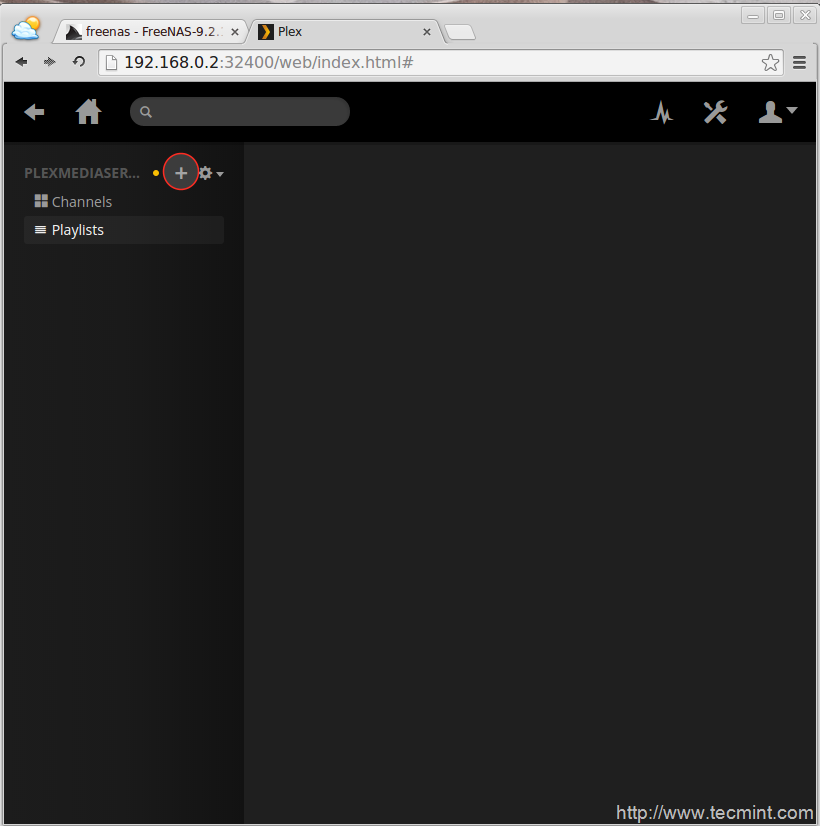
Add Media Library Plex Media
20. Here I’m choosing Movies and click next to give a name for my Library.
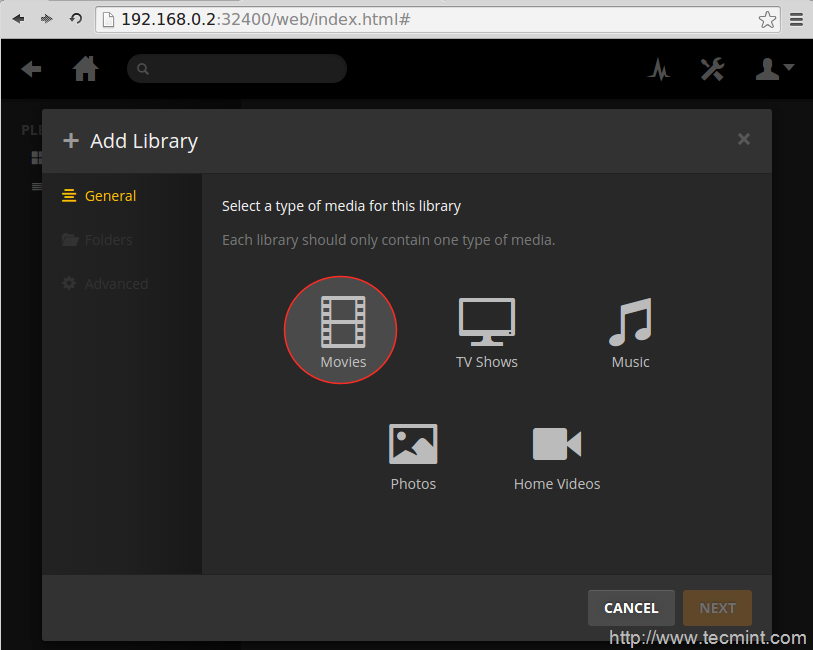
Select Movies
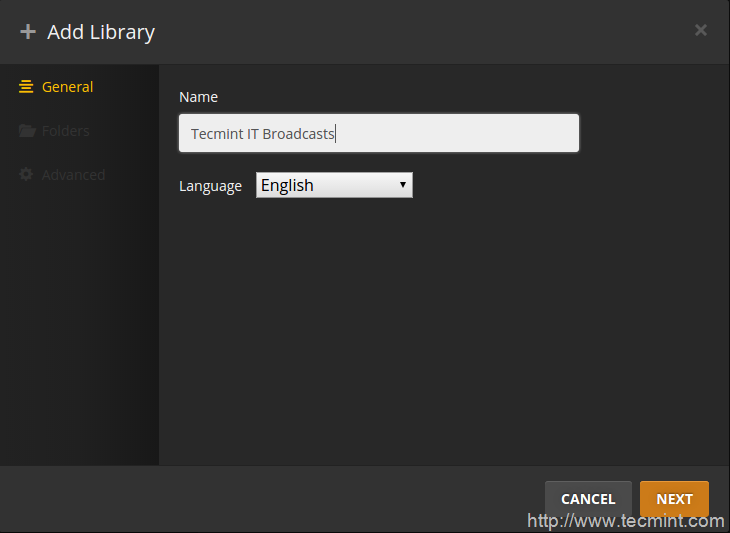
Name Media Library
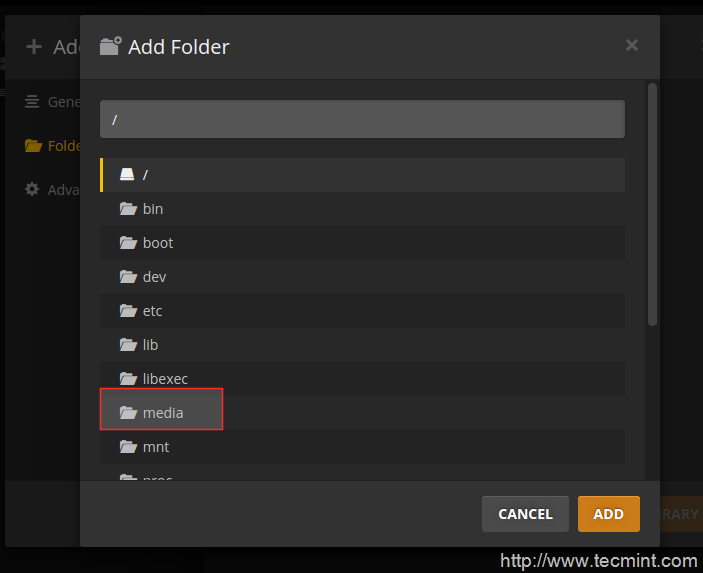
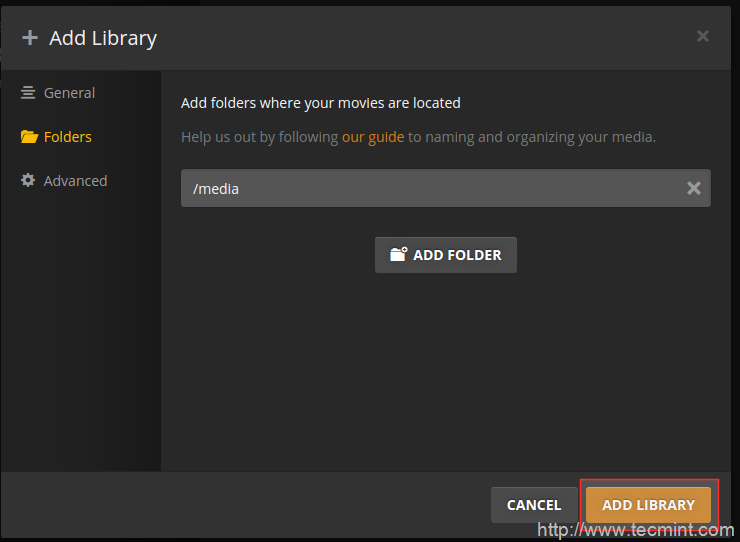
21. Click Next to continue with our choose name. Then Click on ADD Folder and choose the media as our content folder and click on Add.

Select Add Folder
Add Media Folder
22. Then Click ADD Library to add media.
Add Media Library
23. Now after Adding, we will get our Plex media Dashboard as shown in below picture.
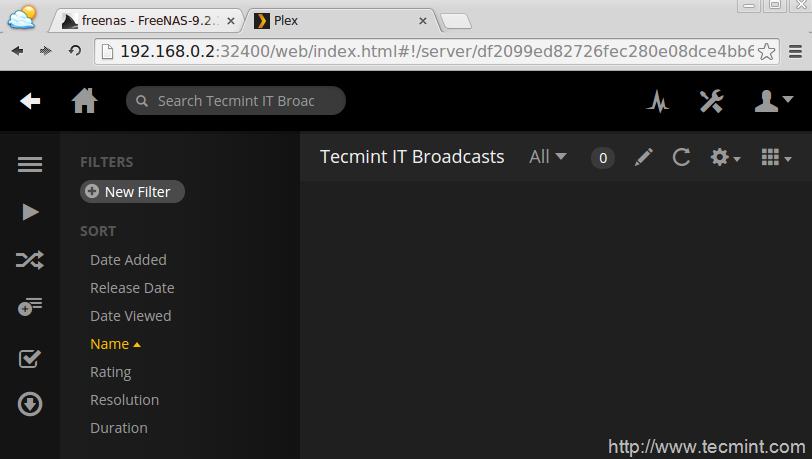
Plex Media Dashboard
24. Now there is no media files currently added, we have to add some media files now. We can Add several Channels by navigating to Home at the top left side Corner.
Step 6: Adding Media Files to Plex
25. To add media files to plex server we need to login into the Samba share in any one of the system, here I’m using my desktop machine (Linux Mint 17 Qiana) to add the files to FreeNAS CIFS share, but you can use any Linux, Mac, or Windows machines too.
But, before accessing samba share, we need to install samba packages on client machine.
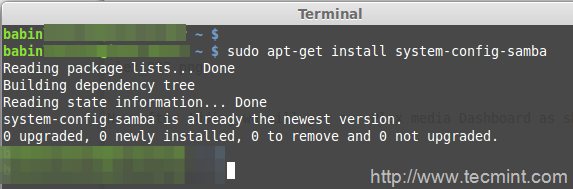
Install Samba For Plex
26. Then connect to the samba share as a anonymous user and add the files from our desktop to the Plex Share.
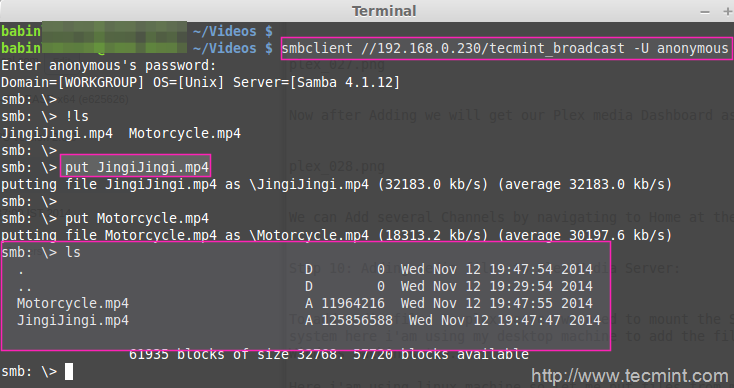
Add Files to Plex
If you’re using Windows, machine, you can simple use \\192.168.0.230\tecmint_broadcast to access the share from any windows explorer, and drag and drop the files to share.
Step 7: Play Media Files from Plex UI
27. Switch back to browser and Refresh to load the media files, If media files not loaded we can choose the settings in right top corner and click on Force Refresh to load every media files.

Load Media Files in Plex
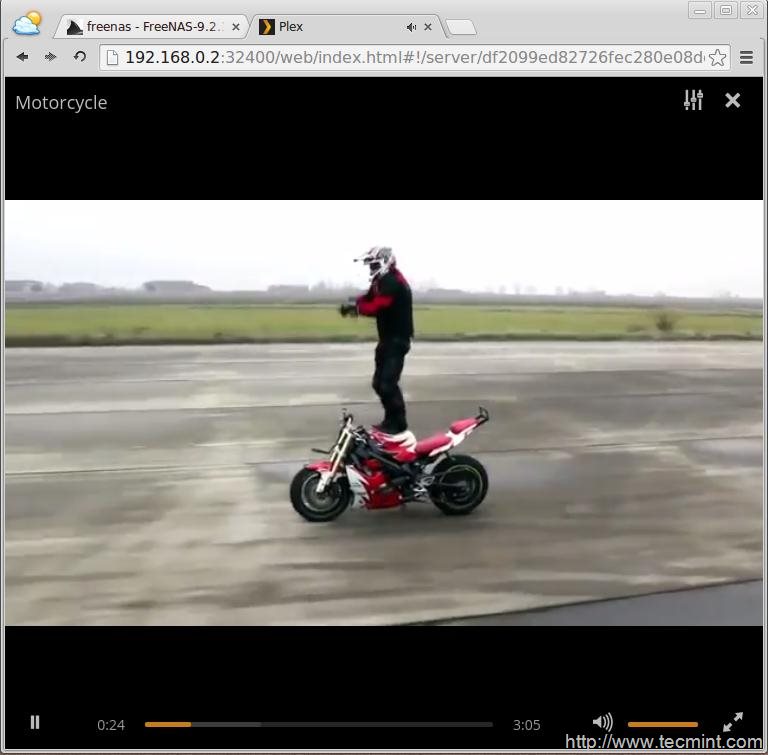
28. Choose any one of the media file and Click on Play in the Left top Corner to watch the videos.
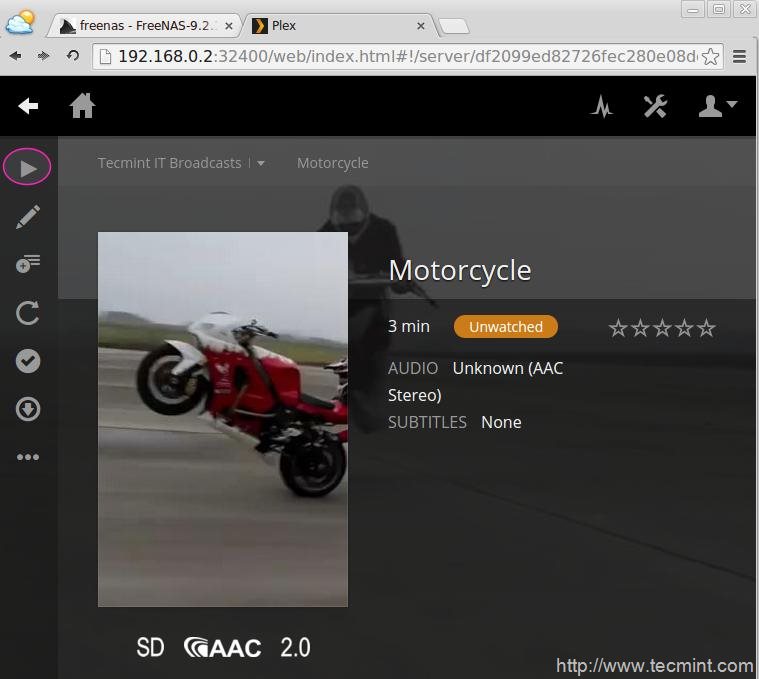
Video Play 1: Preview
Video Play 2: Preview
Here we can see some of the detailed information which we can get for the particular media.
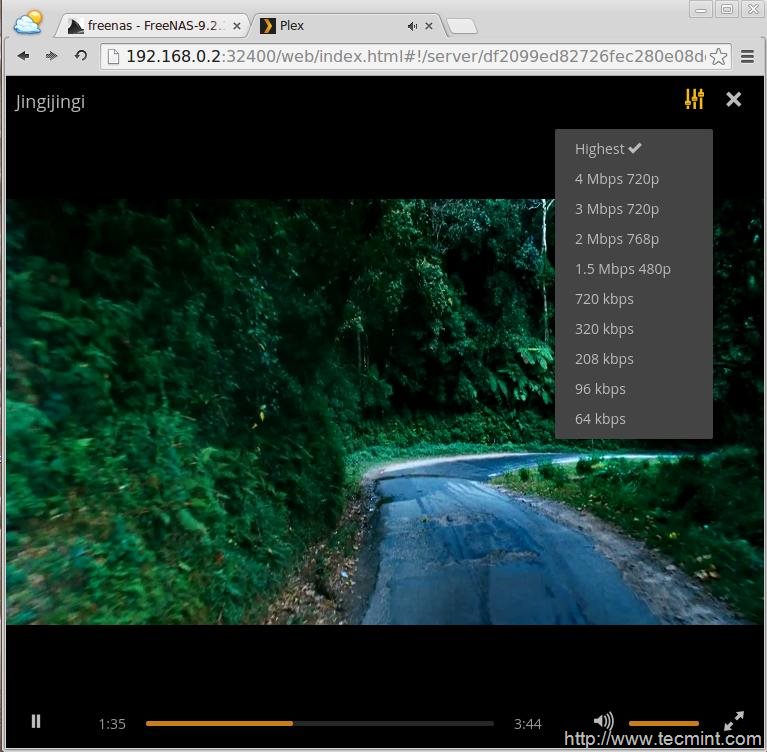
Adjust Media Bitrate

Media Information
That’s it! we have successfully deployed a home based streaming server using Plex.
Conclusion
Plex Media, mostly now days using in DLNA enabled devices. Most of them love to watch there favourites videos in the DNLA enabled devices, Hope this setup help you to Share your videos with friends and family. happy streaming.
No comments:
Post a Comment