Install RHEL/CentOS 7.0 on Multiple Servers using FTP Network Source
This tutorial will demonstrate how you can install Red Hat Enterprise Linux/CentOS 7.0, using a FTPserver (vsftpd) as Network Source. Which allows you to install the system on multiple machines from a single source point, using a minimal ISO image on the machines you perform installation and the extracted binary DVD ISO mounted on FTP server path, on the server machine that holds the source tree.
Install RHEL/CentOS 7.0 Using FTP Network
For this to work, you must already have an installation of RHEL/CentOS 7.0 on a machine attached to your network, but you can, also, use other RHEL/CentOS versions, or even other Linux distributions with a FTP, HTTP or NFS server installed and functional, that you will mount RHEL/CentOS 7 binary DVD ISO image, but this guide will concentrate on RHEL/CentOS 7 Vsftpd server only.
Requirements
On Server Side
CentOS or RHEL 7 minimal installation with Vsftpd server and the binary DVD ISO image located on DVD/USB drive.
On Clients Side
Download CentOS or RHEL 7 minimal ISO image, that can be obtained from following links.
- Download CentOS 7.0 ISO Image
- Download RHEL 7.0 ISO Image – [You must have active RedHat subscription]
Step 1: Prepare Network Sources on – Server Side
1. The first step will be to install Vsftp server on your CentOS/RHEL server by issuing the following command.
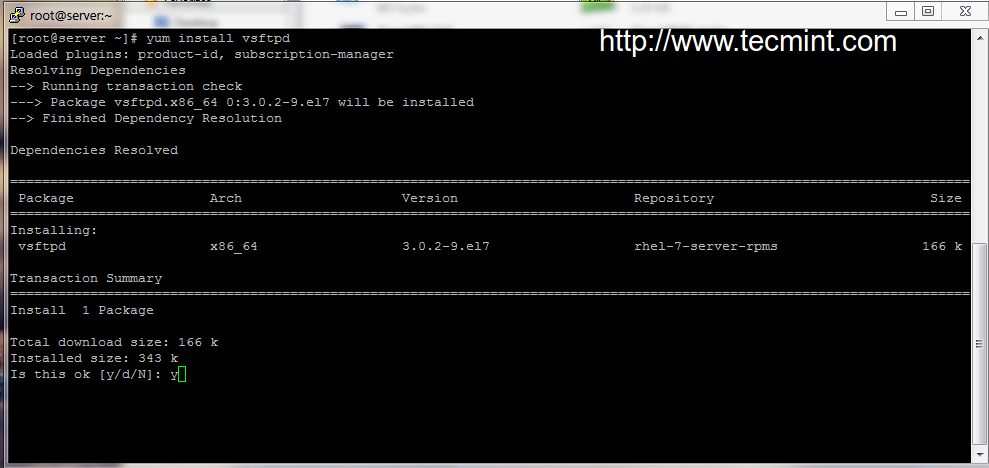
Install vsftpd in CentOS
2. After Vsftpd binary package is installed on your system start the service and get your system externalIP Address, that you will later need to access your Network Sources from a remote location.
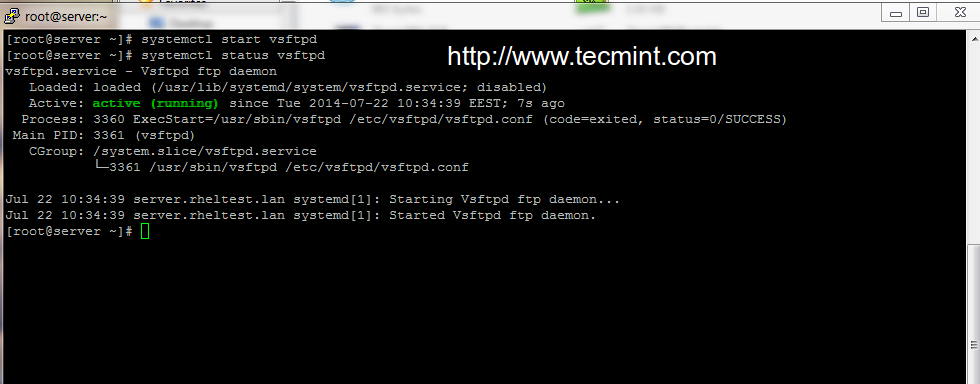
Start vsftpd Service

Check IP Address
3. To make the Vsftp server available to outside connections add a firewall rule on your system to open port 21 using the above command and restart Firewall to apply the new rule if you added with a permanent statement.
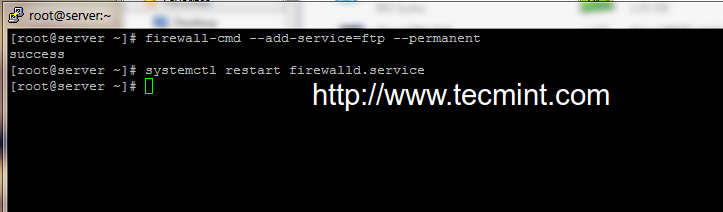
Open FTP Port on Firewall
4. Assuming that you already have downloaded RHEL/CentOS 7 binary DVD ISO image, put it on your machine DVD-ROM/USB drive and mount it as loop with read-only attributes to Vsftp server path – for vsftpd usually the location is /var/ftp/pub/, using the following command.
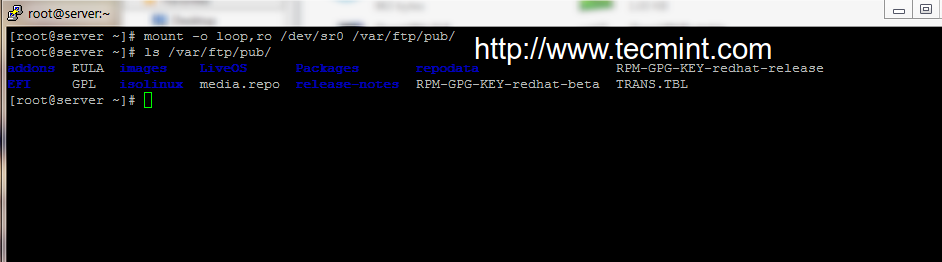
Mount DVD Image
5. To see the result so far, open a browser from a remote location and navigate to the addressftp://system_IP/pub/ using FTP protocol.
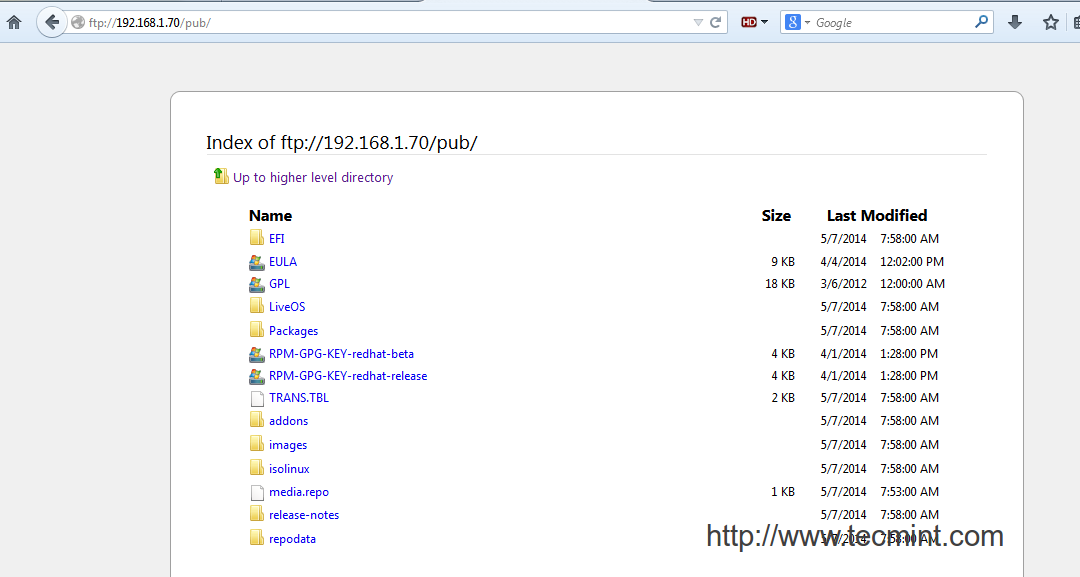
Check FTP in Browser
As you can see from the screenshot above an installation tree directory should appear with the extracted contents of the binary DVD ISO image. Now the FTP Network Sources are prepared to be used for remote installations.
Step 2: Add Network Installation Sources to – Remote Clients
6. Now it’s time to install RHEL/CentOS 7 on other machines using as a FTP Source Installation the above configured server. On the system that you will perform the installation of RHEL/CentOS 7 put the minimal bootable binary ISO image on DVD-ROM/USB drive, for creating bootable USE drive, useUnetbootin Bootable tool.
We use the same procedure as described in our earlier articles for CentOS/RHEL 7 installation process, but slightly change the in the Installation Summary order.
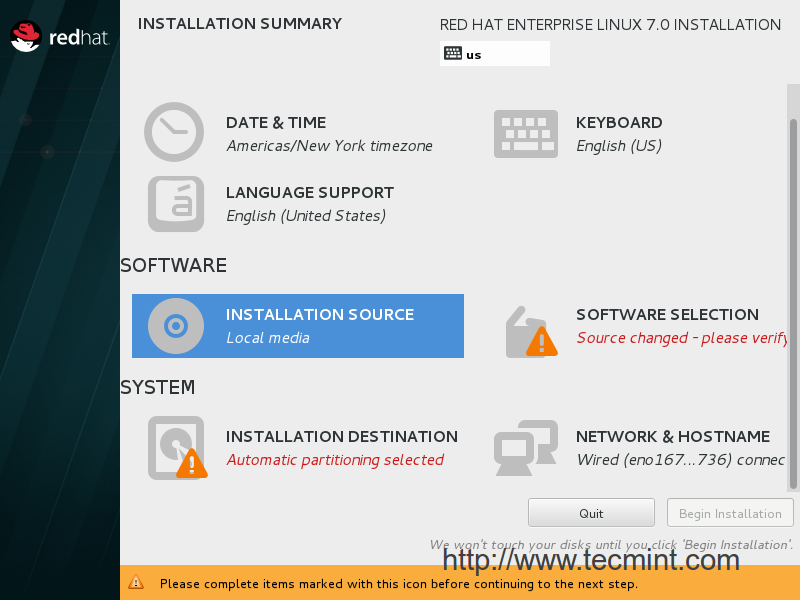
After you have configured your Date and Time, Keyboard and Language, move Network and Hostnameand switch your system Ethernet card to ON to automatically obtain network configurations and gain network connectivity if you have a DHCP server on your network or configure it with a static IP Address.
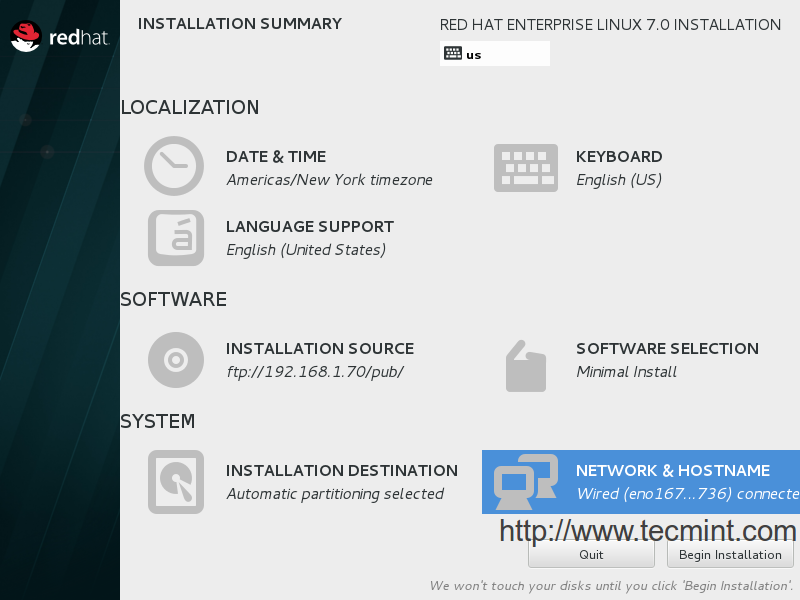
Installation Summary
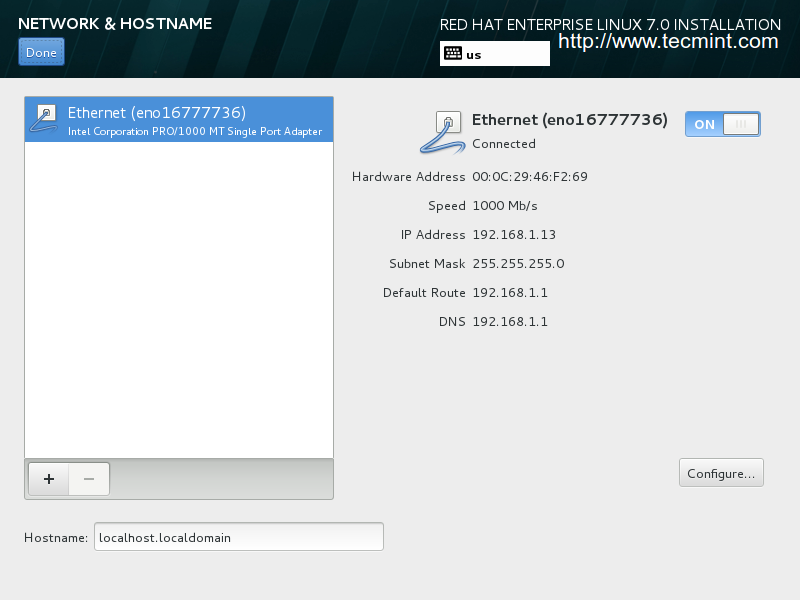
Enable Network Card
7. After the Network Card is active and operational it’s time to add the Network Installation Sources. Go to Software -> Installation Source from Installation Summary menu. Choose Network Installation Sources using FTP protocol and add you sources configured earlier with the FTP server IP Address and path, like in the image below.
Installation Sources
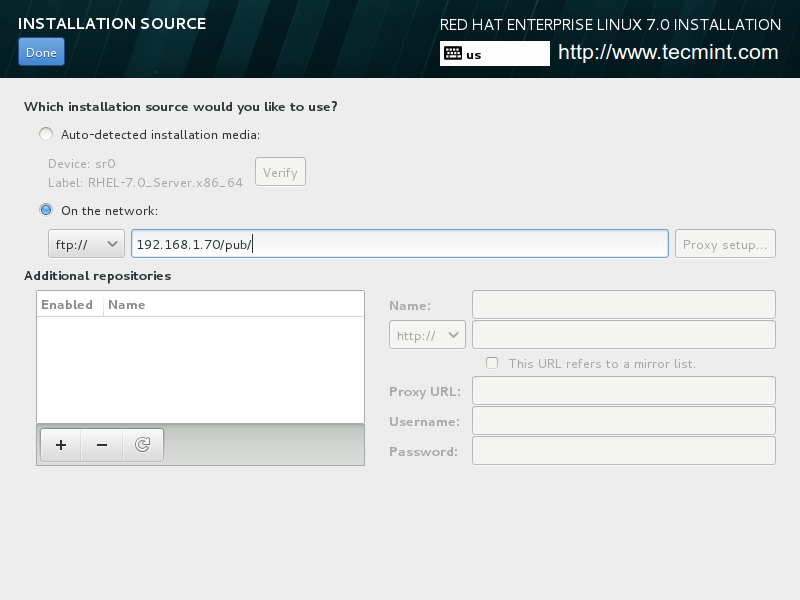
Enter FTP Installation Sources
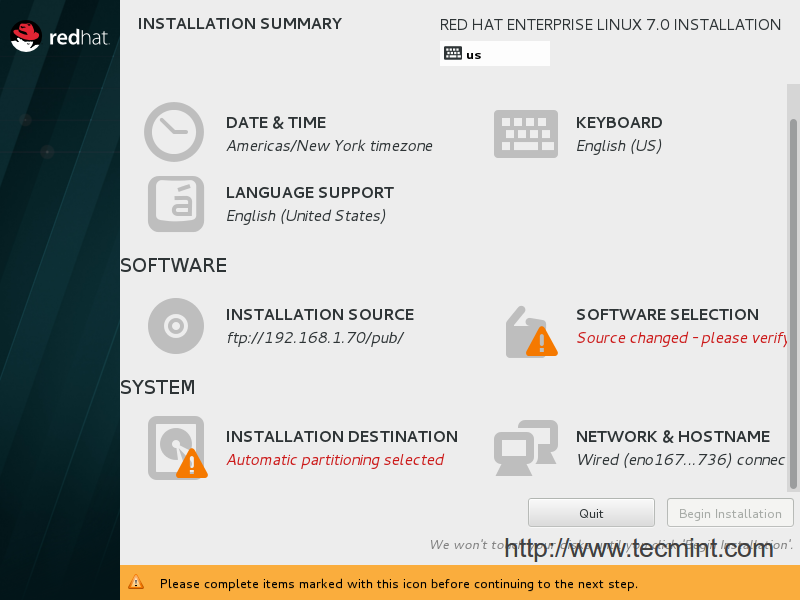
8. After you added the Network Installation Sources, hit on above Done button to apply changes and wait for the installer to detect and automatically configure your Network Sources. After everything is configured you can move forward with the installation procedure in the same manner as if you are using a local binary DVD ISO image.
Start Installation Process
9. Another approach to add Network Sources is to set them up from command line on Boot menu by pressing TAB key on Boot menu to add extra options on your installation process, and append the following line.
- ip=dhcp -> automatically starts your NIC and configures using DHCP method.
- inst.rep=ftp://192.168.1.70/pub/ -> your FTP server IP Address and path that holds the DVD mounted Installation Sources.

Add Network Sources boot Menu
10. After finishing editing the Boot command line, press Enter key to start installation process and the FTP Network Installation Sources should automatically be configured and appear on Installation Summary.
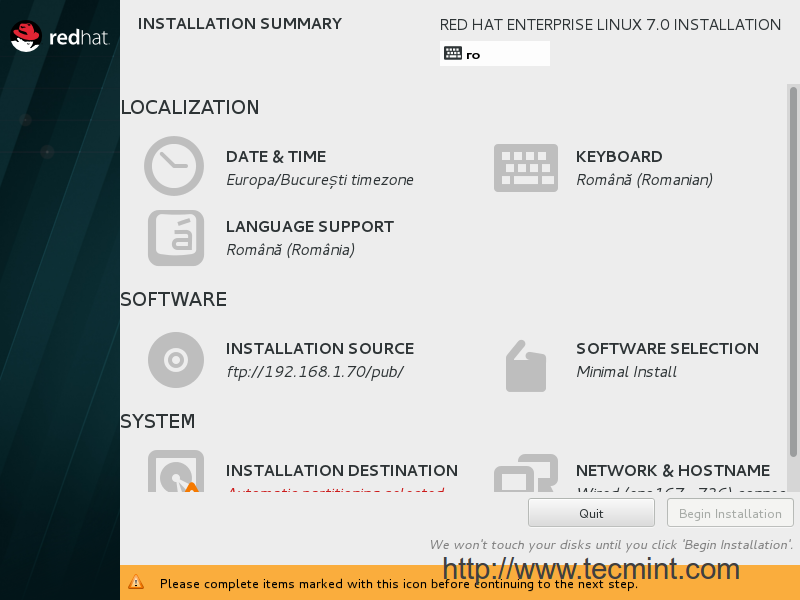
Begin Installation Process
Although this tutorial only presents using as Network Location for Sources Installation only the FTP protocol, in the same manner you can use other protocols, such as HTTPS and HTTP, the only change is for NFS protocol witch uses the copy of the binary DVD ISO image on the exported path configured in/etc/exports file, without the need to mount the DVD ISO image on your system.
No comments:
Post a Comment