How to Install and Configure pfSense 2.1.5 (Firewall/Router) for Your Home/Office Network
pfSense is an open source network firewall/router software distribution which is based on the FreeBSD operating system. pfSense software is used to make dedicated firewall/router for a network and it is considered for its reliability and offers many features which mostly found in commercial firewalls. Pfsense can be included with many third party free software packages for additional functionality.
pfSense Installation for Network
As we are using many popular firewall’s in industry level such as Cisco ASA, Juniper, Check Point, Cisco PIX, Sonicwall, Netgear, Watchguard etc.. We can use the pfsense in free of cost with rich web interface to configure all our network components. pfsense supports traffic shapper, virtual ip, Load balancer and much more. It has several Diagnostics tool by default.
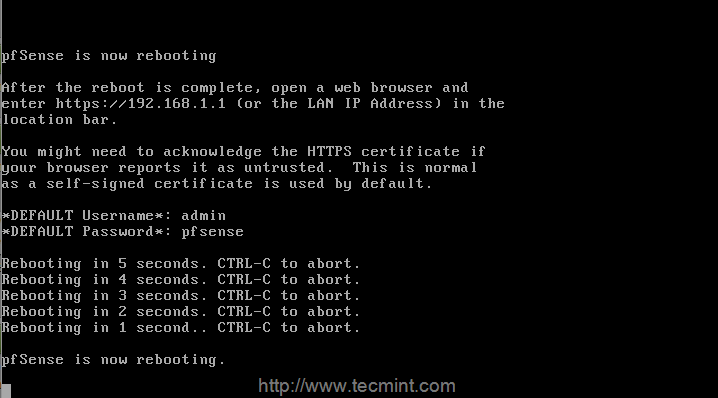
This article will guide you through the basic instructions on how to install and configure pfSense version 2.1.5 in a home/office network and offers few basic recommendations which is based on my experience.
Hardware Requirements
- Pentium II Processor, 256MB RAM, 1GB of HDD Space, CD-ROM.
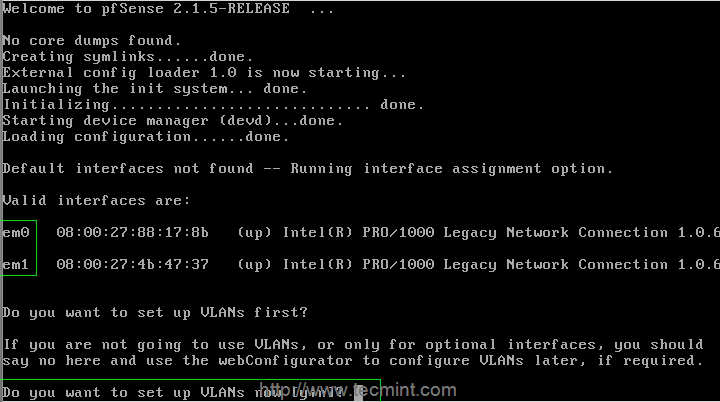
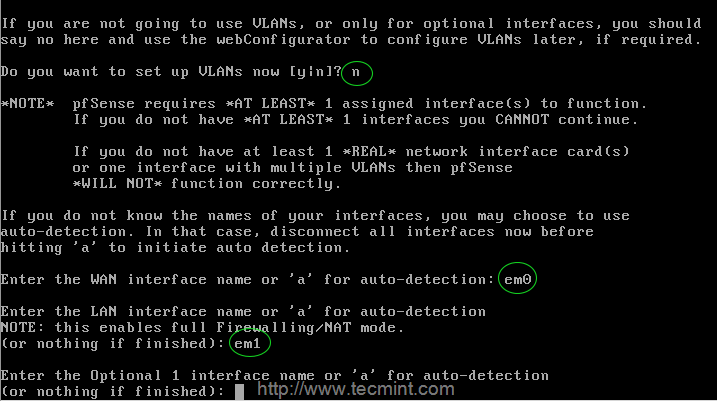
- 2 Ethernet Card’s, Pfsense ISO file.
My Environment Setup
pfSense Installation and Configuration
1. First visit the pfSense download page and select your computer architecture and platform. Here I’ve chosen “i368 (32-bit)” as my computer architecture and platform as “LiveCD with installer“, but in your case it would be different, make sure to select and download correct architecture for your system.
2. After selecting the architecture and platform, you will get a list of mirrors to download, make sure to select nearest mirror link to download the image from there.
3. After download completes, the downloaded image must be burn to an CD/DVD media as an ISO image before we start using it. You can use any CD/DVD burning software to burn the image to CD/DVD media.
If incase, you don’t have an CD/DVD drive, you can use Unetbootin tool to create a Live bootable USB media or if you don’t want to follow all these procedures, just go the pfSense download page, there you will get pre-created bootable pfSense images for you USB media, just go there and grab the “Live CD with installer (on USB Memstick)“. Don’t forget to select USB console type before downloading…
4. Now switch on or reboot the target machine, place pfSense CD/DVD or USB stick and set the BIOS options to your booting method (CD/DVD or USB) according to your choice and choose the boot options by pressing a keyboard function keys, usually F10 or F12, pfSense will start booting….
5. As the pfSense starts booting, a prompt is displayed with some options and a countdown timer. At this prompt, press 1 to get install pfsense by default. If we don’t choose any option it will start to boot option 1 by default.
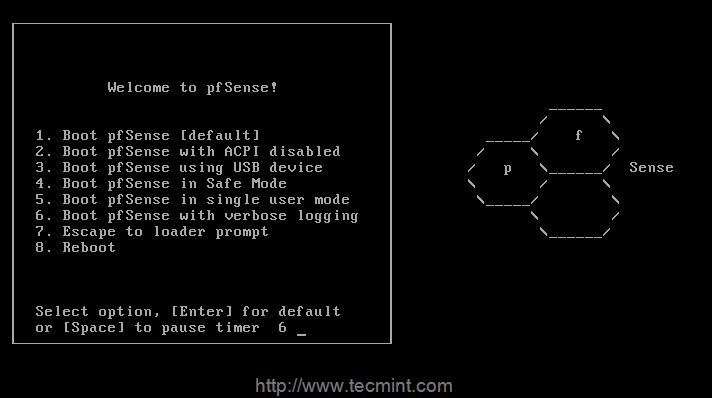
Boot pfSense
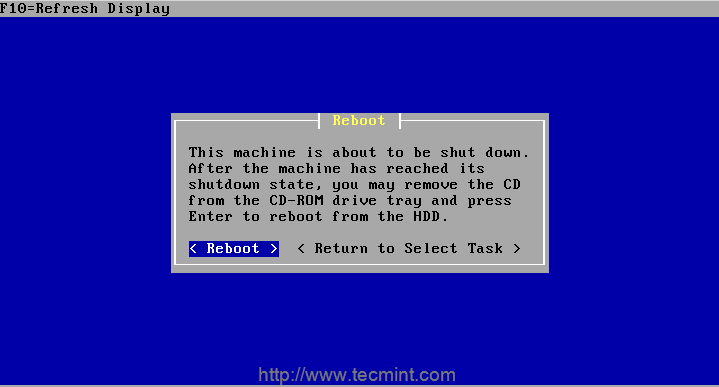
6. Next, press ‘I‘ to install fresh copy of pfsense, If we need to start a recovery use R, to Continue using Live CD choose C within 20 seconds count.
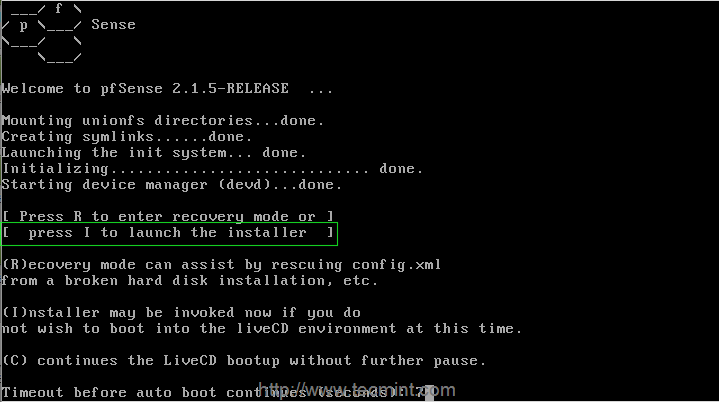
Install pfSense
7. On the next screen, it will ask you to ‘Configure Console‘, just press ‘Accept these settings‘ to move forward for installation process.

Configure Console
8. If you’re new to pfsense, choose ‘Quick/Easy Install‘ option to take make things easier or choose ‘Custom Install‘ to get advance options during installation process (recommended for advance users).
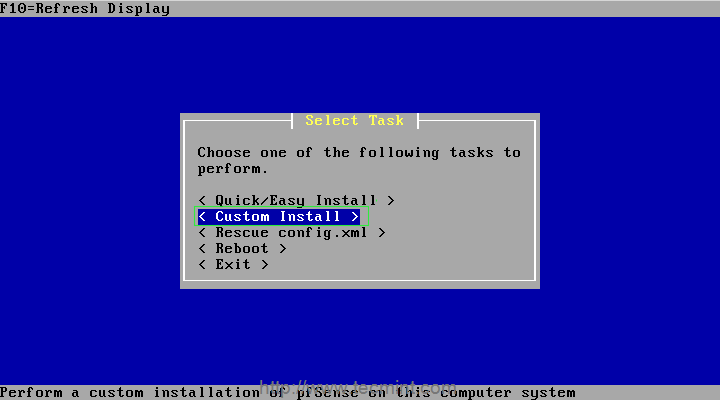
pfSense Custom Install
9. Next, select the disk on which you want to install pfsense.
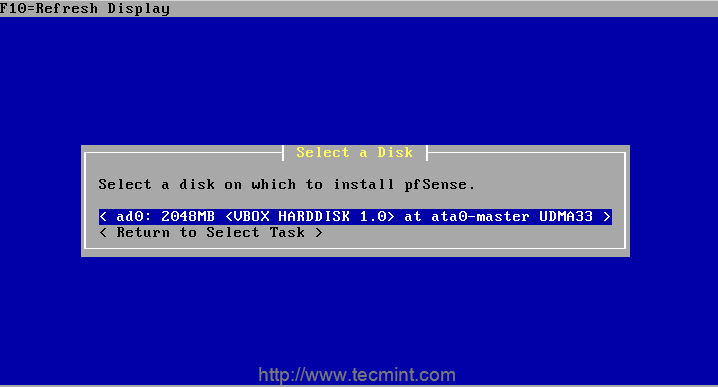
Select pfSense Install Disk
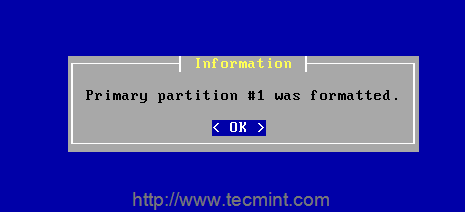
10. Next, it will ask you to format the selected disk, if it’s new disk you should format or if it contains any important data you should take backup before formatting the disk.
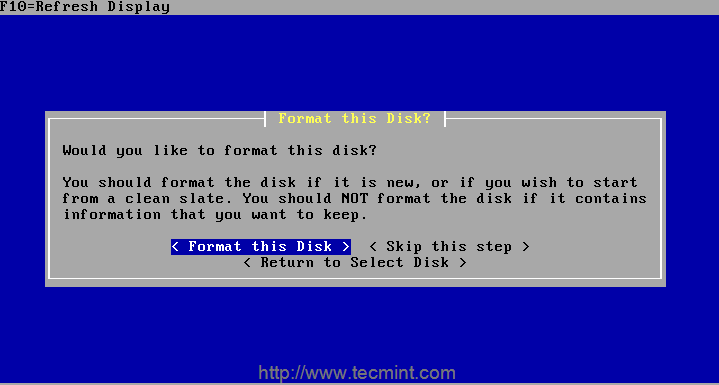
Format Disk
11. Choose the cylinder size and heads, here I’m using the default settings option ‘Use this Geometry‘ to move forward for the installation.
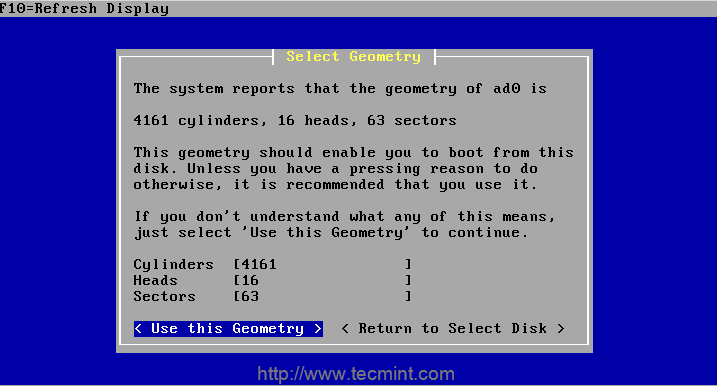
Select Geometry
12. On the next step, it will prompt you a warning about disk format, if you sure about that the disk has no data, just move forward with the selection.
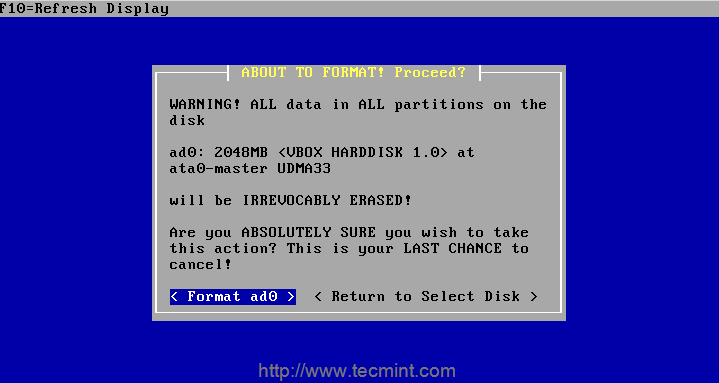
Format Data on Disk
13. Now it’s time to partition the disk.
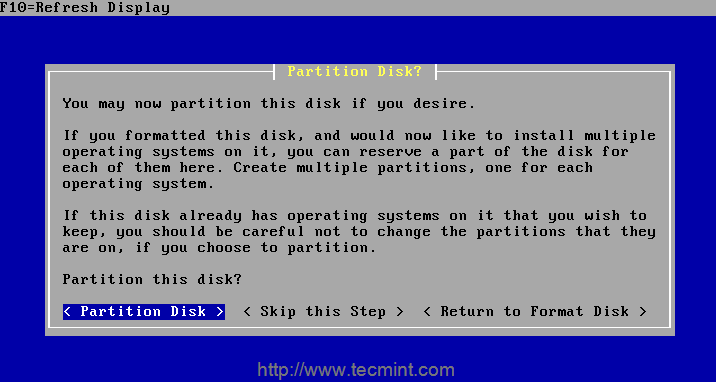
Disk Partitioning
14. Next, select the partitions you want to have on the disk and enter a raw size in sectors, then accept and create the partition using the specified size or you may move forward with default options.
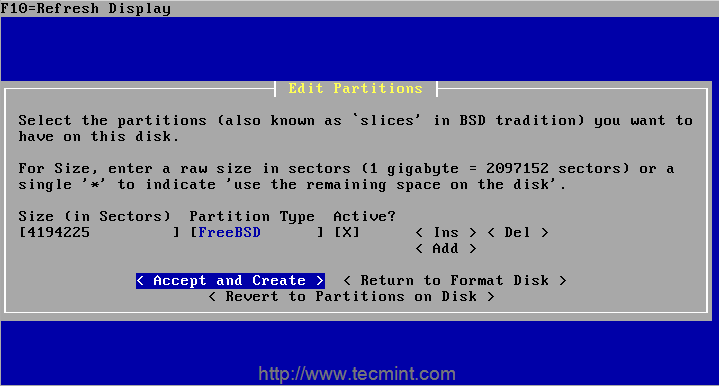
Select Partition Size
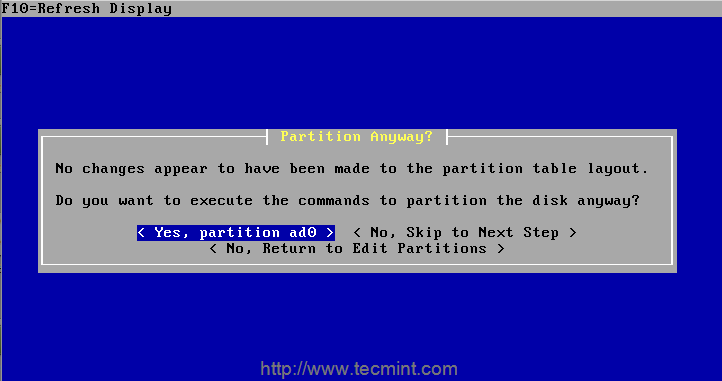
Confirm Partition
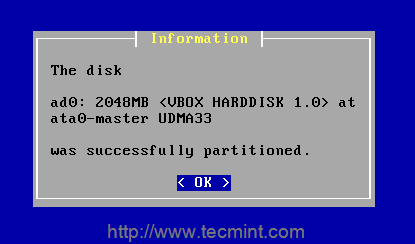
Partition Created
15. Once partition created successfully, it’s time to install bootblocks to get install the boot loader for pfsense.
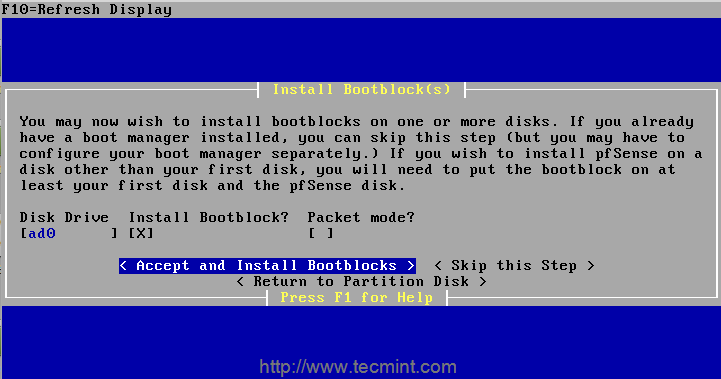
Install Bootblocks
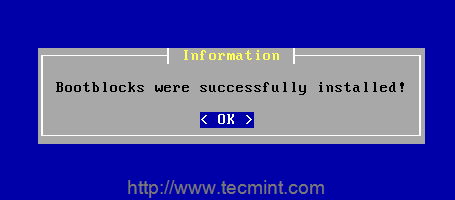
Bootblock Installation Completed
16. Select a partition to install the pfsense, which also called as slice in BSD.
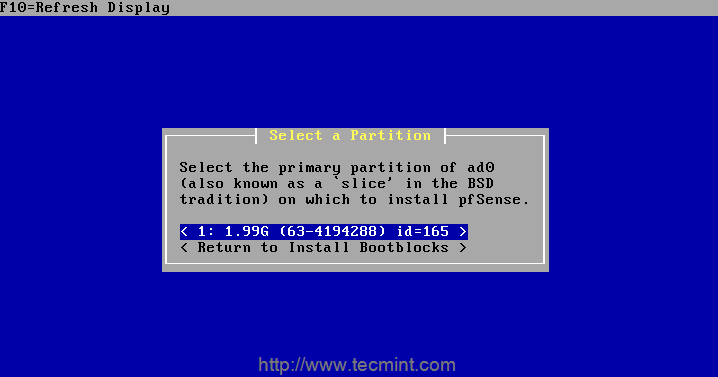
Select a Partition
Note: A warning alert will be displayed, telling that during installing pfsense partition will be overwritten. Click on ‘Ok’ button to continue..
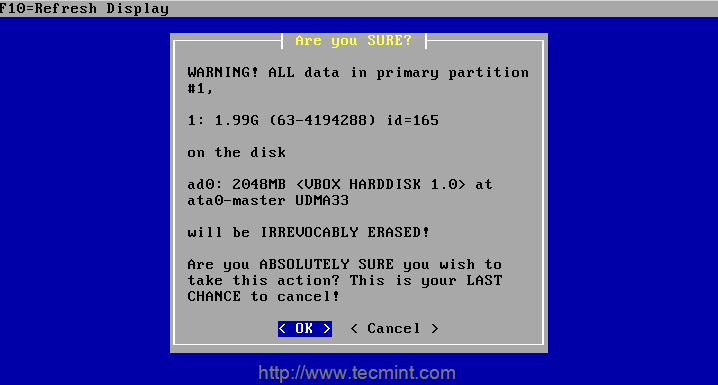
Data Loss Warning Alert
Format Confirmation
17. Next, setup the subpartitions (also well known as ‘partitions’ in BSD tradition) to create the subpartition.
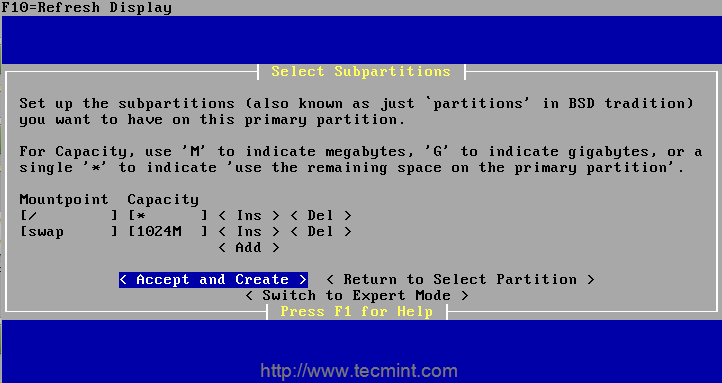
Setup Subpartitions


No comments:
Post a Comment