How to Setup Failover and Load Balancing in PFSense
Failover is a type of backup operational mode in which the operations of a system components such as network are assumed by secondary system, only when the Primary system becomes unavailable due to system failure or any scheduled down times.

Setup Failover Load Balancer in PFSense
In this setup, we will see how to setup Failover and Load balancing to enable PFSense to load balance traffic from your LAN network to multiple WAN’s (here we’ve used two WAN connections, WAN1 andWAN2).
For example, If in-case, one of your WAN connection went offline due to some network connectivity issues, in this case your second WAN will be automatically shifted from WAN1 to WAN2 by pinging one of your system IP, if there isn’t any reply from system, it will automatically shift from WAN1 to WAN2 or vice-versa.
Load Balancer will combine our both WAN connections to become one powerful internet connectivity. For example, if you’ve 2MB connection for WAN1 and 2MB for WAN2, it will combine both into one with 4MB to stabilize the network connection speed.
To setup Failover Load Balancer, we need at least three Ethernet cards with minimum 100MB/1GB as follows. The first NIC is used for LAN with static IP and other two with DHCP.
My Environment Setup
Before proceeding further, you must have a working PFSense installation, to know more on how to install pfsense, go through the following article.
Step 1: Configuring Network Interface
1. After installing PFSense, you will presented with the following screen with available interfaces to configure the network.
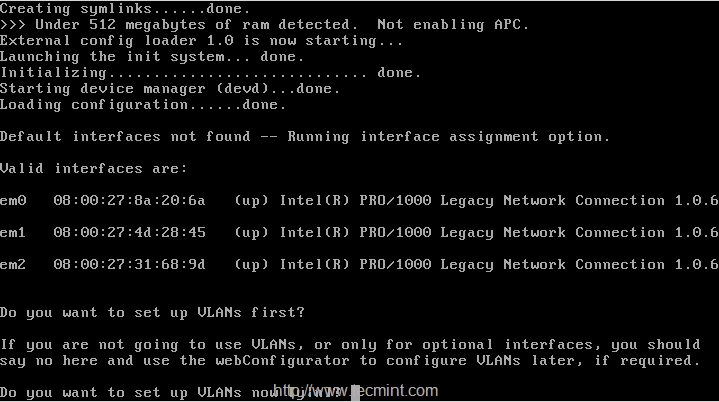
Configure Pfsense Interfaces
2. Choose 1st interface em0 as WAN1, IP will be assigned from DHCP, second interface will be em2 for LAN and add one more interface em01 (optional), this will be later changed to WAN2 with DHCP IP address. Here is the final interfaces assigned as follows.
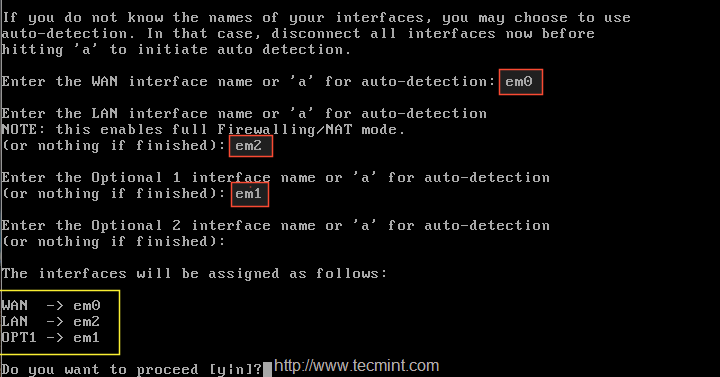
Configure Network Interfaces
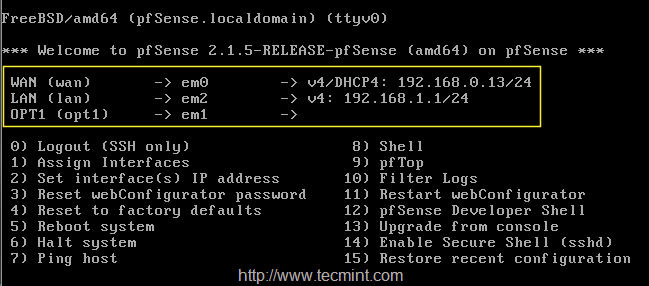
Configured Networks
3. After configuring network interfaces, login into Pfsense dashboard at the following location and configure LoadBalancer.
4. After login into GUI, there you can see only WAN, LAN under the interface widgets as shown below.
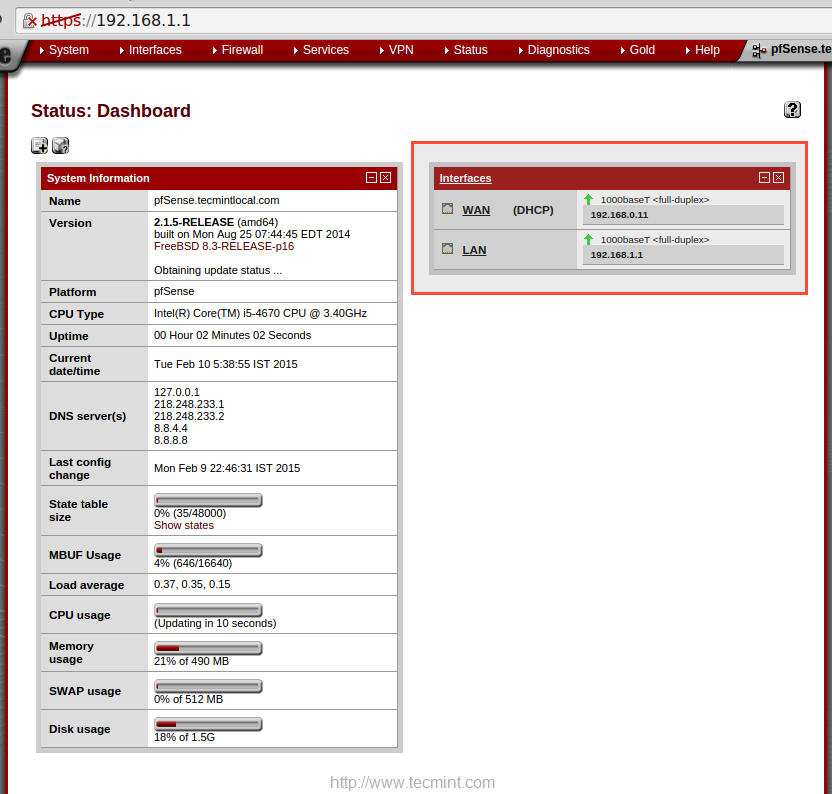
Configured Interfaces
5. To configure Interface choose “Interface” from the TOP menu and click on WAN to add the description to WAN1, then click on Save to make changes.
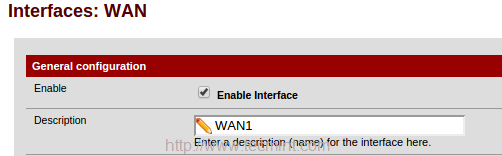
Configure WAN1 Interface
Again click on Interface and choose OPT1 and enable the interface to change description from OPT1 toWAN2.
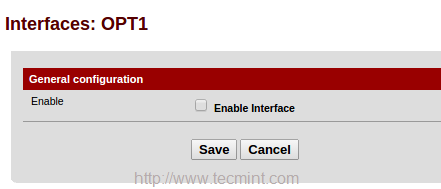
Enable OPT1 Interface
Next, choose DHCP for IPv4 configuration type, or else choose IPv6 and configuration type as DHCP 6.
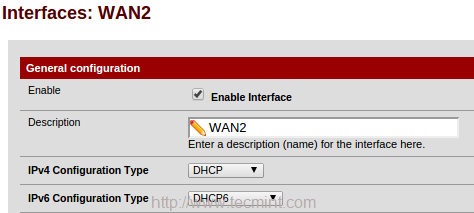
Configure WAN2 Interface
6. From the bottom of WAN2 page under Private networks, untick Block Private networks to unblock traffic from local networks, and block bogon networks. Save the changes by clicking on Save.
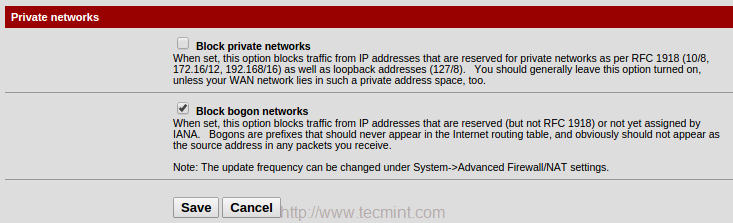
Configure Private Networks WAN2
After making above changes, it will ask you to apply changes in the top of page, Click to confirm the changes.
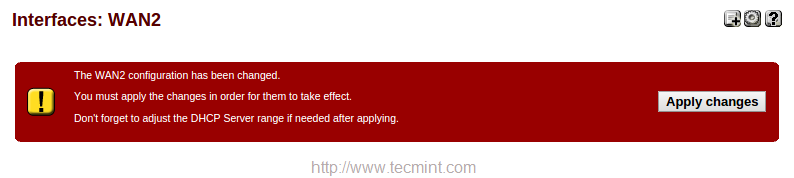
Confirm WAN2 Changes
Now you will get three interfaces in ‘Interface‘ widget in the Dashboard.
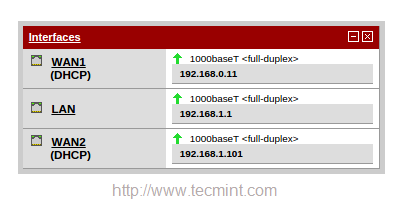
Confirm Interfaces
So, here we’ve configured 2 WAN for our pfsense. Now let us see how to configure our LoadBalancer for these configured WAN’s.
Step 2: Configuring Monitor IP
7. Before configuring Load Balance for pfsense, we need to configure a monitor IP for Load Balancer. Navigate to ‘System‘ menu in top and choose “Routing“.
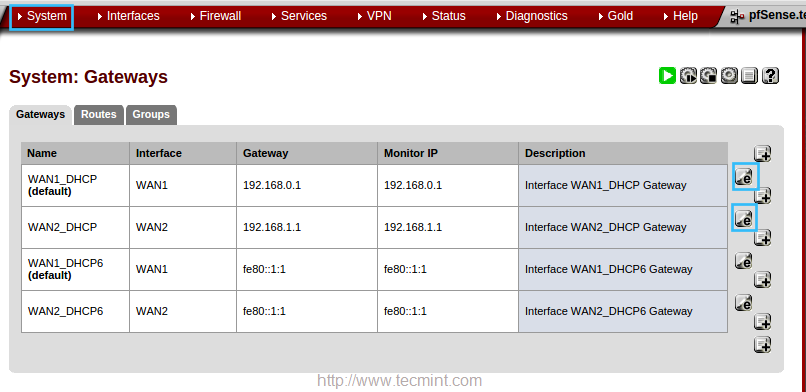
System Gateways
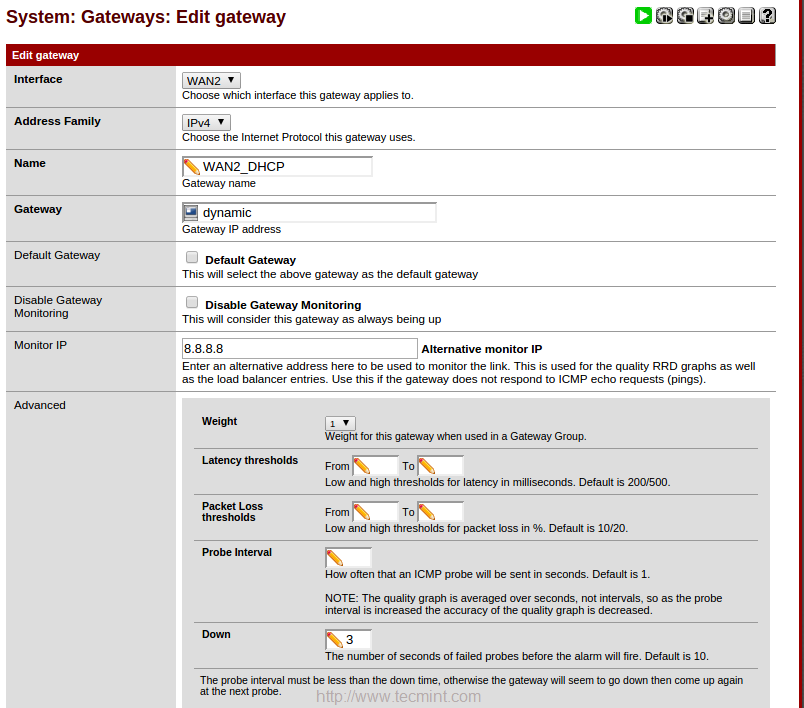
8. In the ‘Edit gateway‘ page, enter the IP address of monitor IP for both WAN1 and WAN2. In WAN1 I’m going to use my ISP DNS server IP 218.248.233.1. In WAN2 going to use Google public DNS 8.8.8.8.
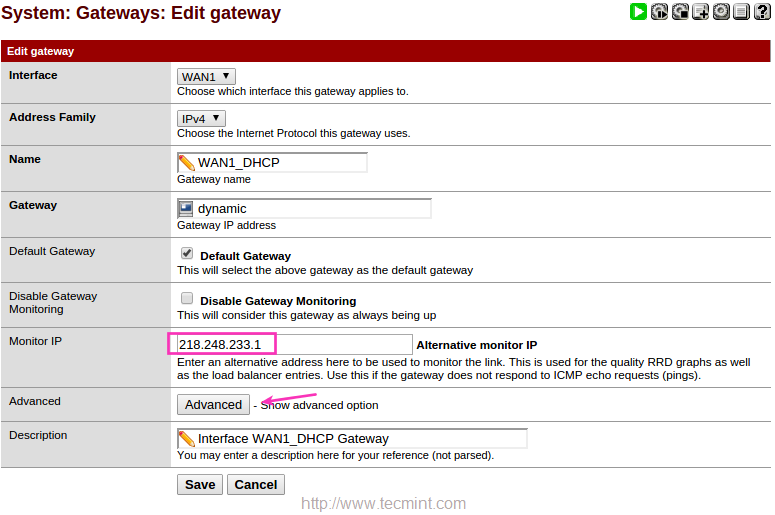
Configure Monitor IP
9. After adding Monitor IP, click on Advanced and give a low value for DOWN, here I’m using 3 seconds to monitor the IP. Default will be 10 Seconds.
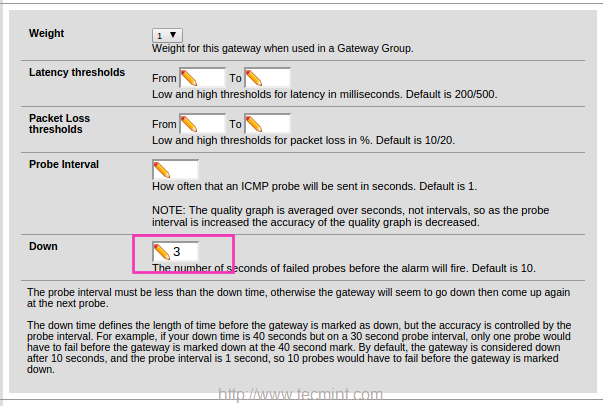
Monitor IP Failover
Use same settings for WAN2. Here I have used Google DNS instead of using my ISP DNS. Click save to exit.
Configured System Gateways
Click on Apply changes to make the changes permanent.
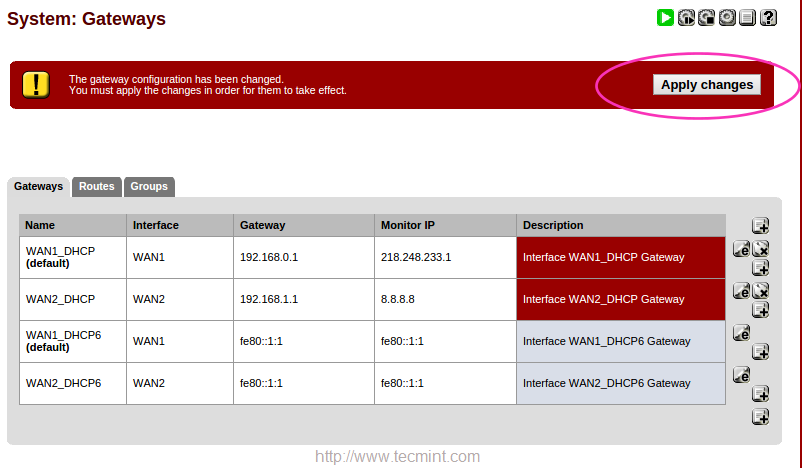
Confirm Gateways Settings
Step 4: Configuring Gateway Group
10. After configuring Gateway monitoring, click on Groups to create a Gateway Group. Click + button right to add new GW group.

Create Gateway Group
11. Give a Group Name and choose Tier for WAN1 and WAN2 and make changes by clicking on Save.
I have provided my group name as TecmintADSL and chosen tier1. To obtain a LoadBalancer we have to select more than one gateway in same tier.
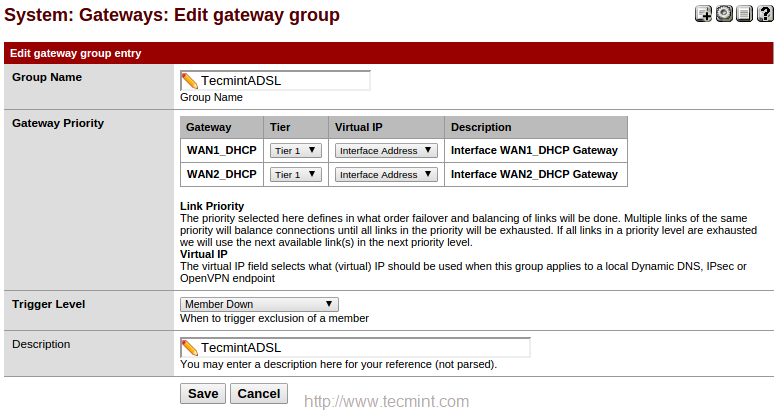
Give Gateway Group Name
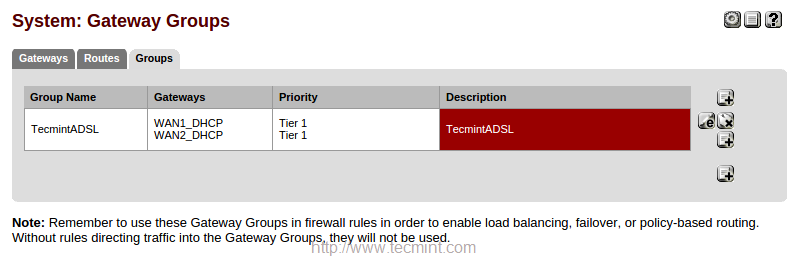
Configured Gateway Groups
Step 5: Configuring Firewall Rules
12. After creating a Group, now it’s time to create firewall rules for the created group, to assign the Rules, navigate to “FIREWALL” from top and choose “RULES“.
Choose the LAN interface and edit configuration.
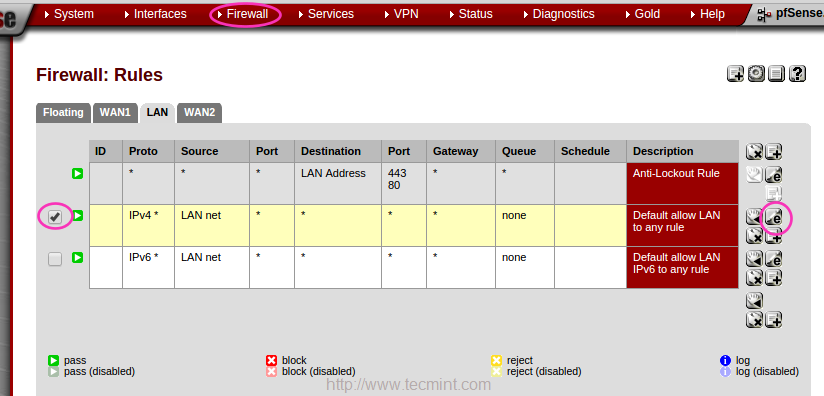
Configure Firewall Rules for Group
13. At the bottom of the page, choose the created Gateway Group “TecmintADSL” by clicking onAdvanced under Gateway option and click on save to Apply changes to make the changes permanent.
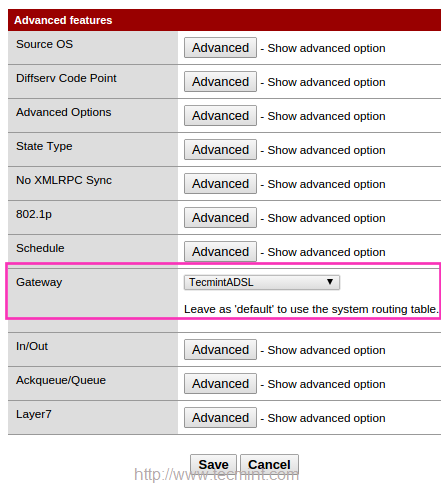
Configure Firewall Gateway
After applying modifications, you can see the gateway and advanced icon as show below.
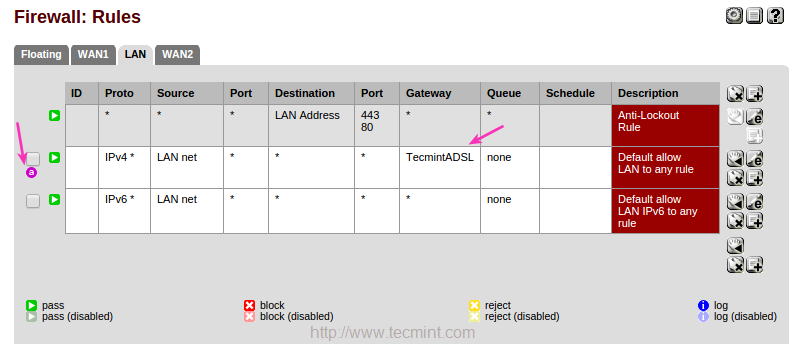
Confirm Firewall Settings
We have successfully setup-ed our LoadBalancer, Now let us verify how it work’s.
Step 6: Testing LoadBalancer
14. To verify the Load Balancer, go the ‘Status‘ from the top Menu and click on “Gateways” to verify that the both Gateways are online.
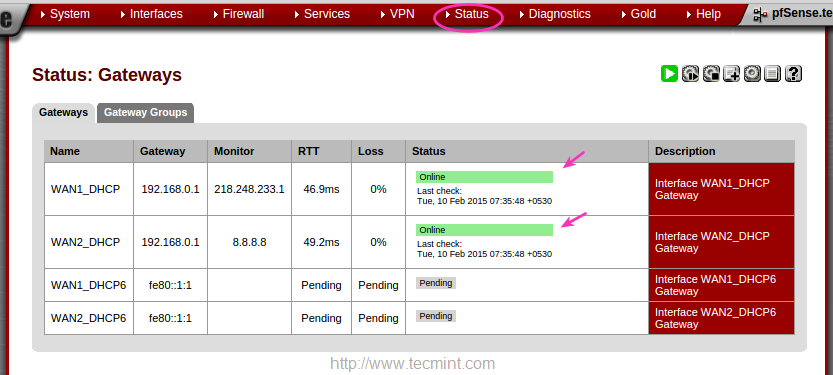
Confirm Gateway Status
15. To get the real time Graph we can use “Traffic Graph” under “Status” menu.
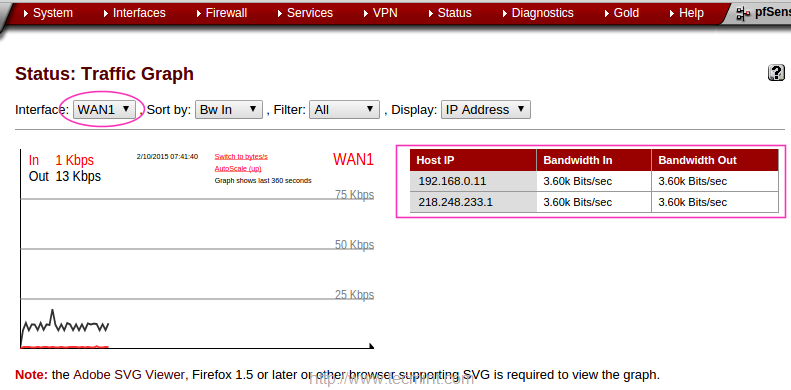
Real Time Traffic Graph
Step 7: Setup Failover Using Pfsense
16. To setup a failover in Pfsense, we need to create different Tier, navigate to “System” menu and choose “Routing“. There we can see Gateways already assigned for LoadBalancer, so let’s create two groups for failover now.
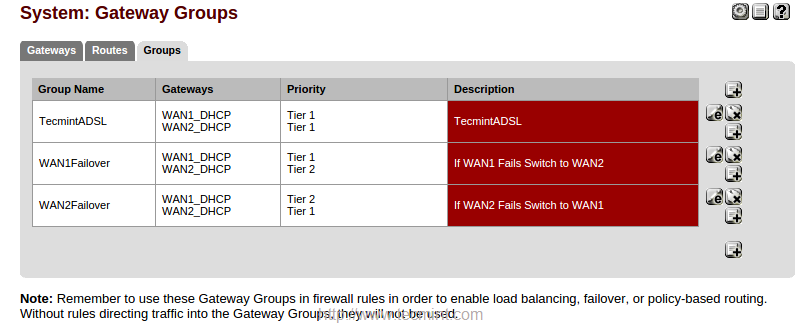
Choose “Groups” under System: Gateway Groups. Here we will create two groups, the first group we will be creating for WAN1 and the second group for WAN2, if WAN1 fails it will automatically switch to WAN2 and vise-versa.
Create a Group in the name of WAN1Failover, Choose WAN1 with Tier1 and WAN2 with Tier2, if WAN1fails it will switch to WAN2. Choose Packet Loss for Tigger Level, When ever ping reply to DNS packet Loss it will switch to WAN2.
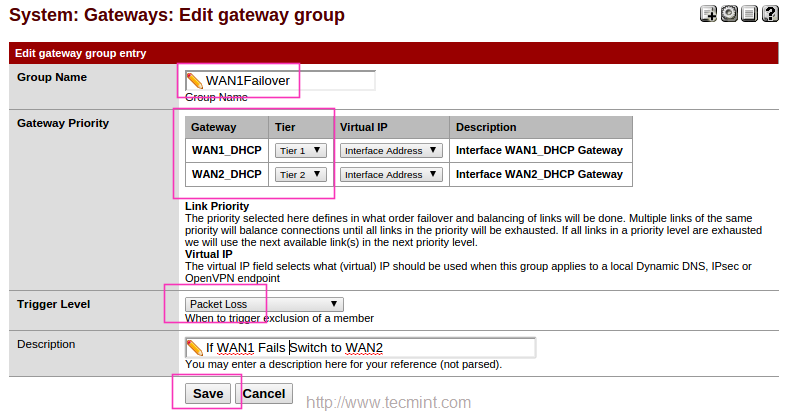
Create Failover Groups
17. Follow the same above instructions for creating WAN2Failover group. Choose WAN2 with Tier2 andWAN2 with Tier1, If WAN2 fails it will Switch to WAN1. Choose Packet Loss for Trigger Level. Here to when ever ping fails to DNS it will Switch to WAN1.
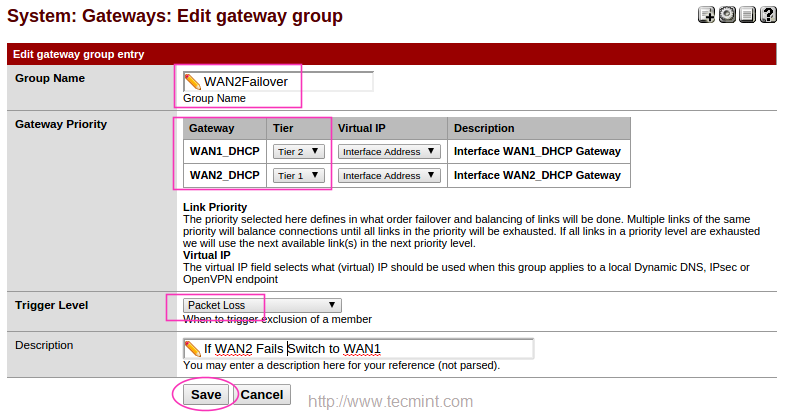
Create Failover WAN2 Group
Now, we will get three groups, first for LoadBalancing, second and third for Failover.
Confirm System Gateway Groups
Step 8: Configure Firewall Rules for Failover
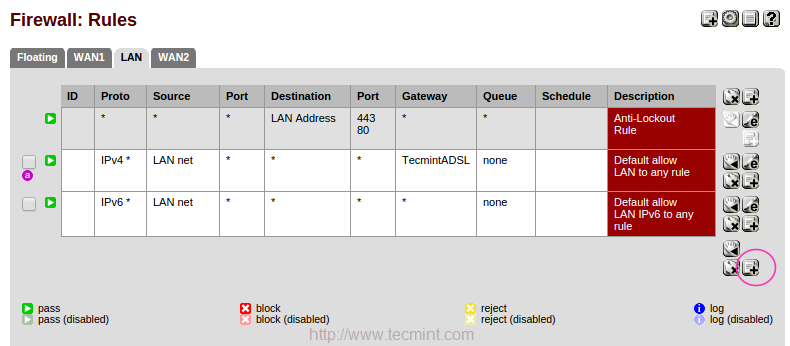
18. Now, here we need to assign firewall rules for failover, To configure firewall rules navigate to “Firewall” and choose “Rules“. Under LAN we have to add new rules for failover.
Click on + Symbol in right side to add new rules.
Add FailOver Firewall Rule
Make changes to below options.
- Interface = LAN
- Protocol = any
- Source = LAN net
- Description = What ever you wish for fail-over.
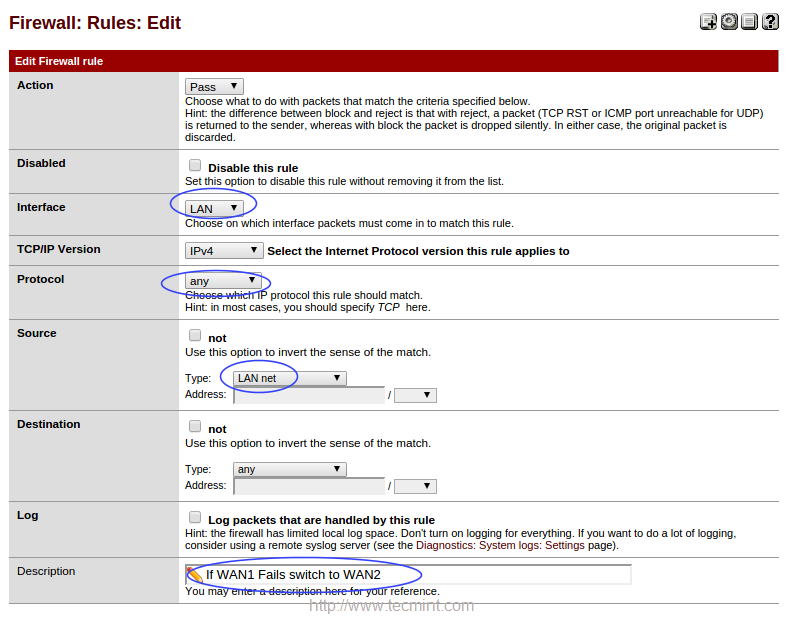
Configure FailOver Firewall Rule
Under advance settings of Gateway choose WAN1Failover and save, repeat the same instructions to configure WAN2Failover.
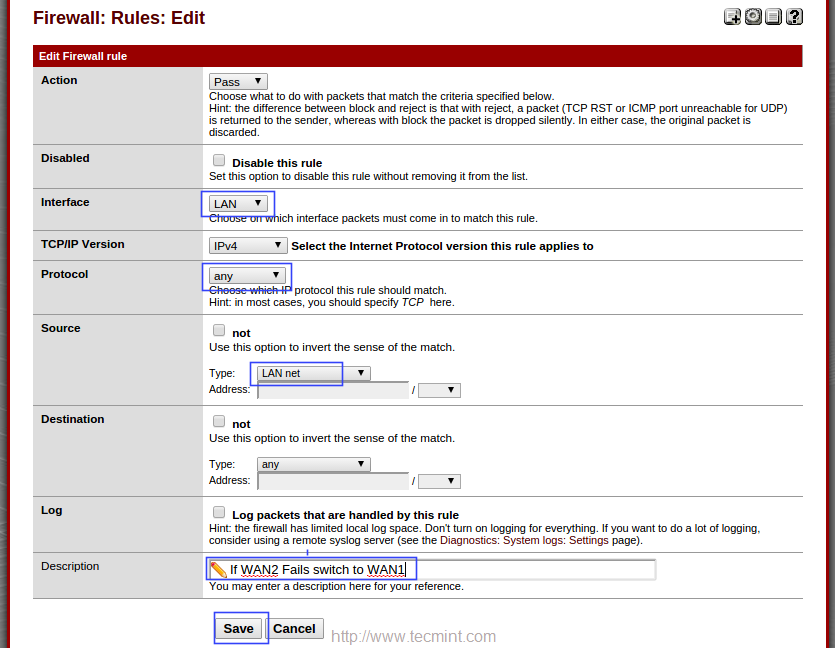
Select FailOver Gateway for WAN1
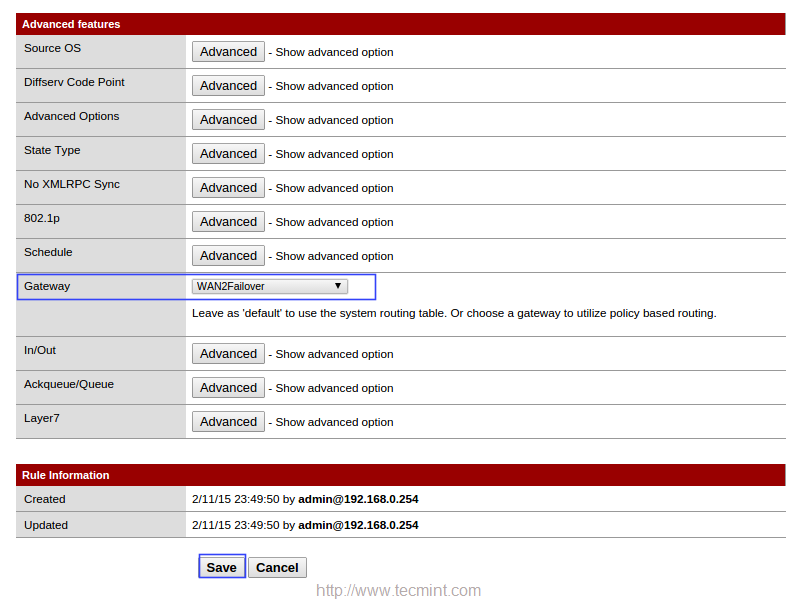
Select FailOver Gateway for WAN2
19. After adding the above rules, you can see the below listed rules for both LoadBalancer and Failover.
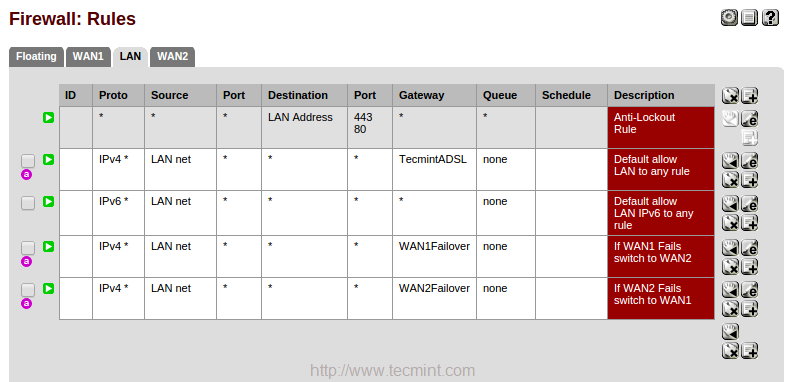
Confirm LoadBalancer Failover Rules
20. Now it’s time to assign at least one DNS server for our Gateway and apply changes and make sure to check the Status of our Gateway.
From “System” Menu choose “General Setup” and check for DNS respectively, which we have assigned under gateway.
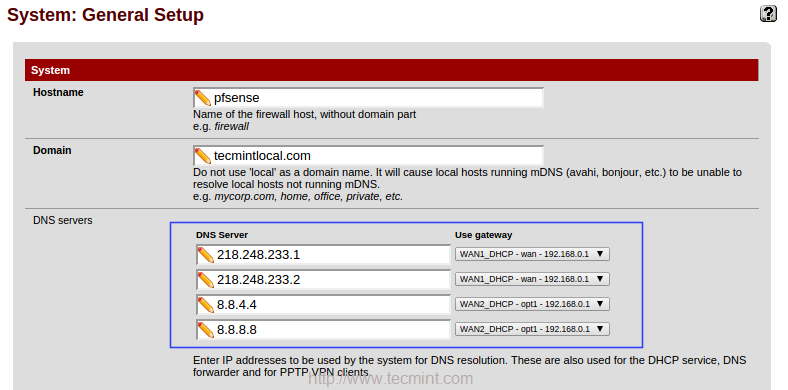
Add DNS IP Addresses
Choose “Status” menu and click on “Gateways” to get the status.
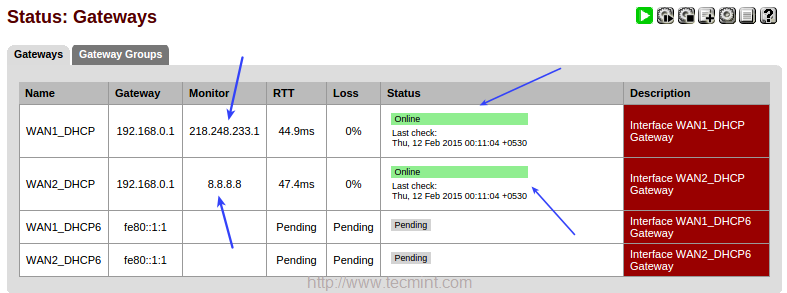
Check DNS Status
That’s it we have successfully deployed a Failover in pfsense.
Conclusion
The above pfsense LoadBalancer and Failover setup can be used in home or office environments only if you have Dual ISP connection’s. Instead of paying for a branded dedicated Router with LB options we can use this setup to build a LB with Failover.
No comments:
Post a Comment