Step-by-Step IPP based Print Server using CUPS
This tutorial describes how to install a Linux print server with CUPS. It also covers the installation and configuration of printer drivers on the print server as well as the printer setup on a Windows 2000 client.
Contents:
1. IPP Server Setup
2. Installation/Configuration of printer drivers
3. IPP Client Setup
1. IPP Server Setup
2. Installation/Configuration of printer drivers
3. IPP Client Setup
1. IPP Server Setup
Step #1 - Installing CUPS Service
# su root
# yum install cups*
# yum install cups*
Step #2 - Configuring CUPS
# vi /etc/cups/cupsd.conf
The default CUPS configuration limits administration to the local machine. To open up access, edit the /etc/cups/cupsd.conf and comment out the lines reading:
The Below lines restricts web administration access to localhost
Comment lines 842, 843, 844 so it should look like this
      Order deny,allow
      Deny from all
      Allow from 127.0.0.1
To disable password authentication you need to edit the /etc/cups/cupsd.conf file and comment out the lines reading:
The Below lines restricts the printer access to system users
Comment lines 838, 839 so the user can print without authentication
      AuthType Basic
      AuthClass System
Step #3 - Restart the CUPS server
# service cups restart
Step #4 - Run the steps described in "IPP_PrintDrivers_Setup" document
Step #5 - Restart the CUPS Service
# service cups restart
Step #6 – If required the CUPS can be managed with
http://localhost:631 - on local system
or
http://192.168.6.210:631 - on remote system (Replace the IP)
Note: Here IP: 192.168.6.210 is for the example use your own
Step #6 – Run the steps described in “IPP_Client_Setup” document
Step #7 - Trouble shooting CUPS
If you find the error message in the log file /var/log/cups/error_log:
print_job: Unsupported format 'application/octet-stream'!
Hint: Do you have the raw file printing rules enabled?
Soluation: uncomment the line in the /etc/cups/mime.types file:
print_job: Unsupported format 'application/octet-stream'!
Hint: Do you have the raw file printing rules enabled?
Soluation: uncomment the line in the /etc/cups/mime.types file:
application/octet-stream
and in the /etc/cups/mime.convs file:
and in the /etc/cups/mime.convs file:
application/octet-stream application/vnd.cups-raw
If the CUPS is installed with public IP, port 631 should be enabled on proxy/squid/router level
If the CUPS is installed with a private IP and wants to print from anywhere, we need to configure port forwarding at router end and router should configured with a public ip so that the print service can be used with http://publicIP:631/printers/printername and router will forward packets to localip:631.
2. Installation/Configuration of printer drivers
Print Driver Installation for PostScript Printer on linux.
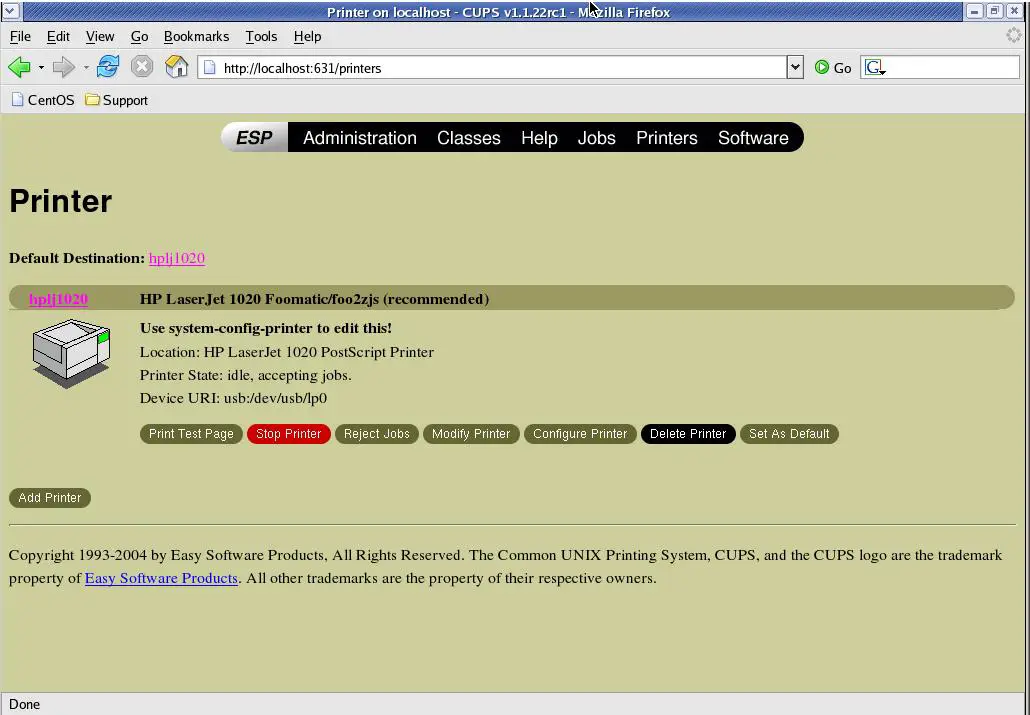
Printer Model: HP LaserJet 1020
Operating System: CentOS 4.4
Operating System: CentOS 4.4
Note: Steps 1 to 9 are differs from printer to printer
Step #1
# cd /tmp
Step #2 - Download print driver for HPLJ1020
# wget -O foo2zjs.tar.gz http://foo2zjs.rkkda.com/foo2zjs.tar.gz
Please go through the reference: http://foo2zjs.rkkda.com/ for more information on different type of printers.
Step #3 - De-compress the file
# tar zxf foo2zjs.tar.gz
Step #4 - Compile it
# cd foo2zjs
# make
# make
Step #6 - Get the driver info for HP LaserJet 1020
# ./getweb 1020
Step #7 - Installation of driver
# make install
Step #8 - Enable it for USB hot plugging feature
# make install-hotplug
Step #9 - Configure HPLJ1020 drivers to cups
# make cups
Step #10 - Configuration of printer using Command Line Interface
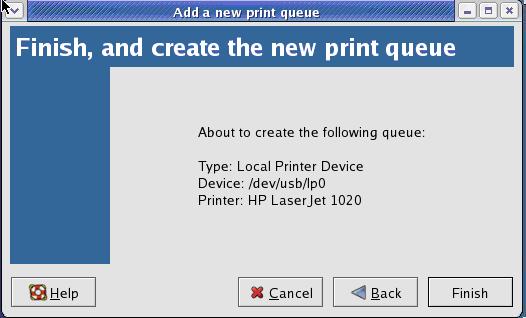
# lpadmin -p hplj1020 -E -v /dev/usb/lp0 -m /backup/downloads/foo2zjs/PPD/HP-LaserJet_1020.ppd
- Set it as default (if require)
# /usr/sbin/lpadmin -d hplj1020
- Start printer services
# /usr/bin/enable hplj1020
- Accept printing
# /usr/sbin/accept hplj1020
- Set it as default (if require)
# /usr/sbin/lpadmin -d hplj1020
- Start printer services
# /usr/bin/enable hplj1020
- Accept printing
# /usr/sbin/accept hplj1020
Step #10 - Configuration of printer using GUI Interface (Preffered)
# printconf-gui
- The above command displays the GUI Interface.
Or we can choose it from
(GNOME)-> Applications -> System Settings -> Printing
(GNOME)-> Applications -> System Settings -> Printing

- Click Button “New”.
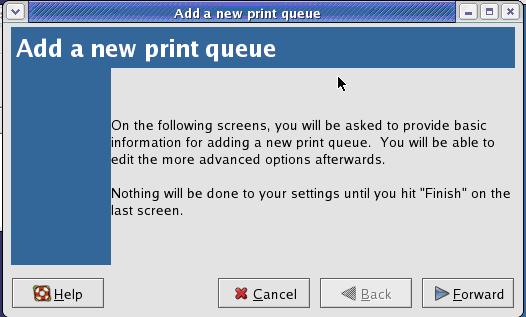
-> Click Button “Forward”.
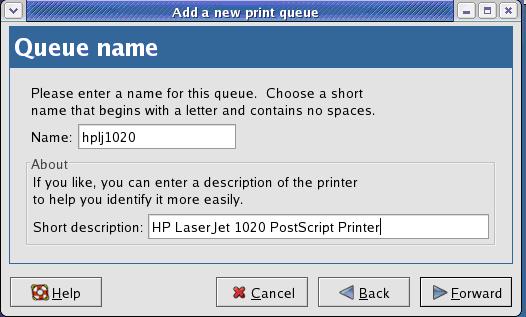
- Name = hplj1020 (choose your own)
- Short description = HP LaserJet 1020 PostScript Printer (choose your own)
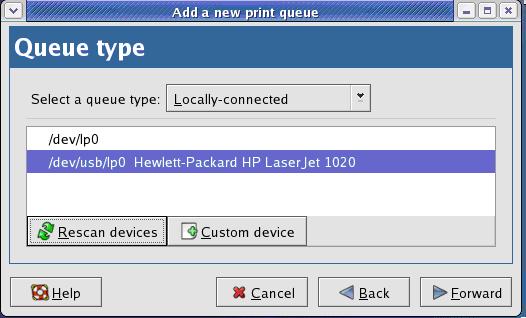
Select the printer.
Note: If the printer is just connected, use button “Rescan devices” to list the printer.
Select the Manufacturer and Model of the printer.
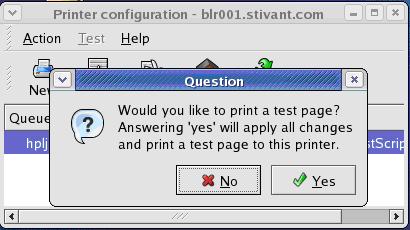
Click the Button “Yes” (for test page).
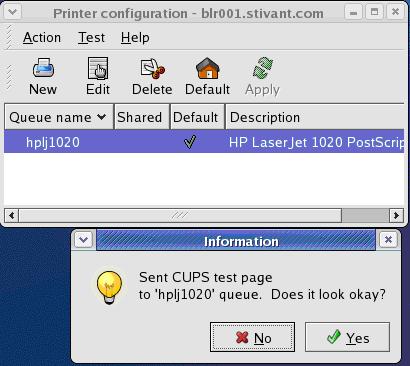
If the test print is ok Click button “Yes”.
3. IPP Client Setup
Client OS: Windows XP/2000
Start -> Settings -> Printers and Faxes
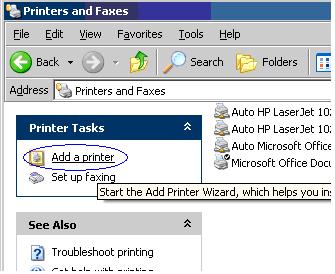
Click on “Add a printer”.
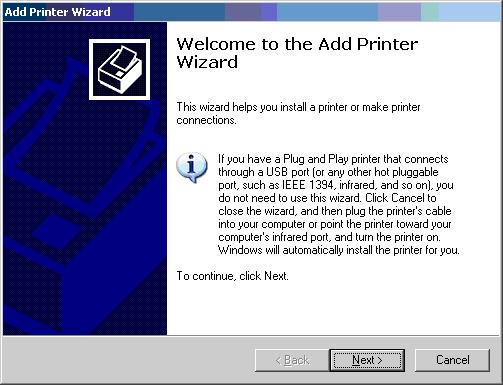
Click on “Next”.

Select option “A network printer, or a printer attached to another computer”.
Click on “Next”.
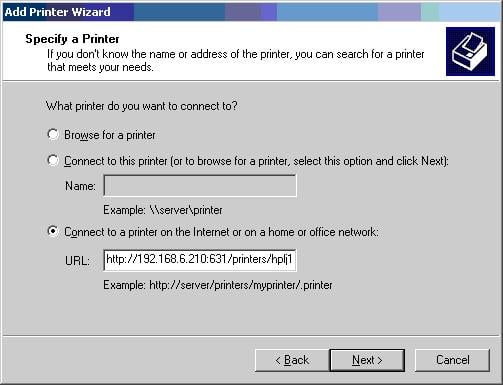
Select third option “Connect to a printer on the Internet or on a home or office network:”
URL: http://192.168.6.210:631/printers/hplj1020
Note: Specify the URL provided by the administrator.
URL: http://192.168.6.210:631/printers/hplj1020
Note: Specify the URL provided by the administrator.
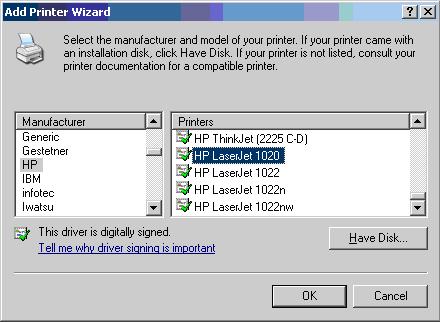
Choose the correct Driver for the printer
For example: HP LaserJet 1020
Manufacturer: HP
Printer Model: HP LaserJet 1020
Manufacturer: HP
Printer Model: HP LaserJet 1020
Note: If printer model is not found, install the printer drivers first then start from the beginning.
Click on “Ok”.
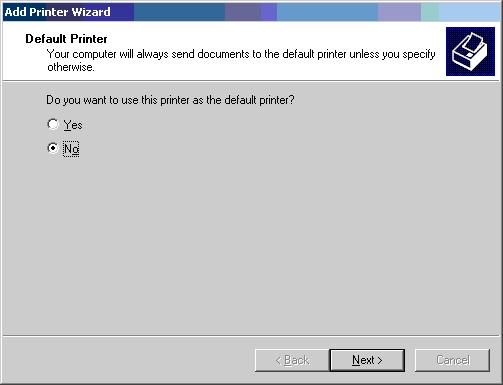
Select “Yes” (If you want to run this printer as default).
Click on “Next”.
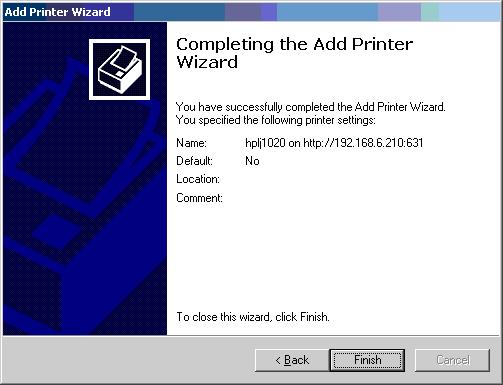
Click on “Finish” to complete the task.
So, you can print your hard copies to the printer which is connected to server somewhere in the world.
No comments:
Post a Comment