Introduction
Fedora Linux allows you to do operating system installations via a network connection using a Kickstart server. It is frequently much faster than using CDs and the process can be automated. The procedure is fairly simple:
- Connect the new server (installation client) to the same network as the server with the pre-loaded installation files (installation server).
- Boot the installation client from a specially created boot CD
- Enter your preferred installation method (FTP, HTTP, NFS) and the needed network parameters to do this
- The installation procedure will then continue with the more familiar Fedora Linux installation screens. Enter your selections and then complete the installation.
This chapter will briefly explain how to set this up using all three methods using a single installation server (bigboy) with an IP address of 192.168.1.100.
Setting Up The Kickstart Server
Kickstart can be configured on an FTP, NFS or Apache server. Each method is explained below, but my experience has been that the Apache server has a number of advantages over the other two.
Using a web server for kickstart is generally easier because:
- Sometimes a kickstart server has to be located on a remote network, often passing through a firewall. Strict firewall rules for HTTP are generally easier to configure than those for FTP or NFS.
- The http:// nomenclature used by kickstart for accessing files is more familiar to users than that used for NFS and FTP. This may be important for you when configuring files for automated kickstart installation.
Basic Preparation
In this example we are going to set up a kickstart server that will be used in Fedora Core installations. All the necessary files will be placed in the /data/network-install directory.
Create The Installation Directories
We'll first create the directories /data/network-install/RPM and /data/network-install/ISO in which we will copy the necessary files.
[root@bigboy tmp]# mkdir -p /data/network-install/RPM
[root@bigboy tmp]# mkdir -p /data/network-install/ISO
You now need to place the network installation driver files into the base directory.
Copying The Files
The HTTP, NFS and FTP kickstart methods all require the base set of Fedora files to be installed on the kickstart server. Here's how to do it:
1) Create a mount point for your CD ROM drive.
[root@bigboy tmp]# mkdir /mnt/cdrom
2) Mount your first Fedora CD ROM.
[root@bigboy tmp]# mount /dev/cdrom /mnt/cdrom
3) Copy the files from the CD ROM base directory to the hard disk
[root@bigboy tmp]# cp -r /mnt/cdrom/* /data/network-install/RPM
4) Unmount your CD ROM and use the eject command to retrieve it from the drive bay.
[root@bigboy tmp]# umount /dev/cdrom
[root@bigboy tmp]# eject cdrom
5) Repeat steps 2 to 4 with all your CDROMs. Overwrite files when prompted.
Note: Note: You also have the option to FTP all the files of the desired version of Fedora from the Fedora website to the /data/network-install/RPM directory.
HTTP & FTP Preparation
Copy all the contents of each installation CD to the /data/network-install/RPM directory. This will require about 3-5 GB of space. When this is completed, your /data/network-install/RPM directory should look like this:
[root@bigboy tmp]# ls -1 /data/network-install/RPM
eula.txt
Fedora
fedora.css
GPL
images
index.html
isolinux
README-Accessibility
RELEASE-NOTES-en_US.html
repodata
RPM-GPG-KEY
RPM-GPG-KEY-beta
RPM-GPG-KEY-fedora
RPM-GPG-KEY-fedora-extras
RPM-GPG-KEY-fedora-legacy
RPM-GPG-KEY-fedora-rawhide
RPM-GPG-KEY-fedora-test
RPM-GPG-KEY-rawhide
stylesheet-images
[root@bigboy tmp]#
NFS Preparation
Create ISO images of the installation CDs and place them in the /data/network-install/ISO directory. This will require about 3-5 GB of space as well. You can download the ISO images from the Fedora website or use the Fedora CDs as shown below. If you create the ISOs files from CDs, make sure they have the same file names as the ones you can download from the Fedora Web site.
Follow these steps for each CD, substituting the filename where necessary:
[root@bigboy tmp]# cd /data/network-install/ISO
[root@bigboy ISO]# dd if=/dev/cdrom of=filename.iso bs=32k
...
...
[root@bigboy ISO]# eject cdrom
Note: Here is a sample procedure to make ISO files with the older mkisofs command. You may have to install the mkisofs RPM on newer Fedora versions. The command requires a mounted CDROM drive, so don't forget the mount command.
[root@bigboy ISO]# mount /mnt/cdrom
[root@bigboy ISO]# mkisofs -J -r -T -o filename.iso /mnt/cdrom
[root@bigboy ISO]# eject cdrom
Setup Your Webserver
NameVirtualHost 192.168.1.100

#
# For HTTP Installations
#
<VirtualHost 192.168.1.100>
  ServerName 192.168.1.100
  DocumentRoot /data/
</VirtualHost>

<Directory /data/network-install>
   Options +Indexes
   AllowOverride AuthConfig
   order allow,deny
   allow from all
</Directory>
Setup Your FTP Server
You'll also have to set up your VSFTPD server to make incoming anonymous FTP connections log in to the /data/network-install/RPMdirectory by default. You will also want to enable the correct logging. Here is a sample snippet of the vsftpd.conf file. Remember to restart VSFTPD to make these settings take effect
#
# File: vsftpd.conf
#

#
# Anonymous FTP Root Directory
#

anon_root=/data/network-install/RPM

#
# Log file definition
#

xferlog_enable=YES
xferlog_file=/var/log/vsftpd.log
Create A Special FTP User
You can also create a special user for non anonymous FTP installations with its home directory as "/". You must also make sure that the user has read access to the /data/network-install directory. An example is below.
[root@bigboy tmp]# useradd -g users ftpinstall
[root@bigboy tmp]# passwd ftpinstall
Changing password for user ftpinstall.
New password:
Retype new password:
passwd: all authentication tokens updated successfully.
[root@bigboy tmp]#
[root@bigbot tmp]# usermod -d / ftpinstall
[root@bigbot tmp]#
Setup Your NFS Server
The steps for setting up an NFS server are more complicated.
1) Create a /etc/exports file with the following entry in it. You must use tabs, not spaces between the entries
/data/network-install *(ro,sync)
2) Make sure that the rpcbind (portmap on older versions of Linux) , nfs, nfslock and netfs daemons are all running to create an NFS server. The startup scripts for these are found in the /etc/init.d directory. Chapter 29, "
Remote Disk Access with NFS", will explain this in more detail.
3) Run the exportfs command to add this directory to the NFS database of network available directories.
[root@bigboy tmp]# exportfs -ra
4) The installation client must have a matching pair of forward and reverse DNS entries on your DNS server. In other words, a DNS lookup on the IP address of the installation client must return a server name that will map back to the original IP address when a DNS lookup is done on that same server name.
[root@bigboy tmp]# host 192.168.1.96
96.1.168.192.in-addr.arpa domain name pointer 192-168-1-96.my-site.com.
[root@bigboy tmp]#

[root@bigboy tmp]# host 192-168-1-96.my-site.com
192-168-1-96.my-site.com has address 192.168.1.96
[root@bigboy tmp]#
This may mean that you will have to create entries for all your DHCP IP addresses if you choose to use a DHCP method of assigning IP addresses during installation.
Configure Your DHCP Server
During the installation procedure, the installation client will prompt you for the IP address it should use for the installation process. I recommend selecting the option that makes the Installation Client get its address via DHCP. This will automate the installation more and will therefore make it faster. It will also reduce the possibility of human error.
Setting up the Installation Server as a DHCP server is fairly straight forward and can be found in Chapter 8, "
Configuring the DHCP Server".
Creating A Kickstart Boot CD
Creating a kickstart boot CD is easy to do. Here are the steps:
1. Your RPM directory should have a subdirectory named images in it. There will be a file there named boot.iso which is used in booting your system when installing Linux from DVD or CD. Fedora mirror sites that have directory structures similar to that of the DVD also have a boot.iso file located in the <fedora-version>/Fedora/i386/os/images/ directory. This file is different in both size and function to that on your DVD. It usually larger than 10 MB in size and it is the boot file you need for kickstart. Download the boot.iso file from your favorite mirror site using a utility like wget.
[root@bigboy tmp]# wget http://website.org/8/Fedora/i386/os/images/boot.iso
2. You will now need the device name of your CDROM device. This can be obtained using the wodim command. In this case it is called /dev/scd0.
[root@bigboy tmp]# wodim --devices
wodim: Overview of accessible drives (1 found) :
-------------------------------------------------------------
 0  dev='/dev/scd0'     rwr--- : 'LITE-ON' 'DVDRW LH-20A1P'
-------------------------------------------------------------
[root@bigboy tmp]#
3. Insert a blank CD. The wodim command can now be used again to burn the boot.iso ISO image file to the CD.
[root@bigboy tmp]# wodim dev=/dev/scd0 driveropts=burnfree,noforcespeed \
fs=14M -dao -eject -overburn -v boot.iso
...
...
...
BURN-Free was never needed.
wodim: fifo had 6 puts and 6 gets.
wodim: fifo was 0 times empty and 0 times full, min fill was 100%.
[root@bigboy RPM]#
Keep the CD. You will soon need it for your kickstart client machine.
The Network Installation
From here on, the installation procedure mimics the regular Linux installation, except for the first couple steps.
- Connect your client Linux box to the DHCP network.
- Boot your system using the kickstart boot CD. This is the only CD you'll need for future network installations.
- A menu will appear. Select “Install or upgrade an existing system”.
- Go through the usual steps until the process prompts for the "Installation Method". You will see a number of choices
Local CDROM
Hard Drive
NFS Image
FTP
HTTP
- Select the network option of your choice (NFS, FTP, HTTP)
- Select the Ethernet device to which the installation client is connected to the installation server network. This would most likely be interface "eth0".
- Select "DHCP" in the following "Configure TCP/IP" screen. This will make the Installation client use DHCP during the installation.
If You Selected The NFS Method
You will now reach the "NFS setup" menu. Enter the IP address of the installation server as the "NFS Server Name". The "Red Hat directory" will be "/data/network-install/ISO". The following menus will be the usual Fedora GUI installation screens.
If You Selected The HTTP Method
You will now reach the "HTTP Setup" menu. Enter the IP address of the installation server when prompted for a "Web site name".The "Red Hat directory" will be /network-install/RPM. The following menus will be text based versions of the usual Fedora installation screens.
During the installation, issue the following command on the server to check the Apache logs. It will help to verify whether the kickstart client is accessing the files correctly. You should get a status code of 200<code> after each GET statement. You should retrace your steps if you are not.
[root@bigboy tmp]# tail -f /var/log/httpd/access_log
192.168.1.247 - - [12/Nov/2006:12:01:04 -0800] "GET /network-install/RPM/repodata/repomd.xml HTTP/1.1" 200 1140 "-" "urlgrabber/2.9.9"
192.168.1.247 - - [12/Nov/2006:12:01:05 -0800] "GET /network-install/RPM/repodata/primary.xml.gz HTTP/1.1" 200 844228 "-" "urlgrabber/2.9.9"
192.168.1.247 - - [12/Nov/2006:12:01:19 -0800] "GET /network-install/RPM/repodata/comps.xml HTTP/1.1" 200 853899 "-" "urlgrabber/2.9.9"
If You Selected The FTP Method
You will now reach the "FTP Setup" menu. Enter the IP address of the installation server as the "FTP Site Name".
- "Not Selecting" The Non-Anonymous FTP Box
- The "Red Hat directory" will be "/". The following menus will be text based versions of the usual Fedora installation screens.
- "Selecting" The Non-Anonymous FTP Box
- The "Red Hat directory" will be "/data/network-install/RPM". Enter the username and password of your special FTP user account. The following menus will be text based versions of the usual RedHat installation screens.
Note: During the installation, issue the following command on the server to check the FTP logs. It will help to verify whether the kickstart client is accessing the files correctly.
[root@bigboy ~]# tail -f /var/log/vsftpd.log
Sun Nov 12 20:53:12 2006 1 192.168.1.231 1140 /data/network-install/RPM/repodata/repomd.xml b _ o r ftp-install ftp 0 * c
Sun Nov 12 20:53:21 2006 2 192.168.1.231 844228 /data/network-install/RPM/repodata/primary.xml.gz b _ o r ftp-install ftp 0 * c
Sun Nov 12 20:53:40 2006 2 192.168.1.231 853899 /data/network-install/RPM/repodata/comps.xml b _ o r ftp-install ftp 0 * c
Troubleshooting The Network Installation
You can do some basic troubleshooting by accessing the various installation status screens available.
- The installation logs can always be viewed by hitting <CTRL-ALT-F3>
- Kernel messages can be seen by hitting <CTRL-ALT-F4>
- Access to a limited BASH shell Kernel can be gained by hitting <CTRL-ALT-F2>
- You can return to the main installation screen at any time by hitting <CTRL-ALT-F1> for text based installations and <CTRL-ALT-F7> when the GUI is used.
Examine your server's <code>/var/log/httpd/access_log, /var/log/httpd/error_log files for the HTTP method; the/var/log/vsftpd.log file for the FTP method; and your /var/log/messages file for the NFS method.
Automating Installation With Kickstart
Both Fedora and RedHat Linux save all the parameters you used during installation in the /root/anaconda-ks.cfg kickstart configuration file. You can use this file to create an automated installation of a duplicate system which can be useful if you have a large number of servers to install.
This section shows you how to automate network installations using the kickstart application and NFS. You can use HTTP and FTP but they have been omitted to keep the discussion brief.
How To Create New Kickstart Configuration Files
You can create a customized kickstart configuration file by using the "ksconfig" command from a GUI console. It will bring up a menu from which you can select all your installation options. When finished, you save the configuration with the filename of your choice.
You may want to then edit the configuration file and comment out certain parameters that may change from system to system with a "#". These could include things like the system's name and IP address. During the kickstart process you will be prompted for these unspecified values.
Note: Do not change the order of the entries in the kickstart configuration file.
Note: The IP address you assign must be on the same subnet as that of the DHCP server for kickstart to work. If the server is going to reside on a different network after the installation, then you'll have to run a separate script to change the IP addressing information after the installation is complete.
Adding Post Installation Commands
You may want to run some commands on the newly created Linux installation after kickstart is complete. Some processes that are activated by default by Fedora may not be suitable for your server and may need to be disabled.
This can be done by placing a %post section at the end of the kicksrart file with all the post installation commands you wish to run. Here is an example:
%post
chkconfig isdn off
chkconfig pcmcia off
chkconfig portmap off
chkconfig apmd off
chkconfig nfslock off
chkconfig nfs off
A Note About Using anaconda-ks.cfg
It is possible to use the /root/anaconda-ks.cfg file as a template for future installations. RedHat comments out the partitioning information in this file, so you will either have to uncomment it and then make your partitioning modifications or be prepared to be prompted for your portioning information.
How To Run A Kickstart Installation
It is best to place your kickstart files in a subdirectory under the /data/network-install directory. The examples below assume the subdirectory is called /data/network-install/kickstart.
Remember that you may want to remove the "#" comments from the partition section of the file. If not, you will be prompted for this information.
Using a NFS Server
Verify that the first two lines of the file look like this or else you may be prompted for NFS ISO file location information.
install
nfs --server=192.16.1.100 --dir=/data/network-install/ISO
Using a Web Server
Verify that the first two lines of the file look like this or else you may be prompted for RPM base file location information.
install
url --url http://192.168.1.100/network-install/RPM
Booting With Your Kickstart Files
There are two ways to specify the name of the kickstart file to use. The first is to enter it manually from the LILO boot: prompt when you insert the boot CD. The second is to have your DHCP server automatically tell the Kickstart client about the name of the kickstart file to use when it assigns the IP address. Both methods are listed below:
Manually Specifying the Kickstart Filename
Once you have booted from your boot CDROM, you'll need to use the following command at the lilo boot: prompt to continue with the installation. The ks.cfg file is the kickstart configuration file we want to use.
NFS Method
boot: linux ks=nfs:192.168.1.100:/kickstart/ks.cfg
HTTP Method
boot: linux ks=http://192.168.1.100/network-install/kickstart/ks.cfg
Configuring The Filename Automatically
Whenever you have to create lots of cloned Linux servers, then you may want to configure your DHCP server to specify the single kickstart configuration file you wish to use. Here is how it's done:
1) Place your kickstart file in the /data/network-install/kickstart directory.
2) Edit your dhcpd.conf file and add the following lines to the section for the interface that will be serving DHCP IP addresses. The next-server value is the IP address of the kickstart server.
filename "/data/network-install/kickstart/ks.cfg";
next-server 192.168.1.100;
3) Insert the boot CD into the kickstart client Linux box and connect it to the DHCP network. At the boot: prompt type in the following command:
boot: linux ks
Kickstart will first search for a configuration file named ks.cfg on either the boot CD. It will then automatically attempt to get a DHCP IP address and see if the DHCP server will specify a configuration file.
Kickstart will then use NFS to get both the configuration file and the installation ISOs. The rest should be automatic.
Conclusion
The Kickstart method of Fedora Linux installation can greatly reduce the length of time it takes to install the operating system. Time is saved not only because a network connection can be faster than using CDs, but also because it can be left unattended to install a predetermined Linux configuration. A Kickstart server connected to an isolated wireless network dedicated to the purpose may be a good idea for data centers with hundreds of Linux servers.
A recent standard called PXE allows you to run kickstart without a CD ROM if you configure the NIC card to do a network boot from a specially configured DHCP server. The topic is beyond the scope of this book, but it may be interesting for readers with more complex projects to research this option more.
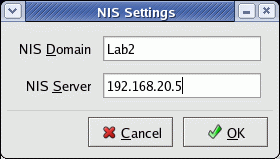
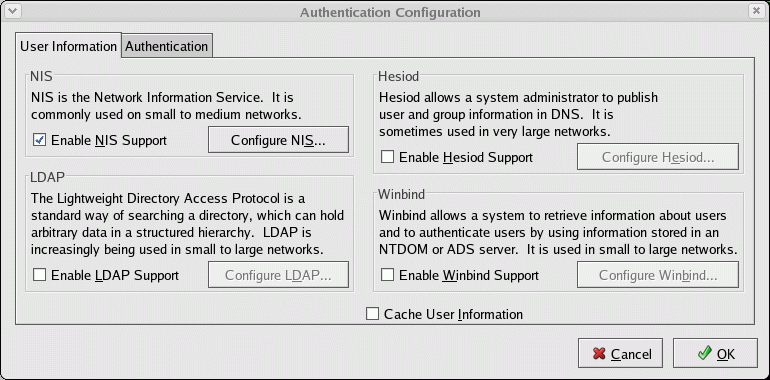 Select the "Configure NIS ..." button: