Complete guide to install Zimbra Mail on CentOS & RHEL
Zimbra Collaboration Suite (ZCS) or commonly known as Zimbra Mail, is collaborative software suite that includes an email server and a web client. It also includes contacts, file sharing, calendar , tasks etc which can be easily accessed via web mail.
Zimbra offers two editions, the commercially supported edition called ‘Network Edition’ & an free/open source version called ‘Open Source Edition’, which is the focus of this tutorial. In this tutorial, we are going to discuss how to install Zimbra mail on CentOS & RHEL machines.
Let’s start by discussing some requirements for Zimbra mail on CentOS,
Pre-requisites
1- We need to have a systems with freshly installed OS, minimal OS is recommended. We can also use a system with pre-installed OS but make sure that we have web, database & mail services (Postfix, Sendmail) disabled.
Even with freshly installed OS, we will have some of these services working, mainly POSTFIX. Disable it,
$ sudo systemctl stop postfix
$ sudo systemclt disable postfix
2- We will also need ‘A record’ & ‘MX record ‘ for our mail server in DNS, this is required to send & receive mails. We can also use a local DNS server for the same.
If not have one already, refer to our article on “How to create a BIND Server” to create a local DNS server.
3- Create a hostname entry for your server in ‘/etc/hosts’ file,
$ sudo vim /etc/hosts
192.168.1.120 testmail.linuxtechlab.com testmail
where, ‘testmail.linuxtechlab.com’ is FQDN of the server & ‘testmail’ is the name of the server.
Installation
Before we can install Zimbra mail on Centos or RHEL system, we need to install dependency packages for ZCS. Install them using the following command,
$ sudo yum install wget perl perl-core ntpl nmap sudo libidn gmp libaio libstdc++ unzip sysstat sqlite
After these packages have been installed, we are now ready to download & install latest version of Zimbra mail on CentOS and RHEL systems. At the time of writing this tutorial, 8.7.11 is the latest version available. Download it using the following command,
$ wget https://files.zimbra.com/downloads/8.7.11_GA/zcs-8.7.11_GA_1854.RHEL7_64.20170531151956.tgz
For CentOS & RHEL 6, use the following command to download the install script,
$ wget https://files.zimbra.com/downloads/8.7.11_GA/zcs-8.7.11_GA_1854.RHEL6_64.20170531151956.tgz
Downloaded file is a tar package, extract it
$ tar -xzf zcs-8.7.11_GA_1854.RHEL7_64.20170531151956.tgz
Next, enter into the extracted folder,
$ cd zcs-8.7.11_GA_1854.RHEL7_64.20170531151956
Now, we will start the installation script for the Zimbra mail,
$ ./install.sh –platform-override
Note:- ‘–platform-override’ option is used because script is meant to run on Redhat but to install Zimbra mail on CentOS, we need to add that option.
Once the script starts, we would be firstly required to accept the license. Accept the license by pressing ‘Y’ key,
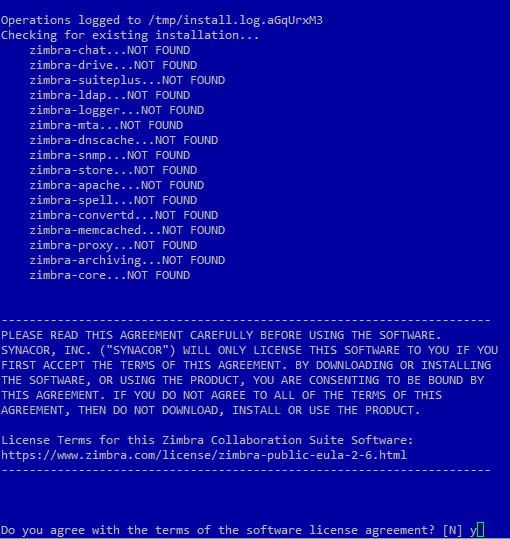
& than will be asked if you would like to use ‘Zimbra Package repository’, press Y. Next, select the packages you need to install. We are selecting all packages for installation,
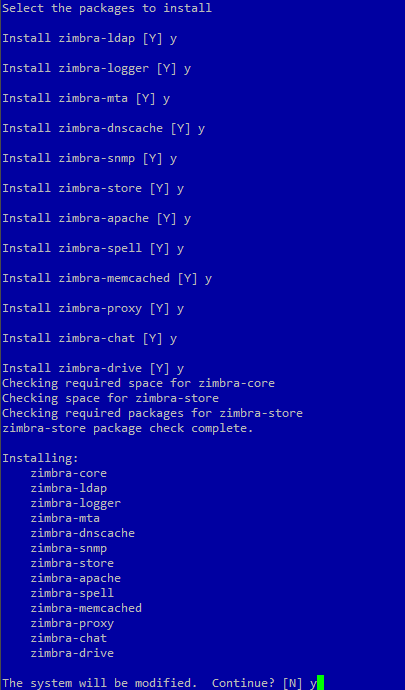
Installation will than start, it will take some time to complete,
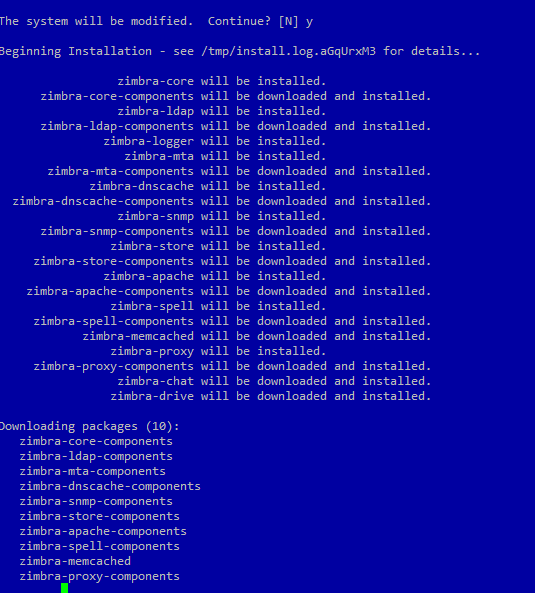
Once the installation completes, you will get the following screen as output,
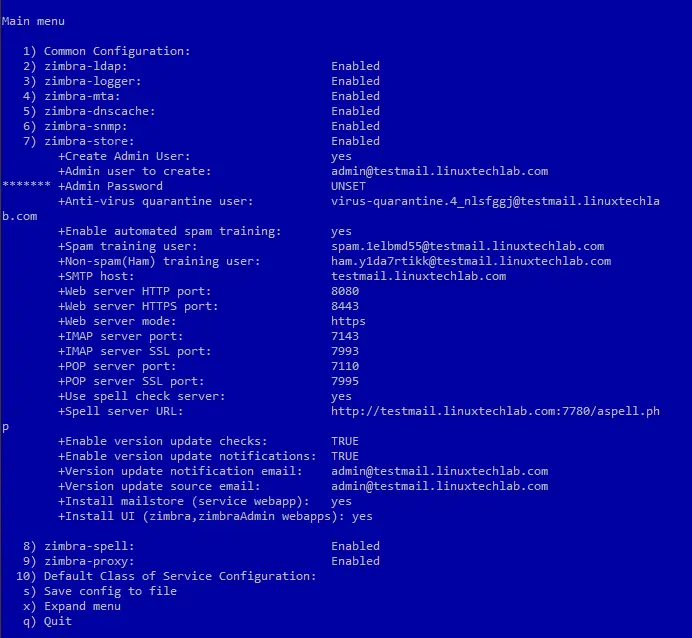
Here we can change any configuration for our server, if we find them wrong or just want to modify them.
We will be changing password for admin user, change it by pressing ‘3’ key & provide the password. Once changes have been made, apply all the configurations made by pressing ‘a’ key & Zimbra will than apply the configurations to the server.
Next save the configuration file by pressing ‘s’ key & quit from the menu by pressing ‘q’ key. Our Zimbra server on CentOS system is now ready, start the Zimbra service,
$ su – zimbra
$ zmcontrol start
& login to the Zimbra mail from a browser with the URL,
http://testmail.linuxtechlab.com
Enter the username ‘admin’ & password that we provided during installation,
After logging in, we can than perform functions like add new accounts, install certificated etc.
This was our tutorial on how to install Zimbra mail on CentOS & RHEL systems.