This guide is based on various community forum posts and webpages. Special thanks to all. All comments and improvements are very welcome as this is purely a personal experimental project at this point and must be considered a work in progress.
This guide is intended as a relatively easy step by step guide to:
Install and configure an Ubuntu 12.04 LTS server for use by small and medium enterprises as business server providing the following features:
Requirements:
- 32bit or 64bit Computer to use as server
- 2GB RAM minimum. 8GB or more is ideal.
- 2 x LAN network adaptors
- 1 x Boot Hard Drive of at least 20GB
- 2 x 1TB (or any same size) hard drives to act as RAID 1 backup storage on server (optional)
- 1 x Internet Router ADSL or Cable
- 1 x Network Router or switch for client computers
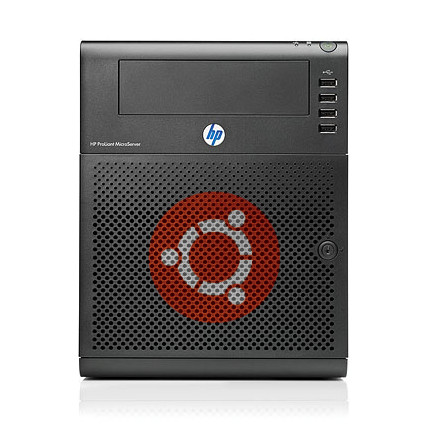
- The Fan Club Recommends : HP ProLiant Microserver
Support:
- Free support is available on the various project websites and forums.
- We offer commercial support for those who do not want to do all the installation work from scratch:
- Bootable 16GB USB Disk with customised installation GUI configuration wizard. P.O.A
- *HP ProLiant Microserver with customised installation GUI configuration wizard. P.O.A (* for South African Residents only)
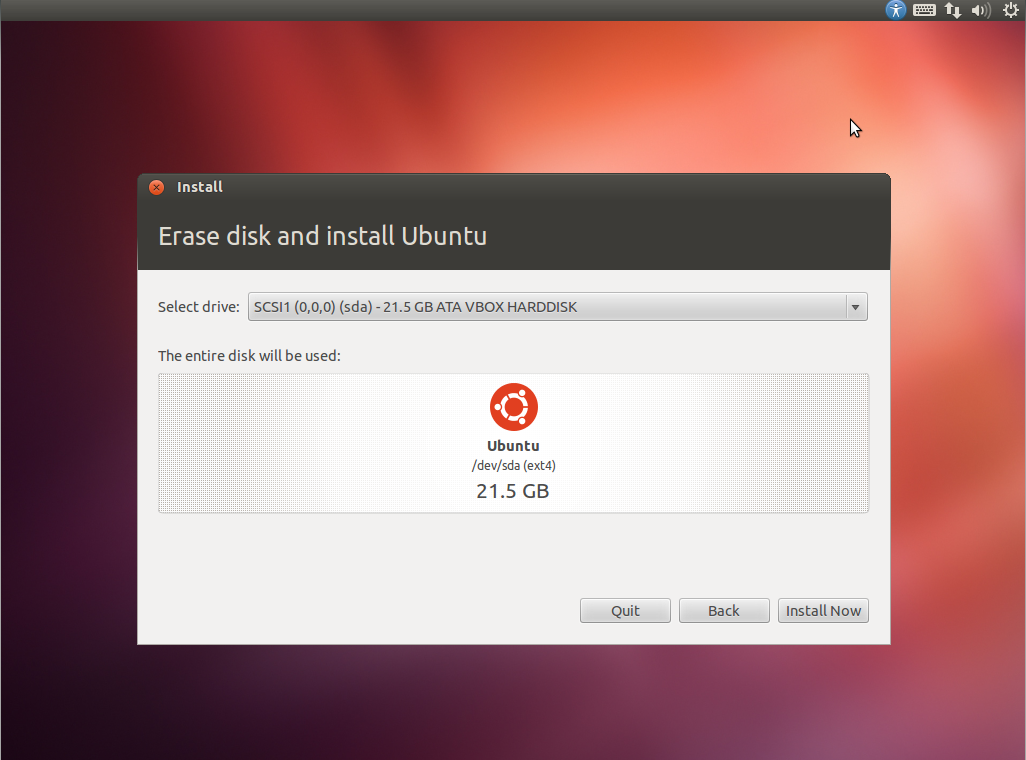
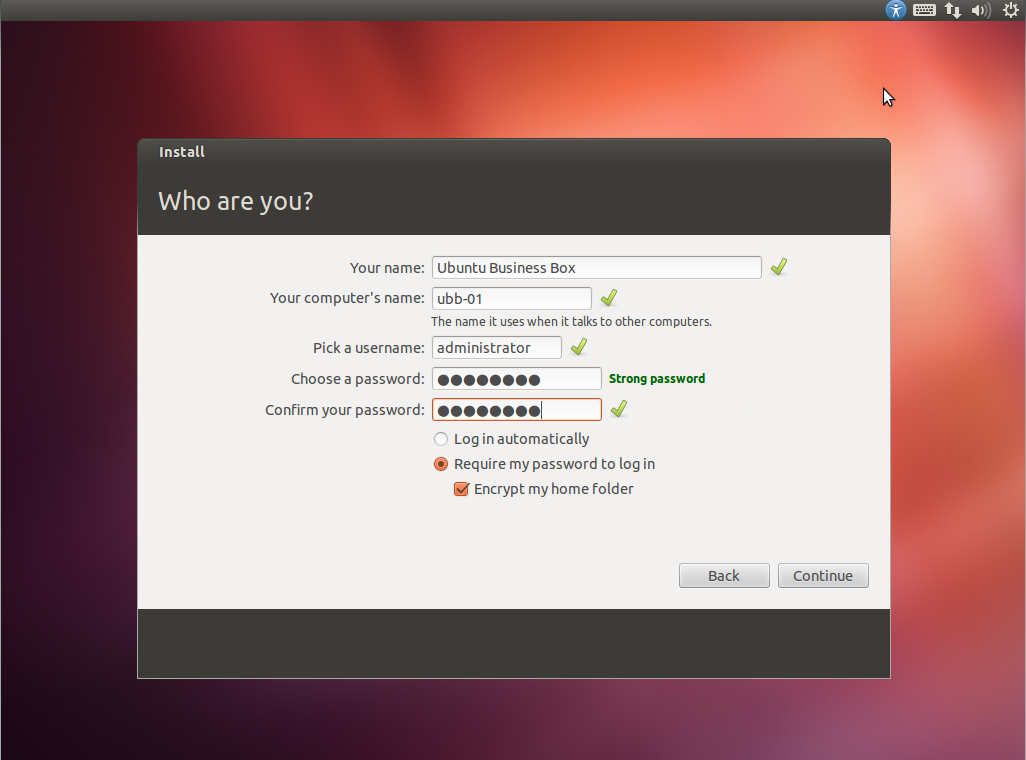
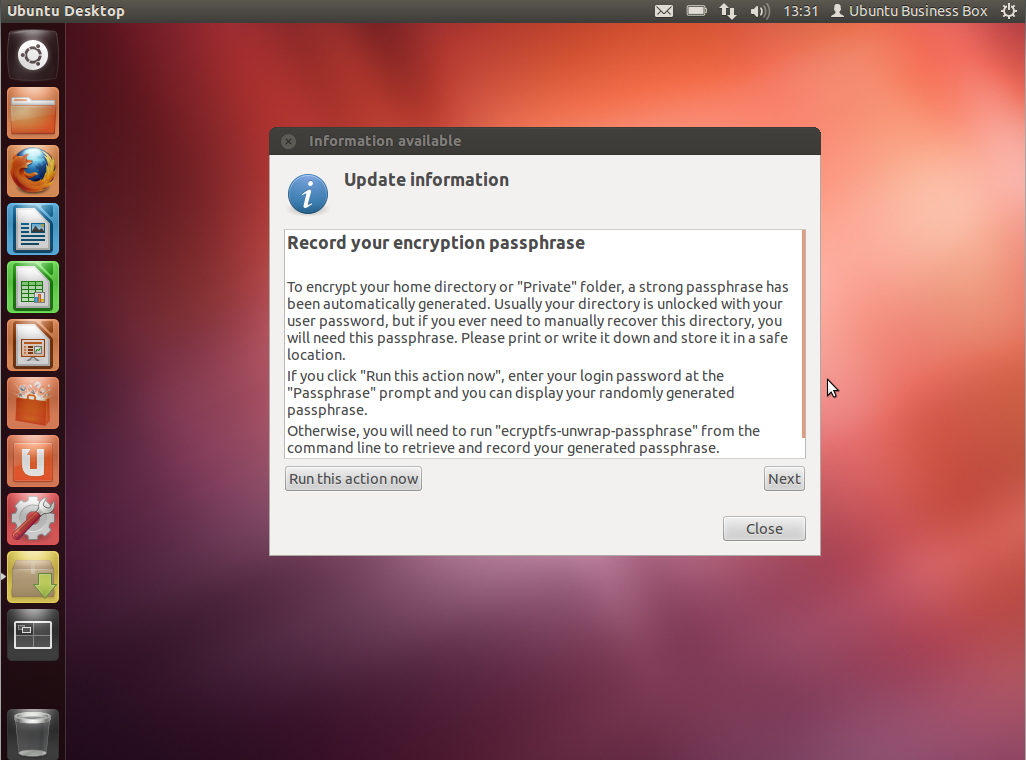
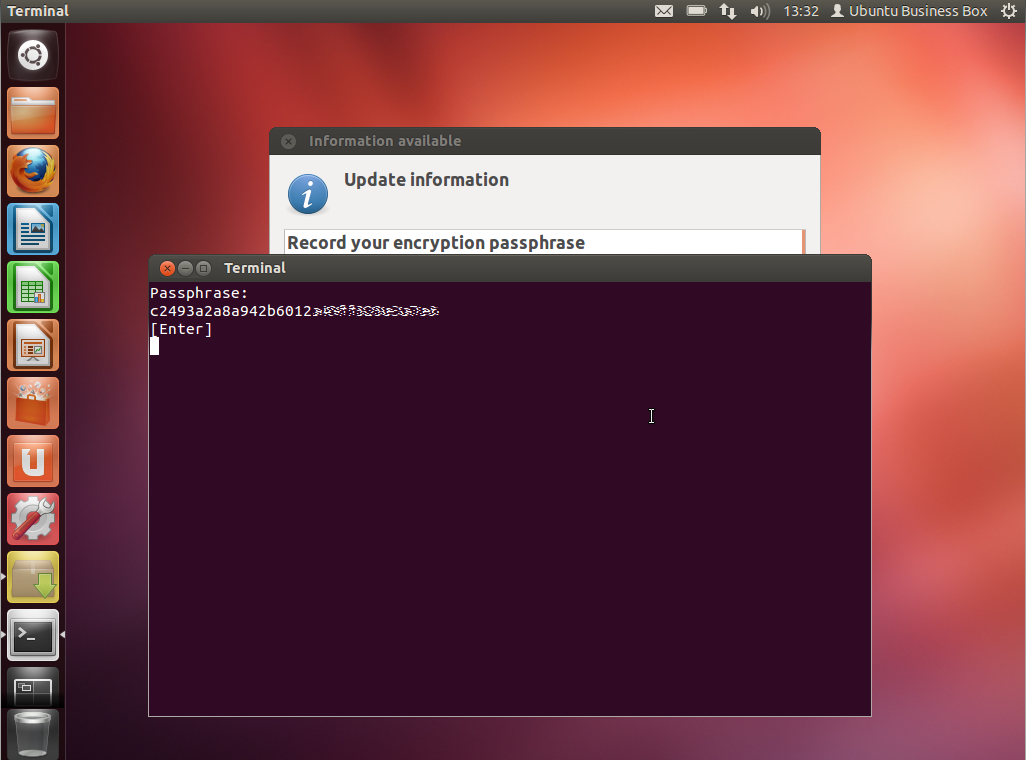
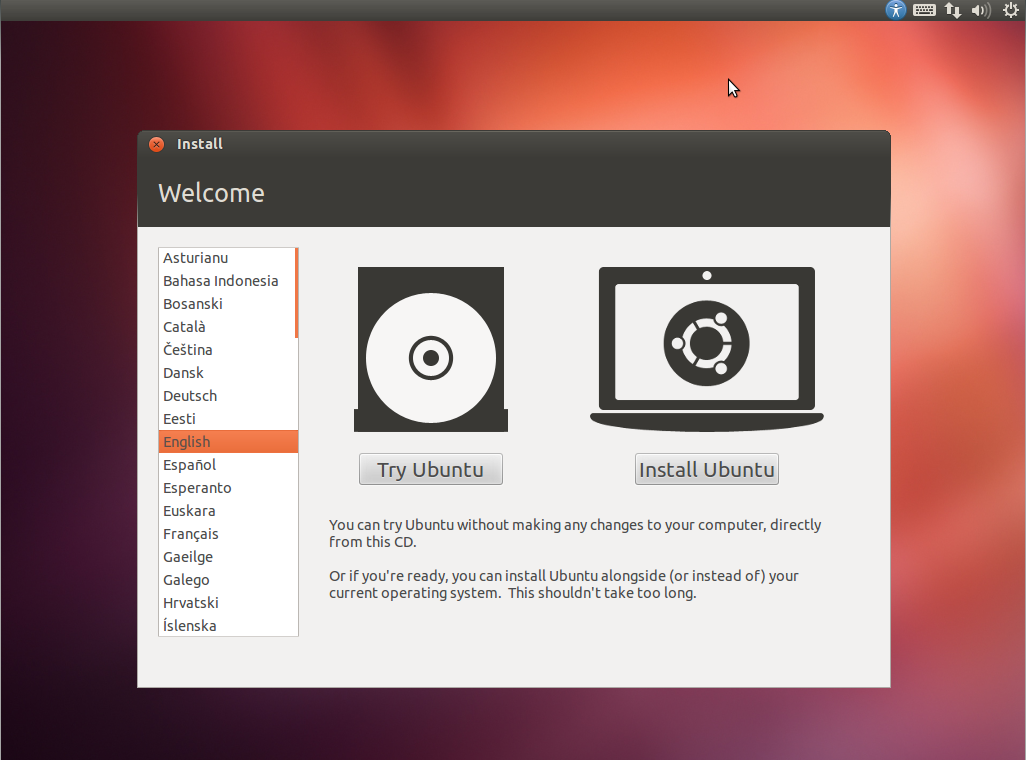
1. Install operating system - Ubuntu 12.04 LTS
- Download Ubuntu 12.04 LTS 32bit or 64bit, Server or Desktop edition. This guide is based on the desktop installation for users not comfortable with command line only.
- Create a bootable USB stick or CD and boot your server computer with the installation as explained on Ubuntu site.
- Once you have booted your computer from the Ubuntu installation USB stick or CD you should see the installation screens below.
- Follow the instructions and adapt as required.
- Encrypting the home folder step is optional but provides an added level of security.
2. Set root password
- Ubuntu has very good reasons why they prefer we do not do this - but this needs to be done at some point or someone else will.
- Open a terminal window and enter :
sudo passwd root
- Enter your new root password.
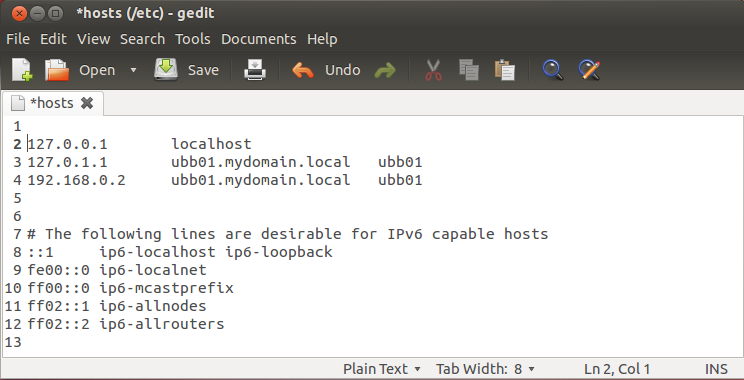
3. Set Hostname (FQDN)
- Select a Fully Qualified Domain Name for your server.
- We will be using ubb01.mydomain.local as our FQDN example in the instructions.
- Add the name and IP to your /etc/hosts file as shown below and save the file:
sudo gedit /etc/hosts
- Then change the hostname file by opening a terminal window and entering:
sudo su
echo "ubb01.mydomain.local" > /etc/hostname
service hostname restart
exit
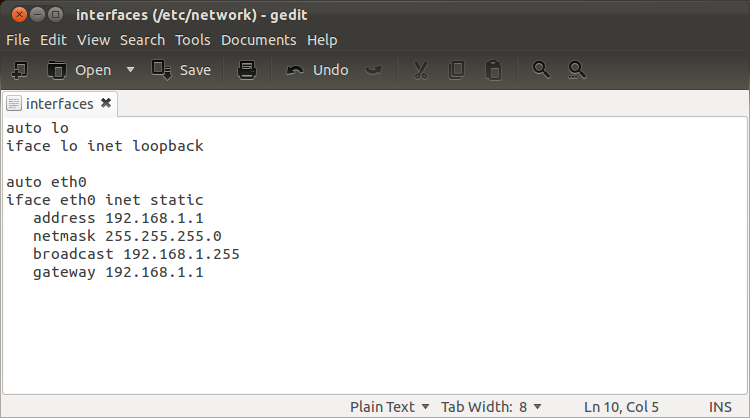
4. Configure Network Interfaces
- Ubuntu has very good reasons why it prefer we do not do this - but this needs to be done at some point or someone else will.
- Open a Terminal Window and enter the following :
sudo gedit /etc/network/interfaces
- Replace the content of the file with the following and save :
# The loopback network interface
auto lo
iface lo inet loopback

# The primary network interface
auto eth0
iface eth0 inet static
 address 192.168.0.2
 netmask 255.255.255.0
 network 192.168.0.0
 broadcast 192.168.0.255
 gateway 192.168.0.1
 dns-nameservers 192.168.0.1, 8.8.8.8

# IPTable rules
post-up iptables-restore < /etc/iptables.up.rules

# The secondary network interface internal
auto eth1
iface eth1 inet static
 address 192.168.1.2
 netmask 255.255.255.0
 network 192.168.1.0
 broadcast 192.168.1.255
- Disable IPv6 or add a static IPv6 to the above if your network supports it.
- Open a Terminal Window and enter the following :
sudo su
echo "net.ipv6.conf.all.disable_ipv6=1" >> /etc/sysctl.conf
echo "net.ipv6.conf.default.disable_ipv6=1" >> /etc/sysctl.conf
echo "net.ipv6.conf.lo.disable_ipv6=1" >> /etc/sysctl.conf
exit
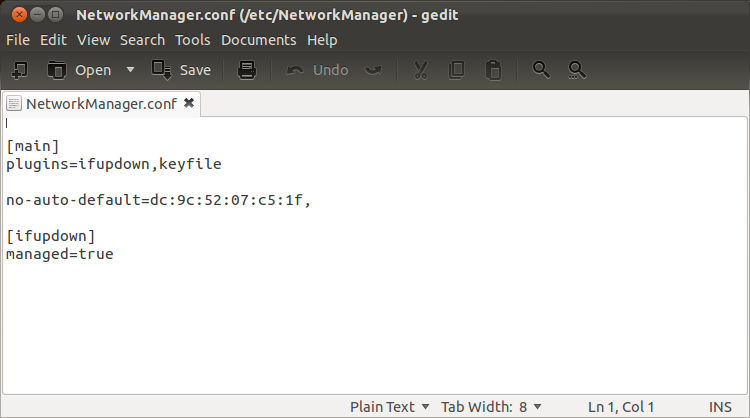
- Remove Network Manager
- Open a Terminal Window and enter the following :
sudo apt-get remove network-manager
5. Edit the DNS configuration - Dnsmasq
- Install Dnsmasq. Open a terminal and enter:
sudo apt-get install dnsmasq
- Edit the Dnsmasq configuration file by opening a terminal window and entering :
sudo gedit /etc/dnsmasq.conf
- Replace the content of the file with the following and save :
# DNS Settings
server=/localnet/192.168.0.2
server=/#/192.168.0.1
server=/#/8.8.8.8
server=/#/8.8.4.4

# Domain Name
domain=mydomain.local

# Server DNS settings... this is required as the server itself will
# not be obtaining it's IP address via DHCP and therefore would
# not be automatically added to the DNS records for forward/reverse
# DNS queries as required by Kerberos

ptr-record=2.0.168.192.in-addr.arpa.,"ubb01.mydomain.local"
address=/ubb01.mydomain.local/192.168.0.2
- NOTE: The setup requires that you have your internet router with a fixed IP address of 192.168.0.1 connected to your LAN Adaptor #1 (eth0) port with a DNS nameserver running on the router providing internet access.
- NOTE: Your outward facing connection is LAN Adaptor #1 (eth0) with IP 192.168.0.2
- NOTE: Your inward facing connection is LAN Adaptor #2 (eth1) with IP 192.168.1.2
6. Reboot and check internet connectivity
- Reboot and after reboot make sure you are connected to the internet.
7. Add Ubuntu Partner Software Repositories and update software
- Make sure that the Ubuntu Partner Repository is active in your /etc/apt/sources.list file and uncomment if needed or add them manually below.
- Open a terminal window and enter :
sudo su
echo "deb http://archive.canonical.com/ubuntu precise partner" >> /etc/apt/sources.list
echo "deb-src http://archive.canonical.com/ubuntu precise partner" >> /etc/apt/sources.list
exit
- Update your software sources and software.
sudo apt-get update && sudo apt-get -y dist-upgrade
- If there were any kernel upgrades reboot your system to complete the installation process before continuing.
8. Install support software
We need to install a bit of supporting software and other essentials. Here goes:
- Install Linux Server Kernel headers if you are working with the Ubuntu Desktop edition.
- Open a terminal window and enter :
sudo apt-get install linux-headers-server linux-image-server linux-server
- Install VIM-NOX to fix VI in Ubuntu - this is optional for command line nerds.
sudo apt-get install vim-nox
- Install OpenSSH Serve and openSSL.
sudo apt-get install openssh-server openssl
- Sync System Clock to internet time server
sudo apt-get install ntp ntpdate
- WebMin PERL and Python essentials
sudo apt-get install perl libnet-ssleay-perl libauthen-pam-perl libpam-runtime libio-pty-perl apt-show-versions python
sudo apt-get install rkhunter chkrootkit
9. Install and configure transparent proxy cache with reporting - Squid | Sarg
- Install Squid.
- Open a Terminal Window and enter the following :
sudo apt-get install -y squid3 ccze sarg calamaris
- Create the cache folder.
- Open a Terminal Window and enter the following :
sudo mkdir /home/cache
sudo chmod 777 /home/cache
sudo chown proxy:proxy /home/cache
- Backup the Squid configuration file.
- Open a Terminal Window and enter the following :
sudo mv /etc/squid3/squid.conf /etc/squid3/squid.conf.origin
sudo chmod a-w /etc/squid3/squid.conf.origin
- Edit the Squid configuration file by opening a terminal window and entering :
sudo gedit /etc/squid3/squid.conf
- Replace the content of the file with the following, adapt according to your network and acl options and save :
#
# NCSA - ncsa_auth : auth_param section
# uncomment the line below to enable - require username and passwrd authentication
#auth_param basic program /usr/lib/squid3/ncsa_auth /etc/squid3/squid_passwd
#
# ACCESS CONTROLS OPTIONS
# ====================
#
acl QUERY urlpath_regex -i cgi-bin ? .php$ .asp$ .shtml$ .cfm$ .cfml$ .phtml$ .php3$ localhost
acl all src
acl localnet src 192.168.1.0/24 # Your internal network here
acl localhost src 127.0.0.1/32
acl safeports port 21 70 80 210 280 443 488 563 591 631 777 901 81 3128 1025-65535
acl sslports port 443 563 81 2087 10000
acl manager proto cache_object
acl purge method PURGE
acl connect method CONNECT
acl ym dstdomain .messenger.yahoo.com .psq.yahoo.com
acl ym dstdomain .us.il.yimg.com .msg.yahoo.com .pager.yahoo.com
acl ym dstdomain .rareedge.com .ytunnelpro.com .chat.yahoo.com
acl ym dstdomain .voice.yahoo.com
acl social dstdomain .facebook.com .twitter.com .skype.com
acl ymregex url_regex yupdater.yim ymsgr myspaceim

# NCSA - uncomment the following two lines to enable username and password authentication
#acl ncsa_users proxy_auth REQUIRED
#http_access allow ncsa_users

# HTTP Access
http_access deny ym
http_access deny ymregex
http_access deny social
http_access allow manager localhost
http_access deny manager
http_access allow purge localhost
http_access deny purge
http_access deny !safeports
http_access deny CONNECT !sslports
http_access allow localhost
http_access allow localnet
http_access deny all
#
# NETWORK OPTIONS
# —————
#
# NCSA - remove the word 'transparent' from the line below to enable username and password authentication
http_port 3128 transparent
#
# OPTIONS WHICH AFFECT THE CACHE SIZE
# ==============================
#
cache_mem 8 MB
maximum_object_size_in_memory 32 KB
memory_replacement_policy heap GDSF
cache_replacement_policy heap LFUDA
cache_dir aufs /home/cache 10000 14 256
maximum_object_size 128000 KB
cache_swap_low 95
cache_swap_high 99
#
# LOGFILE PATHNAMES AND CACHE DIRECTORIES
# ==================================
#
access_log /var/log/squid3/access.log
cache_log /cache/cache.log
#cache_log /dev/null
cache_store_log none
logfile_rotate 5
log_icp_queries off
#
# OPTIONS FOR TUNING THE CACHE
# ========================
#
cache deny QUERY
refresh_pattern ^ftp: 1440 20% 10080 reload-into-ims
refresh_pattern ^gopher: 1440 0% 1440
refresh_pattern -i .(gif|png|jp?g|ico|bmp|tiff?)$ 10080 95% 43200 override-expire override-lastmod reload-into-ims ignore-no-cache ignore-private
refresh_pattern -i .(rpm|cab|deb|exe|msi|msu|zip|tar|xz|bz|bz2|lzma|gz|tgz|rar|bin|7z|doc?|xls?|ppt?|pdf|nth|psd|sis)$ 10080 90% 43200 override-expire override-lastmod reload-into-ims ignore-no-cache ignore-private
refresh_pattern -i .(avi|iso|wav|mid|mp?|mpeg|mov|3gp|wm?|swf|flv|x-flv|axd)$ 43200 95% 432000 override-expire override-lastmod reload-into-ims ignore-no-cache ignore-private
refresh_pattern -i .(html|htm|css|js)$ 1440 75% 40320
refresh_pattern -i .index.(html|htm)$ 0 75% 10080
refresh_pattern -i (/cgi-bin/|?) 0 0% 0
refresh_pattern . 1440 90% 10080
#
quick_abort_min 0 KB
quick_abort_max 0 KB
quick_abort_pct 100
store_avg_object_size 13 KB
#
# HTTP OPTIONS
# ===========
vary_ignore_expire on
#
# ANONIMITY OPTIONS
# ===============
#
request_header_access From deny all
request_header_access Server deny all
request_header_access Link deny all
request_header_access Via deny all
request_header_access X-Forwarded-For deny all
#
# TIMEOUTS
# =======
#
forward_timeout 240 second
connect_timeout 30 second
peer_connect_timeout 5 second
read_timeout 600 second
request_timeout 60 second
shutdown_lifetime 10 second
#
# ADMINISTRATIVE PARAMETERS
# =====================
#
cache_mgr ninja
cache_effective_user proxy
cache_effective_group proxy
httpd_suppress_version_string on
visible_hostname ubb01.mydomain.local
#
ftp_list_width 32
ftp_passive on
ftp_sanitycheck on
#
# DNS OPTIONS
# ==========
#
dns_timeout 10 seconds
dns_nameservers 192.168.0.1 8.8.8.8 8.8.4.4 # DNS Server
#
# MISCELLANEOUS
# ===========
#
memory_pools off
client_db off
reload_into_ims on
coredump_dir /cache
pipeline_prefetch on
offline_mode off
#
#Marking ZPH
#==========
zph_mode tos
zph_local 0x04
zph_parent 0
zph_option 136
### END CONFIGURATION ###
- Create SWAP directory for Squid.
- Open a Terminal Window and enter the following :
squid3 -z
- Configure IP Forwarding.
- Open a Terminal Window and enter the following :
sudo su
echo "net.ipv4.ip_forward=1" >> /etc/sysctl.conf
echo "net.ipv6.conf.all.forwarding=1" >> /etc/sysctl.conf
exit
- Setup IPtables rules.
- Open a Terminal Window and enter the following :
sudo gedit /etc/iptables.up.rules
- Add the following to the end of the file and save.
*nat
-A PREROUTING -i eth1 -p tcp -m tcp --dport 80 -j DNAT --to-destination 192.168.1.2:3128
-A PREROUTING -i eth1 -p tcp -m tcp --dport 80 -j REDIRECT --to-ports 3128
-A POSTROUTING -s 192.168.1.0/24 -o eth0 -j MASQUERADE
COMMIT
- Setup NAT routing at startup.
- Open a editor and add the following :
sudo gedit /etc/rc.local
- Add the following to the /etc/rc.local file BEFORE the exit line
iptables -t nat -A POSTROUTING -s 192.168.1.0/24 -o eth0 -j MASQUERADE
- Fix Sarg log file location issue.
- Open a Terminal Window and enter the following or change the link in Webmin module config :
sudo ln -s /var/log/squid3 /var/log/squid
- Optional : Username and Password Access Control ( *optional steps from this great Squid guide)
- *You can configure squid to prompt users for a username and password using ncsa_auth that reads any NCSA-compliant encrypted password file. You can use the htpasswd program that comes installed with Apache to create your passwords.
sudo touch /etc/squid3/squid_passwd
sudo chmod o+r /etc/squid3/squid_passwd
- *Then uncomment the lines in the squid.conf file above to enable NCSA username and password authentication. (see comments in squid.conf file below. Note there are several options to enable.)
- *To add new users to squid use the htpasswd command (change administrator below for the username) or use Webmin to add new proxy users:
sudo htpasswd /etc/squid3/squid_passwd administrator
- *NOTE: You cannot use the NCSA username and password authentication in combination with a transparent proxy. So if you do select this option you will need to manualy add 192.168.1.2 (the IP of your internal network adaptor eth1) port 3128 as the http proxy to each client machine on the network. This is why this option is disabled by default in this setup.
- Restart Squid and Networking.
- Open a Terminal Window and enter the following :
sudo service squid3 stop
sudo service squid3 start
sudo service networking restart
- Optional : Install SquidGuard Blacklist Web Filter Plugin for Squid with this excellent guide by nixCraft
- Optional : Install DansGuardian Dynamic Web Content Filter Plugin for Squid. "It filters the actual content of pages based on many methods including phrase matching, PICS filtering and URL filtering. It does not purely filter based on a banned list of sites like lesser totally commercial filters". To install open a terminal window and enter:
sudo apt-get install dansguardian
10. Install and configure DHCP Server - ISC DHCP
- Install a DHCP server to act on the internal network and assign IP, cache and routing information dynamically to users on the network.
- You could assign static IP addresses on the network as well but then you would need to manually configure the proxy and gateway information on each computer or network device.
- Open a Terminal Window and enter the following :
sudo apt-get install isc-dhcp-server
- Then we need to edit the DHCP configuration settings.
sudo gedit /etc/dhcp/dhcpd.conf
- Add the following to the end of the file and save.
- Make sure to change your domain name details as shown in blue below.
- Also add other DNS nameservers for your local service provider if needed.
# UBB DHCP settings

subnet 192.168.1.0 netmask 255.255.255.0 {
  range 192.168.1.20 192.168.1.250;
  option domain-name "ubb01.mydomain.local";
  option routers 192.168.1.2;
  option domain-name-servers 192.168.1.2, 8.8.8.8, 196.43.1.11;
  option netbios-name-servers 192.168.1.2;
  option subnet-mask 255.255.255.0;
  option broadcast-address 192.168.1.255;
  default-lease-time 600;
  max-lease-time 7200;
}
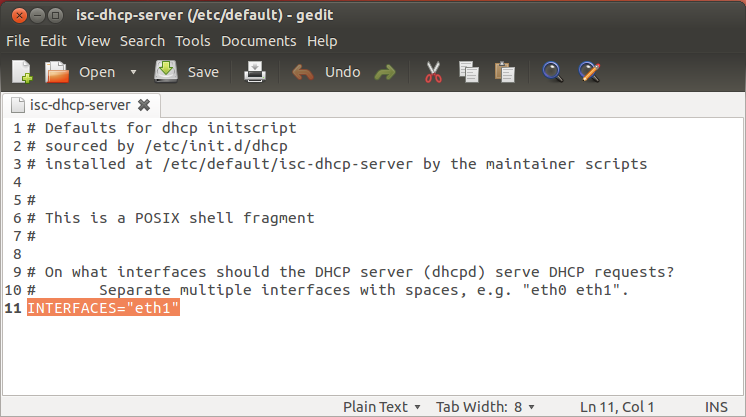
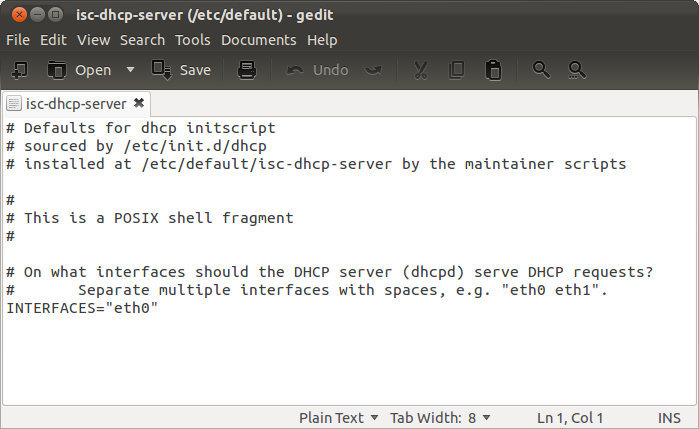
- Select network adaptor for DHCP server.
- Open a Terminal Window and enter the following :
sudo gedit /etc/default/isc-dhcp-server
- Change the value of INTERFACES to INTERFACES="eth1" as shown below and save.
- Fix wrong/missing DHCP links in Webmin (after step 12):
- DHCP Server config file : /etc/dhcp/dhcpd.conf
- DHCP Server executable : /usr/sbin/dhcpd
- Command to start/apply/stop DHCP server : /etc/init.d/isc-dhcp-server (start/stop/restart)
- Path to DHCP server PID file : /var/run/dhcpd.pid
- DHCP server lease file : /var/lib/dhcp/dhcpd.leases
- Restart DHCP server.
- Open a Terminal Window and enter the following :
sudo service isc-dhcp-server restart
11. Install and configure Samba
- Install Samba by opening a terminal window and entering:
sudo apt-get install samba samba-common libpam-smbpass winbind smbclient libcups2
- We will be using Samba as a standalone server and set-up as per the brilliant instructions from HowtoForge
- Next we need to edit the /etc/samba/smb.conf file to uncomment security = user. You could use sed and these three lines to do the search and replace via the command line. Double check as the spaces in the script could change in future config files.
sudo sed 's/#   security = user/security = user/g' /etc/samba/smb.conf > /tmp/.smb.conf
sudo mv /etc/samba/smb.conf /etc/samba/smb.conf.backup
sudo mv /tmp/.smb.conf /etc/samba/smb.conf
- Create directories for sharing
sudo mkdir -p /home/shares/allusers
sudo chown -R root:users /home/shares/allusers/
sudo chmod -R ug+rwx,o+rx-w /home/shares/allusers/
sudo gedit /etc/samba/smb.conf
- Add the following and save
[allusers]
  comment = All Users
  path = /home/shares/allusers
  valid users = @users
  force group = users
  create mask = 0660
  directory mask = 0771
  writable = yes

[homes]
   comment = Home Directories
   browseable = no
   valid users = %S
   writable = yes
   create mask = 0700
   directory mask = 0700
sudo service smbd restart
- Add your admin user to samba users to access allusers folder. We will add administrator to the Samba share group "users" for this example.
sudo usermod -aG users administrator
- Finally set a Samba password for administrator
sudo smbpasswd -a administrator
- You should be able to access the allusers folder and login from a client machine with your administrator username and password at his point by using
smb://ubb01/allusers/
If you have completed step 13. and 14. each user will be able to access their own private home folder using
smb://ubb01/<username>
12. Install Webmin
- Download and install the support software and latest version of Webmin directly from the website with the commands below .
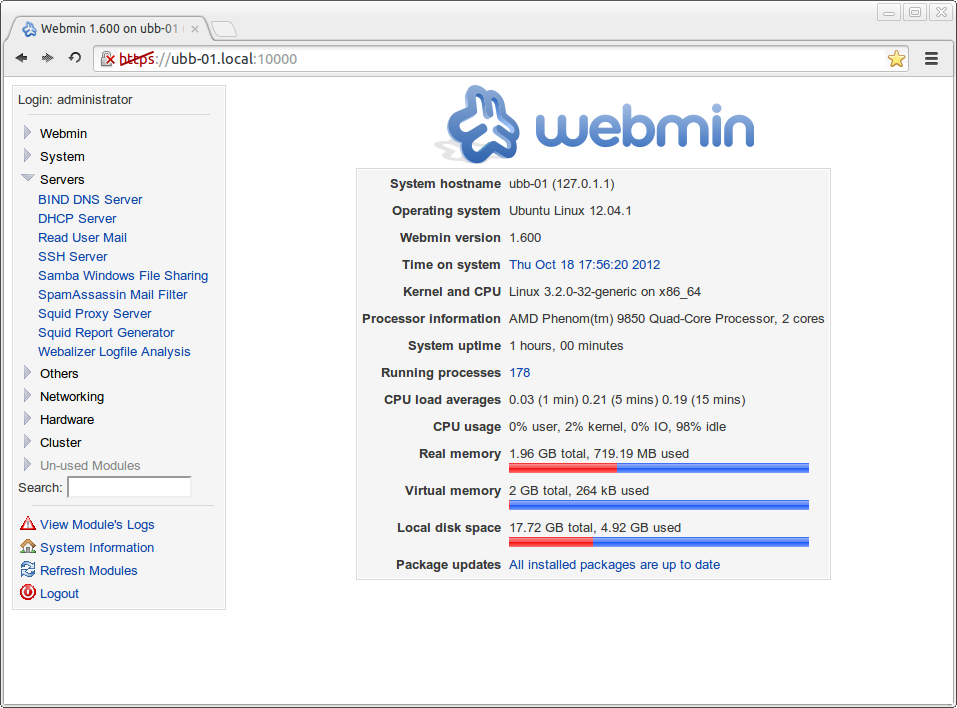
- After installation you will be able to assess webmin via any browser on the network via https://192.168.0.2:10000 orhttps://ubb01.mydomain.local:10000
- Open a Terminal Window and enter the following :
sudo apt-get install webalizer smartmontools vlogger awstats geoip-database
sudo rm /etc/cron.d/awstats
- Finally download and install Webmin
cd /tmp
sudo wget http://www.webmin.com/download/deb/webmin-current.deb
sudo dpkg --install webmin-current.deb
sudo rm webmin-current.deb
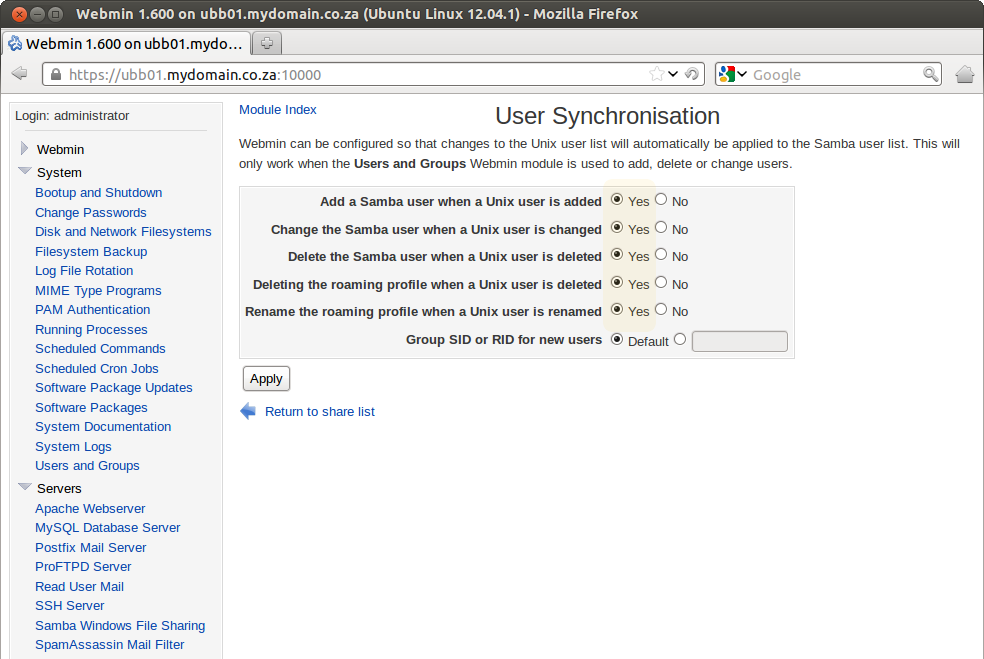
13. Synchronise Samba users and System users (optional)
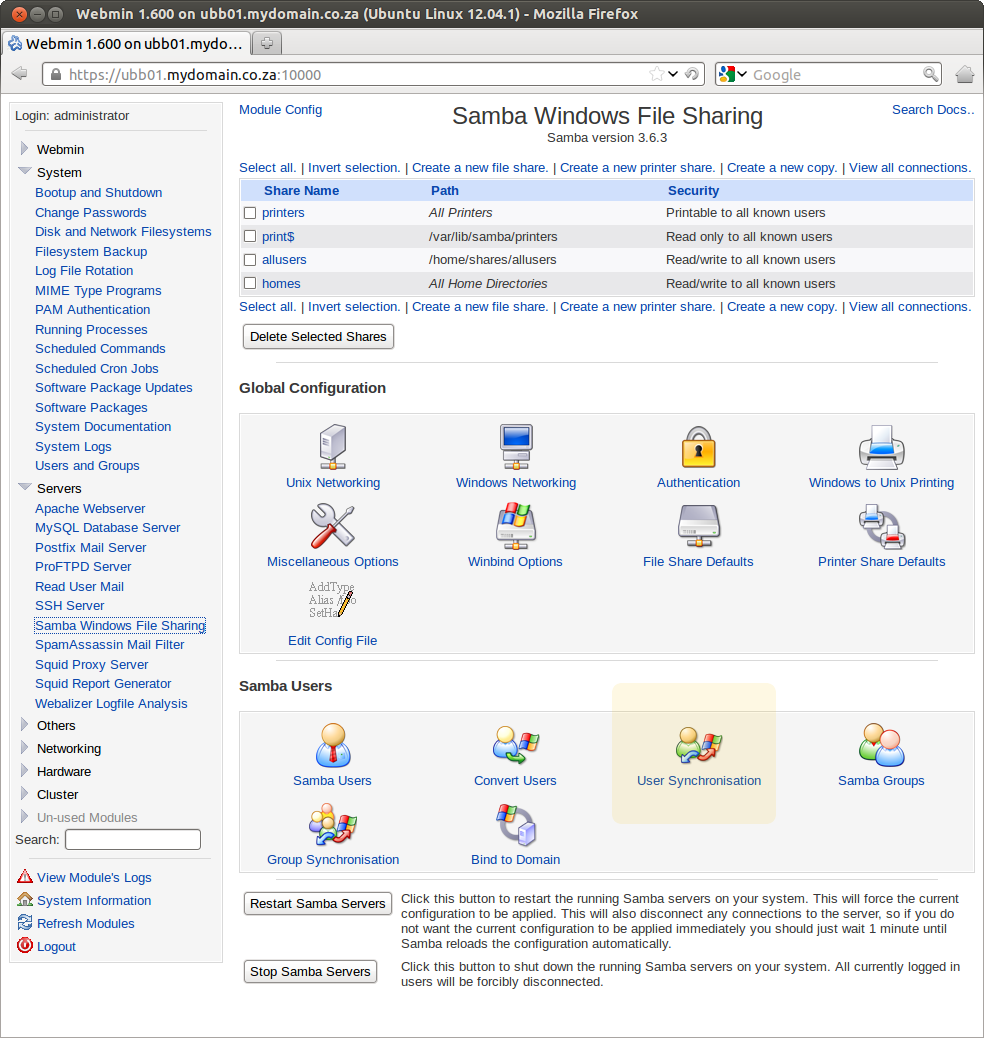
- To synchronise the Samba and System users we can use Webmin to manage this so every time you add a new system user a new samba user is created automatically.
- Open the Webmin and navigate to Servers > Samba Windows File Sharing
- Click on User Syncronisation
- Set everything to Yes and click Apply.
- You will need to restart the Samba server on the main Webmin Samba page above before new settings will take effect.
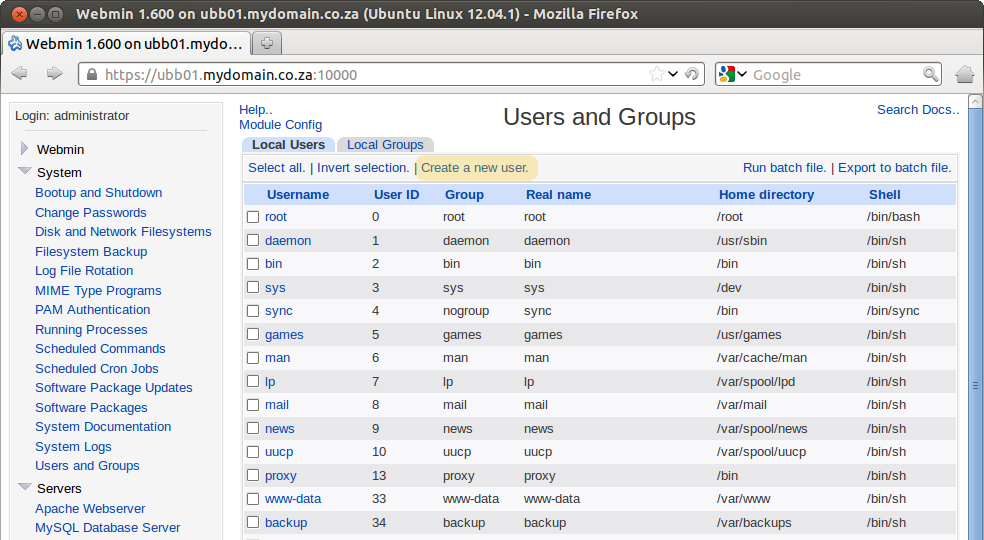
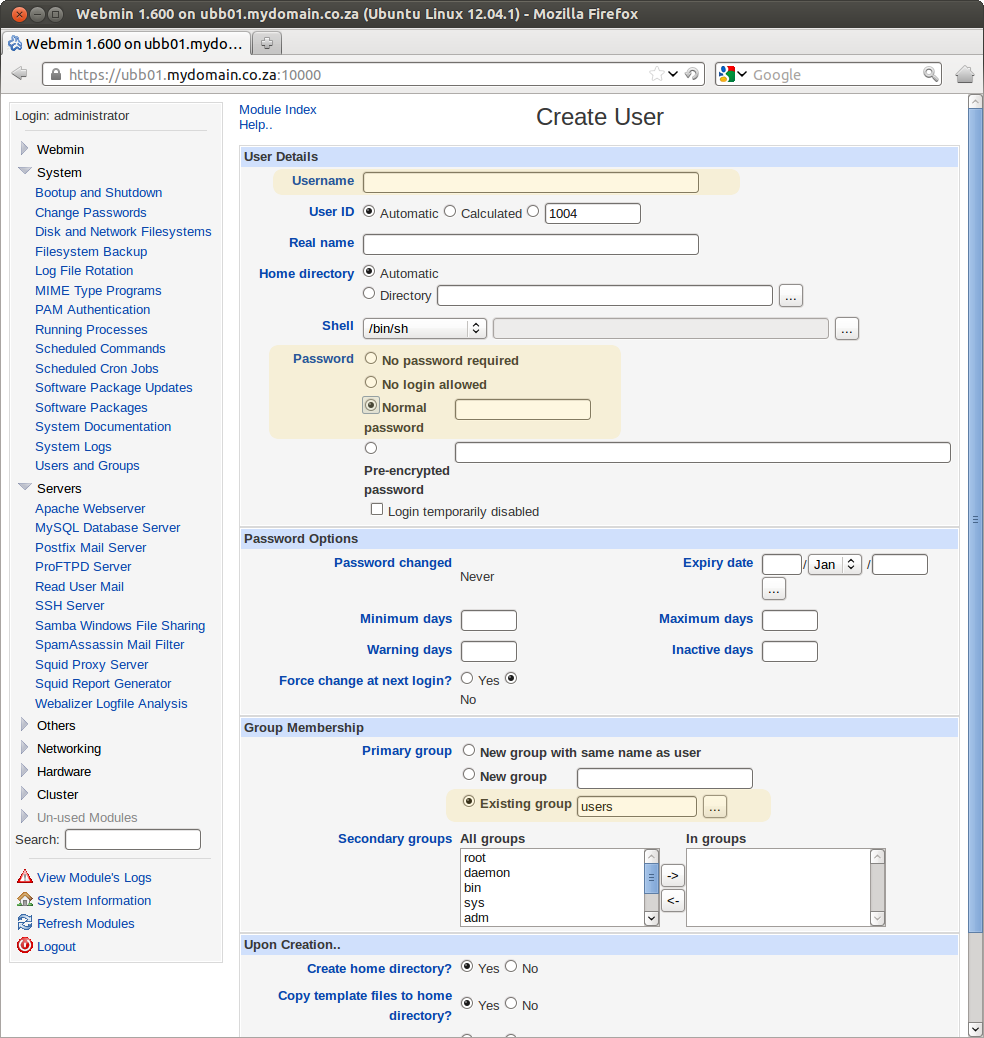
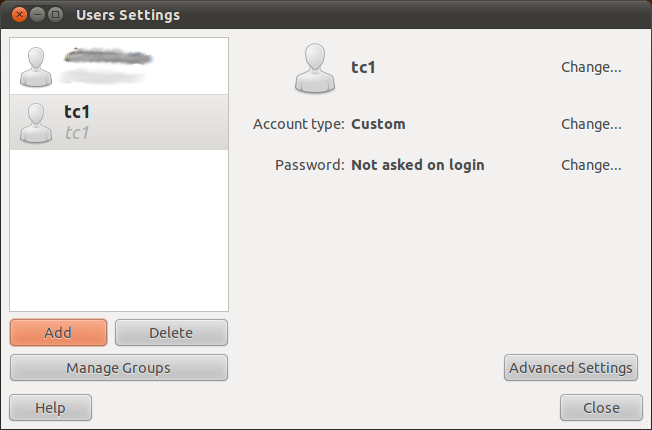
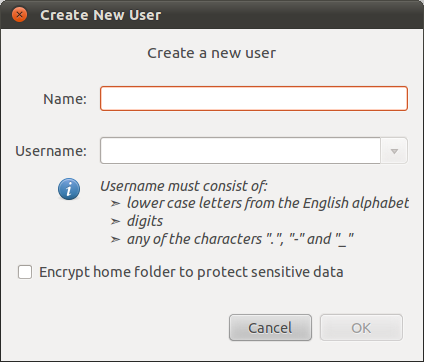
14. Adding new system users.
- Open the Webmin and navigate to System > Users and Groups
- Click on Create New User
- New users on the system will be able to access their own private home folders on the server as well as the allusers shared folder via samba if you followed step 13. above.
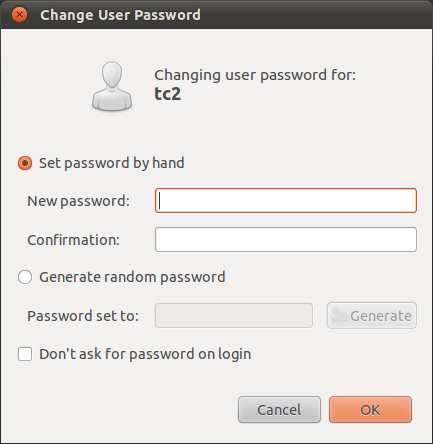
- You need to enter new Username,
- Set the password to "Normal Password" and enter a user password, also make sure that the user belongs to the "users"group or the user will not be able to login to any Samba share.
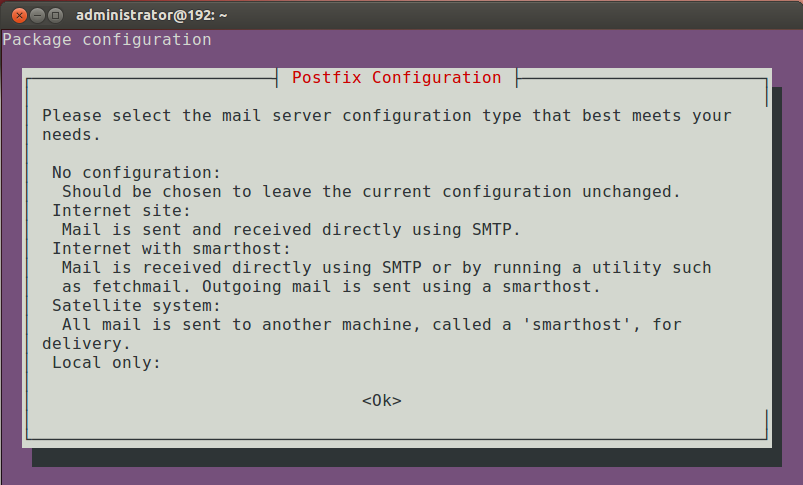
15. Install Email and Database Server - Postfix | Courier | MySQL
Install the following programs and answer as follow to the questions asked:
sudo apt-get install postfix postfix-mysql postfix-doc mysql-client mysql-server courier-authdaemon courier-authlib-mysql courier-pop courier-pop-ssl courier-imap courier-imap-ssl libsasl2-2 libsasl2-modules libsasl2-modules-sql sasl2-bin libpam-mysql openssl getmail4 binutils maildrop
Use TAB key and ENTER to make selections. Answer the questions shown below.
- New password for the MySQL "root" user: ENTER YOUR ROOT PASSWORD
- General type of mail configuration: Internet Site
- Create directories for web-based administration: No
- System Mail Name: ubb01.mydomain.local (Enter Your FQDN Name from part 1)
After installation we need to change a few settings.
- Comment out bind-address in /etc/mysql/my.cnf with a text editor or open a terminal and do it with sed:
sudo sed 's/bind-address/#bind-address/g' /etc/mysql/my.cnf > /tmp/.my.conf
sudo mv /etc/mysql/my.cnf /etc/mysql/my.cnf.backup
sudo mv /tmp/.my.conf /etc/mysql/my.cnf
sudo service mysql restart
- Set Mail Domain name and Fix Courier SSL certificates by first deleting the old default certificates.
cd /etc/courier
sudo rm -f /etc/courier/imapd.pem
sudo rm -f /etc/courier/pop3d.pem
- Then change the mail host name
sudo sed 's/CN=localhost/CN=ubb01.mydomain.local/g' /etc/courier/imapd.cnf > /tmp/.imapd.conf
sudo mv /etc/courier/imapd.cnf /etc/courier/imapd.cnf.backup
sudo mv /tmp/.imapd.conf /etc/courier/imapd.cnf
sudo sed 's/CN=localhost/CN=ubb01.mydomain.local/g' /etc/courier/pop3d.cnf > /tmp/.pop3d.conf
sudo mv /etc/courier/pop3d.cnf /etc/courier/pop3d.cnf.backup
sudo mv /tmp/.pop3d.conf /etc/courier/pop3d.cnf
- Then create new mail SSL certificates
sudo su
mkimapdcert
mkpop3dcert
service courier-imap-ssl restart
service courier-pop-ssl restart
exit
16. Install AntiVirus and AntiSpam
Open a terminal window and enter:
sudo apt-get install amavisd-new spamassassin clamav clamav-daemon zoo unzip bzip2 arj nomarch lzop cabextract apt-listchanges libnet-ldap-perl libauthen-sasl-perl clamav-docs daemon libio-string-perl libio-socket-ssl-perl libnet-ident-perl zip libnet-dns-perl
- We can stop spamassassin as amavisd loads this internally.
- Open a Terminal Window and enter the following :
sudo service spamassassin stop
sudo update-rc.d -f spamassassin remove
17. Install Webserver - Apache | PHP | PHPMyAdmin
- Open a terminal window and enter:
sudo apt-get install apache2 apache2.2-common apache2-doc apache2-mpm-prefork apache2-utils libexpat1 ssl-cert libapache2-mod-php5 php5 php5-common php5-gd php5-mysql php5-imap phpmyadmin php5-cli php5-cgi libapache2-mod-fcgid apache2-suexec php-pear php-auth php5-mcrypt mcrypt php5-imagick imagemagick libapache2-mod-suphp libruby libapache2-mod-ruby php5-dev php-pear make
You will be asked the following questions:
- Web server to reconfigure automatically: apache2
- Configure database for phpmyadmin with dbconfig-common: No
- Then open a Terminal Window and enter the following :
sudo a2enmod suexec rewrite ssl actions include dav_fs dav auth_digest proxy proxy_http headers
sudo service apache2 restart
18. Install FTP sever - ProFTP
- Open a terminal windows and enter:
sudo apt-get install proftpd proftpd-mod-mysql openssl
- You will be asked which mode to run ProFTP - Run proftpd: Standalone
- Edit the file /etc/proftpd/proftpd.conf
sudo gedit /etc/proftpd/proftpd.conf
- Add the following three lines and save:
Include /etc/proftpd/tls.conf
DefaultRoot ~
ServerIdent on "FTP Server ready."
- Create SSL Certificate for TLS FTP support
sudo mkdir /etc/proftpd/ssl
sudo openssl req -new -x509 -days 365 -nodes -out /etc/proftpd/ssl/proftpd.cert.pem -keyout /etc/proftpd/ssl/proftpd.key.pem
- The edit the /etc/proftpd/tls.conf file and add this to the end and save:
<IfModule mod_tls.c>
TLSEngine                  on
TLSLog                     /var/log/proftpd/tls.log
TLSProtocol                SSLv23
TLSOptions                 NoCertRequest AllowClientRenegotiations
TLSRSACertificateFile      /etc/proftpd/ssl/proftpd.cert.pem
TLSRSACertificateKeyFile   /etc/proftpd/ssl/proftpd.key.pem
TLSVerifyClient            off
TLSRequired                off
</IfModule>
sudo service proftpd restart
19. Enable and configure Firewall - ufw
- ufw firewall is installed by default on Ubuntu 12.04.
- gufw is a handy GUI frontends for ufw to manage the firewall.
- Install on your system by opening a terminal windows and enter:
sudo apt-get install ufw gufw
- Then enabe ufw. Open a terminal window and enter :
sudo ufw enable
- Then open ports for various servers and services running on the server.
- Enter one at a time from a terminal window to add the rules, or use gufw to open the ports :
sudo ufw allow 21/tcp    # ftp
sudo ufw allow 22/tcp    # ssh
sudo ufw allow 25/tcp    # smtp
sudo ufw allow 53/tcp    # domain
sudo ufw allow 80/tcp    # http
sudo ufw allow 110/tcp   # pop3
sudo ufw allow 139/tcp   # netbios-ssn samba
sudo ufw allow 143/tcp   # imap
sudo ufw allow 443/tcp   # https
sudo ufw allow 445/tcp   # microsoft-ds samba
sudo ufw allow 631/tcp   # cups
sudo ufw allow 993/tcp   # imaps
sudo ufw allow 995/tcp   # pop3s
sudo ufw allow 3128/tcp  # squid-http
sudo ufw allow 3306/tcp  # mysql
sudo ufw allow 4190/tcp  # SOGo sieve
sudo ufw allow 5900/tcp  # x11vnc
sudo ufw allow 8800/tcp  # DAV
sudo ufw allow 10000/tcp # webmin
sudo ufw allow 10024/tcp # smtp amavis
sudo ufw allow 11211/tcp # memcached
sudo ufw allow 20000/tcp # http-proxy
- After reboot make sure that ufw is loaded. Open a terminal window and enter :
sudo ufw status
20. Install Groupware Email Contacts and Calander - SOGo
- SOGo is a very impressive open source groupware project, with many features and options to enable mail, contact and calendar sharing support.
- Complete setup of SOGo currently falls beyond the scope of this guide due to the vast configuration options available.
- The installation instructions presented here are very specific for using MySQL as database for SOGo and as an User Source.
- Complete documentation available on the SOGo website. And this good SOGo Debian Wiki guide which these instructions are based on.
- Start by adding the software source and install. Open a terminal window and enter:
sudo apt-key adv --keyserver keys.gnupg.net --recv-key 0x810273C4
sudo su
echo "deb http://inverse.ca/ubuntu precise precise" >> /etc/apt/sources.list
exit
sudo apt-get update
sudo apt-get install sogo sope4.9-gdl1-mysql memcached rpl
- Ignore all installation errors and fix some things with the commands below:
sudo rpl 'SHOWWARNING=true' 'SHOWWARNING=false' /etc/tmpreaper.conf # suppress tmpreaper warnings
sudo rpl '127.0.0.1' localhost /etc/memcached.conf # Fix IPv6 errors
sudo service mysql restart
sudo service memcached restart
- Setup the SOGo MySQL database and add some demo users. Change sogopasswd for your sogo user password:
sudo mysql -u root -p mysql
mysql> CREATE DATABASE `sogo` CHARACTER SET='utf8';
mysql> CREATE USER 'sogo'@'localhost' IDENTIFIED BY 'sogopasswd';
mysql> GRANT ALL PRIVILEGES ON `sogo`.* TO 'sogo'@'localhost' WITH GRANT OPTION;
mysql> USE sogo;
mysql> CREATE TABLE sogo_users (c_uid VARCHAR(60) PRIMARY KEY, c_name VARCHAR(60), c_password VARCHAR(32), c_cn VARCHAR(128), mail VARCHAR(128));
mysql> INSERT INTO sogo_users VALUES ('paul', 'paul', MD5('zxc'), 'Paul Example', 'paul@mydomain.com');
mysql> INSERT INTO sogo_users VALUES ('piet', 'piet', MD5('zxc'), 'Piet Jansen', 'piet@mydomain.com');
mysql> FLUSH PRIVILEGES;
mysql> quit
sudo a2enmod proxy
sudo a2enmod proxy_http
sudo a2enmod headers
sudo a2enmod rewrite
sudo service apache2 restart
- Create the SOGo Configuration File changing details according to your setup.
- After entering the configuration settings below the complete SOGo configuration file, is located in/home/sogo/GNUstep/Defaults/.GNUstepDefaults
sudo su sogo
defaults write sogod SOGoTimeZone "Africa/Johannesburg"
defaults write sogod SOGoMailDomain "mydomain.local"
defaults write sogod SOGoLanguage English
defaults write sogod SOGoAppointmentSendEMailNotifications YES
defaults write sogod SOGoFoldersSendEMailNotifications YES
defaults write sogod SOGoACLsSendEMailNotifications YES
defaults write sogod SOGoLoginModule Calendar
defaults write sogod SOGoSieveScriptsEnabled YES
# sometimes Sieve is running on port 2000, port 4190 is relative new:
defaults write sogod SOGoSieveServer sieve://localhost:4190
defaults write sogod SOGoVacationEnabled YES
defaults write sogod SOGoMailMessageCheck every_5_minutes
defaults write sogod SOGoFirstDayOfWeek 1
defaults write sogod SOGoSuperUsernames '( "admin" )'
# MySQL defaults
defaults write sogod OCSFolderInfoURL "mysql://sogo:sogopasswd@127.0.0.1:3306/sogo/sogo_folder_info"
defaults write sogod SOGoProfileURL "mysql://sogo:sogopasswd@127.0.0.1:3306/sogo/sogo_user_profile"
defaults write sogod OCSSessionsFolderURL "mysql://sogo:sogopasswd@127.0.0.1:3306/sogo/sogo_sessions_folder"
# Set MySQL authentication Usersources
defaults write sogod SOGoUserSources '({canAuthenticate = YES;
  displayName = "SOGo Users";
  id = users;
  isAddressBook = YES;
  type = sql;
  userPasswordAlgorithm = md5;
  viewURL ="mysql://sogo:sogopasswd@127.0.0.1:3306/sogo/sogo_users";
})'
# Use SMTP
defaults write sogod SOGoMailingMechanism smtp
defaults write sogod SOGoSMTPServer localhost

#IMAP config
defaults write sogod SOGoDraftsFolderName Drafts
defaults write sogod SOGoSentFolderName Sent
defaults write sogod SOGoTrashFolderName Trash
defaults write sogod SOGoIMAPServer localhost

exit
sudo service sogo restart
- Create new Virtual Host for SOGo and remove SOGo.conf
sudo mv /etc/apache2/conf.d/SOGo.conf /etc/apache2/conf.d/SOGo.conf-backup
sudo su
echo "# disabled" >> /etc/apache2/conf.d/SOGo.conf
exit
- Create a new sogo.mydomain.local virtualhost file:
sudo gedit /etc/apache2/sites-available/sogo.mydomain.local
Then add the following and save.
<VirtualHost *:80>
   ServerName sogo.mydomain.local
   ServerAlias sogo.local
   DocumentRoot /usr/lib/GNUstep/SOGo/WebServerResources/
   ErrorLog /var/log/apache2/error.log
   Customlog /var/log/apache2/access.log combined
   ServerSignature Off

   Alias /SOGo.woa/WebServerResources/ /usr/lib/GNUstep/SOGo/WebServerResources/
   Alias /SOGo/WebServerResources/ /usr/lib/GNUstep/SOGo/WebServerResources/
   AliasMatch /SOGo/so/ControlPanel/Products/(.*)/Resources/(.*) /usr/lib/GNUstep/SOGo/$1.SOGo/Resources/$2

   <Directory /usr/lib/GNUstep/SOGo/>
      AllowOverride None
      Order deny,allow
      Allow from all
   </Directory>

   <LocationMatch "^/SOGo/so/ControlPanel/Products/.*UI/Resources/.*\.(jpg|png|gif|css|js)">
      SetHandler default-handler
   </LocationMatch>

   ProxyRequests Off
   SetEnv proxy-nokeepalive 1
   ProxyPreserveHost On
   ProxyPass /SOGo http://127.0.0.1:20000/SOGo retry=0

   <Proxy http://127.0.0.1:20000/SOGo>
      RequestHeader set "x-webobjects-server-port" "80"
      RequestHeader set "x-webobjects-server-name" "sogo.mydomain.local"
      RequestHeader set "x-webobjects-server-url" "http://sogo.mydomain.local"
      RequestHeader set "x-webobjects-server-protocol" "HTTP/1.0"
      RequestHeader set "x-webobjects-remote-host" %{REMOTE_HOST}e env=REMOTE_HOST
      AddDefaultCharset UTF-8
      Order allow,deny
      Allow from all
   </Proxy>

   ## We use mod_rewrite to pass remote address to the SOGo proxy.
   # The remote address will appear in SOGo's log files and in the X-Forward
   # header of emails.
   RewriteEngine On
   RewriteRule ^/SOGo/(.*)$ /SOGo/$1 [env=REMOTE_HOST:%{REMOTE_ADDR},PT]

   Redirect permanent /index.html http://sogo.mydomain.local/SOGo

</VirtualHost>

<VirtualHost *:8800>
   # this virtualhost is only for carddav on Mac and not tested very well
   RewriteEngine Off
   ProxyRequests Off
   SetEnv proxy-nokeepalive 1
   ProxyPreserveHost On
   ProxyPassInterpolateEnv On
   ProxyPass /principals http://127.0.0.1:20000/SOGo/dav/ interpolate
   ProxyPass /SOGo http://127.0.0.1:20000/SOGo interpolate
   ProxyPass / http://127.0.0.1:20000/SOGo/dav/ interpolate

   <Location />
      Order allow,deny
      Allow from all
   </Location>

   <Proxy http://127.0.0.1:20000>
      RequestHeader set "x-webobjects-server-port" "8800"
      RequestHeader set "x-webobjects-server-name" "sogo.mydomain.local:8800"
      RequestHeader set "x-webobjects-server-url" "https://sogo.mydomain.local:8800"
      RequestHeader set "x-webobjects-server-protocol" "HTTP/1.0"
      RequestHeader set "x-webobjects-remote-host" "127.0.0.1"
      AddDefaultCharset UTF-8
   </Proxy>
   ErrorLog /var/log/apache2/error.log
   Customlog /var/log/apache2/access.log combined
</VirtualHost>
- Enable the new virtualhost in Apache and restart webserver:
sudo a2ensite sogo.mydomain.local
sudo service apache2 restart
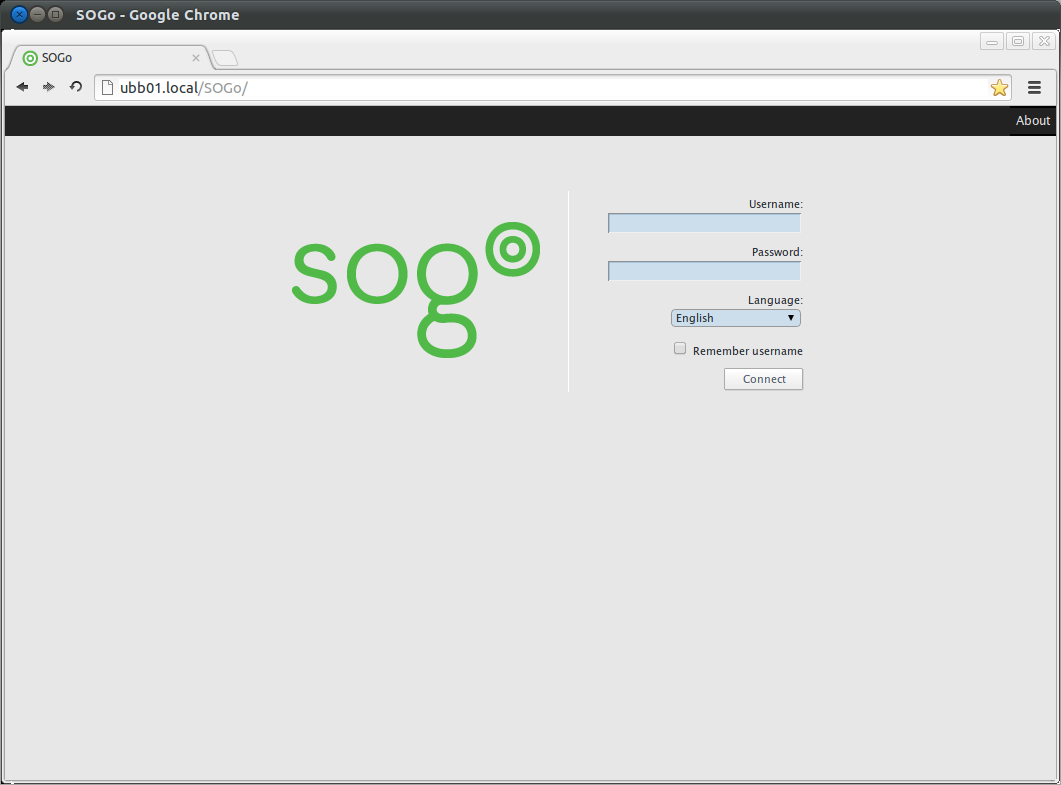
- You should be able to login to SOGo web interface with you demo users credentials.
- Open a browser and go to:
http://ubb01.mydomain.local/SOGo OR http://sogo.mydomain.local/SOGo
21. Install Virtualization - Oracle VM VirtualBox
- Virtualbox will allow you to install and run virtual operating systems on the server.
- This provides support for multiple operating systems and legacy software running on a single server.
- 4GB of RAM or more is advised if this is used as an option on your server install. 2GB of RAM per operating system is a rough guess to make things work smoothly.
- Download and install the latest version of VirtualBox directly from the website.
- Open a Terminal Window and enter the following :
sudo su
echo "deb http://download.virtualbox.org/virtualbox/debian precise contrib" >> /etc/apt/sources.list
wget -q http://download.virtualbox.org/virtualbox/debian/oracle_vbox.asc -O- | sudo apt-key add -
exit
sudo apt-get update
sudo apt-get install linux-headers-$(uname -r) build-essential virtualbox-4.3 dkms
- Install the latest VirtualBox Extension Pack
cd /tmp
wget http://download.virtualbox.org/virtualbox/4.3.10/Oracle_VM_VirtualBox_Extension_Pack-4.3.10-93012.vbox-extpack
sudo VBoxManage extpack install Oracle_VM_VirtualBox_Extension_Pack-4.3.10-93012.vbox-extpack
sudo rm Oracle_VM_VirtualBox_Extension_Pack-4.3.10-93012.vbox-extpack
22. Install and configure Remote Desktop - x11vnc
- The default Remote Desktop Server in Ubuntu 12.04 is Vino. This is not ideal for remote administration as it does not provide the security features needed.
- We will install and configure x11vnc as our VNC server. This provides us with basic password as well as SSH tunneling and SSL security options.
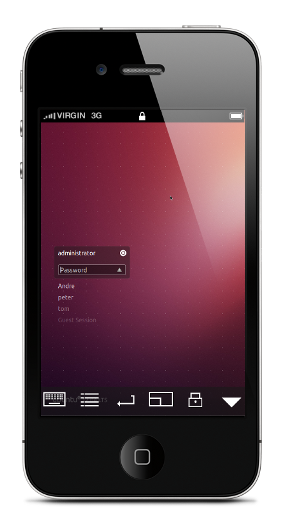
- This setup will allow administrators to log in remotely via all popular VNC viewers on Linux, Windows, Mac, iPad, iPhone and Android
- Programs tested and supported : Vinagre, vncviewer, TightVNC, UltraVNC, Chicken of the VNC.
- Install x11vnc and VNC viewers by opening a terminal window and entering:
sudo apt-get install x11vnc vinagre vncviewer
- Create a x11vnc password file
sudo mkdir /etc/x11vnc
sudo x11vnc -storepasswd /etc/x11vnc/x11vnc.pass
- Add a new lightdm startup configuration file so that x11vnc server is loaded at startup.
sudo gedit /etc/init/x11vnc.conf
- Then add the following and save.
start on login-session-start
script
x11vnc -rfbauth /etc/x11vnc/x11vnc.pass -rfbport 5900 -display :0 -auth /var/run/lightdm/root/:0 -forever -bg -o /var/log/x11vnc.log -noxrecord -noxfixes -noxdamage -nomodtweak
end script
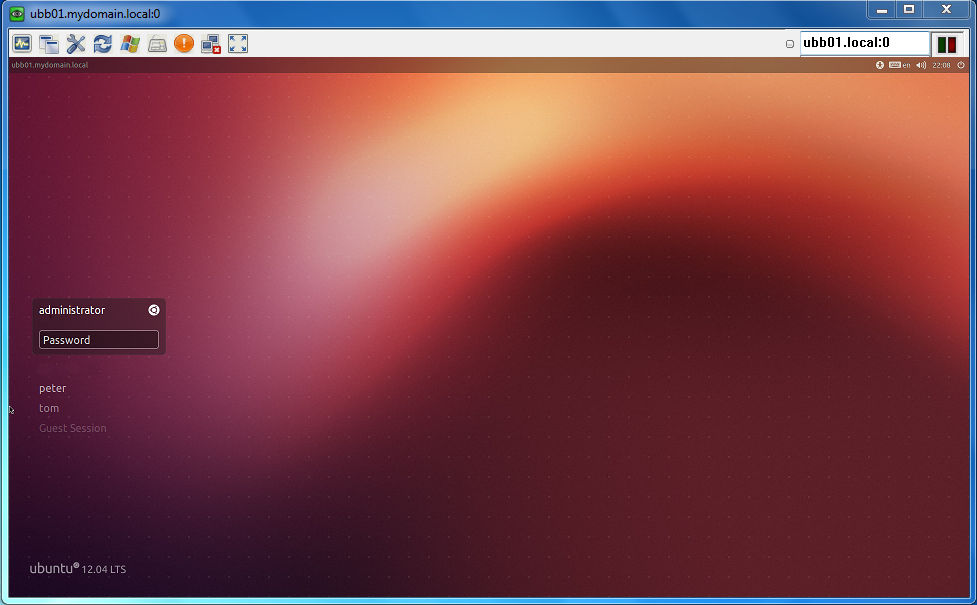
- After reboot you will be able to log into the VNC server on:
Port    : 5900
Display : 0
Host    : ubb01.local (or your server IP address or hostname)
- You can remove '-rfbauth /etc/x11vnc/x11vnc.pass' setting in the script above and will be able to log in but without a vnc password as security.
- You should be able to connect with your vnc viewer like Vinagre with : ubb01.local:0 or ubb01.local:5900 or via your FQDN atubb01.mydomain.local:0 or ubb01.mydomain.local:5900
- You will also be able to securely connect using SSH tunneling specifying the tunneling host as localhost.
- You can do this in Ubuntu with vncviewer with the via command :
vncviewer -via user@host locahost:0
- In our example you will be able to connect as administrator to the server from another Ubuntu client machine (vncviewer installed) with
vncviewer -via administrator@ubb01.local localhost:0
23. Install VPN - LogMeIn Hamachi | Haguichi
24. Install Instant Messaging and VOIP Server - Openfire | Spark
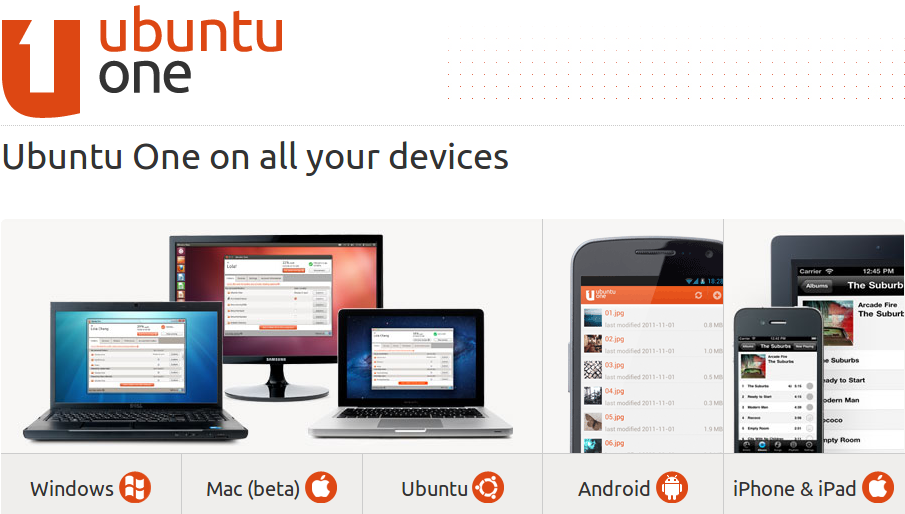
25. Backups - Ubuntu One | Déjà Dup
- Ubuntu One and Deja Dup is installed by default in Ubuntu 12.04.
- Ubuntu One is an excellent cloud backup, storage and sharing solution for small and medium sized business using a mixture of platforms and devices.
- Ubuntu One supports Ubuntu, Windows, Mac OSX, iPhone, iPad and Android.
- To get started on Ubuntu - Click on the Ubuntu One icon on your desktop to create an account and get 5GB free cloud backup storage.
- To setup automated backups you can follow this excellent guide on How to Back Up Ubuntu the Easy Way with Déjà Dup
- Tip: You can only backup the shared Ubuntu One folder in your Home direcotry or files owned by the current logged in user to Ubuntu One. So if you need to backup other users files and folders, use Duplicity and Cron Jobs to create encrypted, incremental backups of all files and folders to the Ubuntu One folder and Sync.
- Tip: You can also use Ubuntu One Headless to set up Ubuntu One from the command line.
26 . How to secure an Ubuntu 12.04 LTS server - Part 1 The Basics
This guide is based on various community forum posts and webpages. Special thanks to all. All comments and improvements are very welcome as this is purely a personal experimental project at this point and must be considered a work in progress.
This guide is intended as a relatively easy step by step guide to:
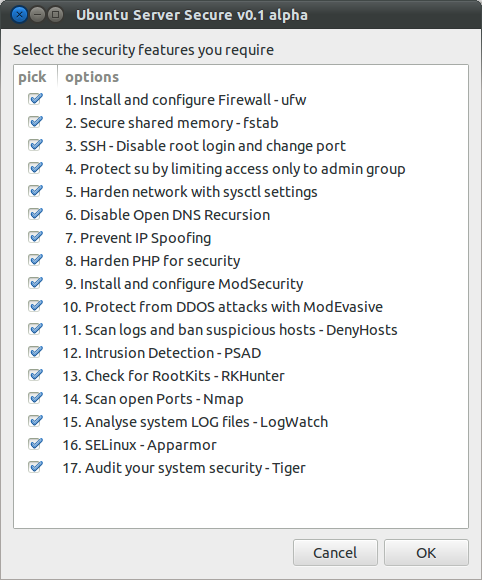
Harden the security on an Ubuntu 12.04 LTS server by installing and configuring the following:
- Install and configure Firewall - ufw
- Secure shared memory - fstab
- SSH - Key based login, disable root login and change port
- Apache SSL - Disable SSL v3 support
- Protect su by limiting access only to admin group
- Harden network with sysctl settings
- Disable Open DNS Recursion and Remove Version Info - Bind9 DNS
- Prevent IP Spoofing
- Harden PHP for security
- Restrict Apache Information Leakage
- Install and configure Apache application firewall - ModSecurity
- Protect from DDOS (Denial of Service) attacks with ModEvasive
- Scan logs and ban suspicious hosts - DenyHosts and Fail2Ban
- Intrusion Detection - PSAD
- Check for RootKits - RKHunter and CHKRootKit
- Scan open Ports - Nmap
- Analyse system LOG files - LogWatch
- SELinux - Apparmor
- Audit your system security - Tiger
Requirements:
- Ubuntu 12.04 LTS or later server with a standard LAMP stack installed.
1. Firewall - UFW
- A good place to start is to install a Firewall.
- UFW - Uncomplicated Firewall is a basic firewall that works very well and easy to configure with its Firewall configuration tool - gufw, or use Shorewall, fwbuilder, or Firestarter.
- Use Firestarter GUI to configure your firewall or refer to the Ubuntu Server Guide, UFW manual pages or the Ubuntu UFW community documentation.
- Install UFW and enable, open a terminal window and enter :
sudo apt-get install ufw
- Allow SSH and Http services.
sudo ufw allow ssh
sudo ufw allow http
sudo ufw enable
- Check the status of the firewall.
sudo ufw status verbose
2. Secure shared memory.
- Shared memory can be used in an attack against a running service. Modify /etc/fstab to make it more secure.
- Open a Terminal Window and enter the following :
sudo vi /etc/fstab
- Add the following line and save. You will need to reboot for this setting to take effect :
- Note : This only is works in Ubuntu 12.04 - For later Ubuntu versions replace /dev/shm with /run/shm
- Save and Reboot when done
tmpfs /dev/shm tmpfs defaults,noexec,nosuid 0 0
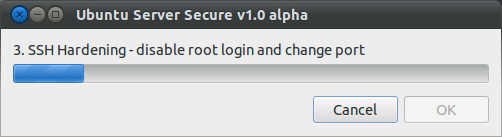
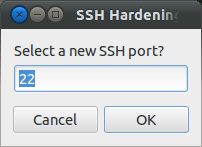
3. SSH Hardening - key based login, disable root login and change port.
- The best way to secure SSH is to use public/private key based login. See SSH/OpenSSH/Keys
- If you have to use password authentication, the easiest way to secure SSH is to disable root login and change the SSH port to something different than the standard port 22.
- Before disabling the root login create a new SSH user and make sure the user belongs to the admin group (see step 4. below regarding the admin group).
- if you change the SSH port keep the port number below 1024 as these are priviledged ports that can only be opened by root or processes running as root.
- If you change the SSH port also open the new port you have chosen on the firewall and close port 22.
- Open a Terminal Window and enter :
sudo vi /etc/ssh/sshd_config
- Change or add the following and save.
Port <ENTER YOUR PORT>
Protocol 2
PermitRootLogin no
DebianBanner no
- Restart SSH server, open a Terminal Window and enter :
sudo /etc/init.d/ssh restart
4. Apache SSL Hardening - disable SSL v3 support.
- The SSL v3 protocol has been proven to be insecure.
- We will disable Apache support for the protocol and force the use of the newer protocols.
- Open a Terminal Window and enter :
sudo vi /etc/apache2/mods-available/ssl.conf
SSLProtocol all -SSLv2
- To the following and save.
SSLProtocol all -SSLv2 -SSLv3
- Restart the Apache server, open a Terminal Window and enter :
sudo /etc/init.d/apache2 restart
5. Protect su by limiting access only to admin group.
- To limit the use of su by admin users only we need to create an admin group, then add users and limit the use of su to the admin group.
- Add a admin group to the system and add your own admin username to the group by replacing <YOUR ADMIN USERNAME> below with your admin username.
- Open a terminal window and enter:
sudo groupadd admin
sudo usermod -a -G admin <YOUR ADMIN USERNAME>
sudo dpkg-statoverride --update --add root admin 4750 /bin/su
6. Harden network with sysctl settings.
- The /etc/sysctl.conf file contain all the sysctl settings.
- Prevent source routing of incoming packets and log malformed IP's enter the following in a terminal window:
sudo vi /etc/sysctl.conf
- Edit the /etc/sysctl.conf file and un-comment or add the following lines :
# IP Spoofing protection
net.ipv4.conf.all.rp_filter = 1
net.ipv4.conf.default.rp_filter = 1

# Ignore ICMP broadcast requests
net.ipv4.icmp_echo_ignore_broadcasts = 1

# Disable source packet routing
net.ipv4.conf.all.accept_source_route = 0
net.ipv6.conf.all.accept_source_route = 0
net.ipv4.conf.default.accept_source_route = 0
net.ipv6.conf.default.accept_source_route = 0

# Ignore send redirects
net.ipv4.conf.all.send_redirects = 0
net.ipv4.conf.default.send_redirects = 0

# Block SYN attacks
net.ipv4.tcp_syncookies = 1
net.ipv4.tcp_max_syn_backlog = 2048
net.ipv4.tcp_synack_retries = 2
net.ipv4.tcp_syn_retries = 5

# Log Martians
net.ipv4.conf.all.log_martians = 1
net.ipv4.icmp_ignore_bogus_error_responses = 1

# Ignore ICMP redirects
net.ipv4.conf.all.accept_redirects = 0
net.ipv6.conf.all.accept_redirects = 0
net.ipv4.conf.default.accept_redirects = 0
net.ipv6.conf.default.accept_redirects = 0

# Ignore Directed pings
net.ipv4.icmp_echo_ignore_all = 1
- To reload sysctl with the latest changes, enter:
sudo sysctl -p
7. Disable Open DNS Recursion and Remove Version Info - BIND DNS Server.
- Open a Terminal and enter the following :
sudo vi /etc/bind/named.conf.options
- Add the following to the Options section :
recursion no;
version "Not Disclosed";
- Restart BIND DNS server. Open a Terminal and enter the following :
sudo /etc/init.d/bind9 restart
8. Prevent IP Spoofing.
- Open a Terminal and enter the following :
sudo vi /etc/host.conf
- Add or edit the following lines :
order bind,hosts
nospoof on
9. Harden PHP for security.
sudo vi /etc/php5/apache2/php.ini
- Add or edit the following lines an save :
disable_functions = exec,system,shell_exec,passthru
register_globals = Off
expose_php = Off
display_errors = Off
track_errors = Off
html_errors = Off
magic_quotes_gpc = Off
- Restart Apache server. Open a Terminal and enter the following :
sudo /etc/init.d/apache2 restart
10. Restrict Apache Information Leakage.
- Edit the Apache2 configuration security file :
sudo vi /etc/apache2/conf.d/security
- Add or edit the following lines and save :
ServerTokens Prod
ServerSignature Off
TraceEnable Off
Header unset ETag
FileETag None
- Restart Apache server. Open a Terminal and enter the following :
sudo /etc/init.d/apache2 restart
11. Web Application Firewall - ModSecurity.
12. Protect from DDOS (Denial of Service) attacks - ModEvasive
13. Scan logs and ban suspicious hosts - DenyHosts and Fail2Ban.
- DenyHosts is a python program that automatically blocks SSH attacks by adding entries to /etc/hosts.deny. DenyHosts will also inform Linux administrators about offending hosts, attacked users and suspicious logins.
- Open a Terminal and enter the following :
sudo apt-get install denyhosts
- After installation edit the configuration file /etc/denyhosts.conf and change the email, and other settings as required.
- To edit the admin email settings open a terminal window and enter:
sudo vi /etc/denyhosts.conf
- Change the following values as required on your server :
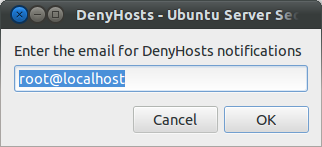
ADMIN_EMAIL = root@localhost
SMTP_HOST = localhost
SMTP_PORT = 25
#SMTP_USERNAME=foo
#SMTP_PASSWORD=bar
SMTP_FROM = DenyHosts nobody@localhost
#SYSLOG_REPORT=YES
- Fail2ban is more advanced than DenyHosts as it extends the log monitoring to other services including SSH, Apache, Courier, FTP, and more.
- Fail2ban scans log files and bans IPs that show the malicious signs -- too many password failures, seeking for exploits, etc.
- Generally Fail2Ban then used to update firewall rules to reject the IP addresses for a specified amount of time, although any arbitrary other action could also be configured.
- Out of the box Fail2Ban comes with filters for various services (apache, courier, ftp, ssh, etc).
- Open a Terminal and enter the following :
sudo apt-get install fail2ban
- After installation edit the configuration file /etc/fail2ban/jail.local and create the filter rules as required.
- To edit the settings open a terminal window and enter:
sudo vi /etc/fail2ban/jail.conf
- Activate all the services you would like fail2ban to monitor by changing enabled = false to enabled = true
- For example if you would like to enable the SSH monitoring and banning jail, find the line below and change enabled fromfalse to true. Thats it.
[ssh]

enabled  = true
port     = ssh
filter   = sshd
logpath  = /var/log/auth.log
maxretry = 3
- If you have selected a non-standard SSH port in step 3 then you need to change the port setting in fail2ban from ssh which by default is port 22, to your new port number, for example if you have chosen 1234 then port = 1234
[ssh]

enabled  = true
port     = <ENTER YOUR SSH PORT NUMBER HERE>
filter   = sshd
logpath  = /var/log/auth.log
maxretry = 3
- If you would like to receive emails from Fail2Ban if hosts are banned change the following line to your email address.
destemail = root@localhost
- and change the following line from :
action = %(action_)s
action = %(action_mwl)s
- You can also create rule filters for the various services that you would like fail2ban to monitor that is not supplied by default.
sudo vi /etc/fail2ban/jail.local
- Good instructions on how to configure fail2ban and create the various filters can be found on HowtoForge - click here for an example
- When done with the configuration of Fail2Ban restart the service with :
sudo /etc/init.d/fail2ban restart
- You can also check the status with.
sudo fail2ban-client status
14. Intrusion Detection - PSAD.
- Cipherdyne PSAD is a collection of three lightweight system daemons that run on Linux machines and analyze iptables log messages to detect port scans and other suspicious traffic.
- Currently version 2.1 causes errors during install on Ubuntu 12.04, but apparently does work. Version 2.2 resolves these issues but is not yet available on the Ubuntu software repositories. It is recommended to manually compile and install version 2.2 from the source files available on the Ciperdyne website.
- To install the latest version from the source files follow these instruction : How to install PSAD Intrusion Detection on Ubuntu 12.04 LTS server
- OR install the older version from the Ubuntu software repositories, open a Terminal and enter the following :
sudo apt-get install psad
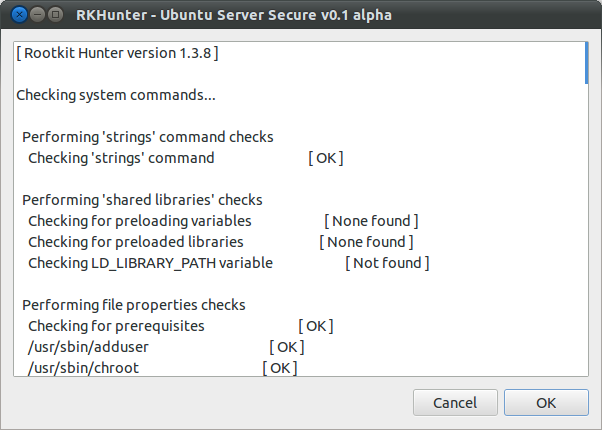
15. Check for rootkits - RKHunter and CHKRootKit.
- Both RKHunter and CHKRootkit basically do the same thing - check your system for rootkits. No harm in using both.
- Open a Terminal and enter the following :
sudo apt-get install rkhunter chkrootkit
- To run chkrootkit open a terminal window and enter :
sudo chkrootkit
- To update and run RKHunter. Open a Terminal and enter the following :
sudo rkhunter --update
sudo rkhunter --propupd
sudo rkhunter --check
16. Scan open ports - Nmap.
- Nmap ("Network Mapper") is a free and open source utility for network discovery and security auditing.
- Open a Terminal and enter the following :
sudo apt-get install nmap
- Scan your system for open ports with :
nmap -v -sT localhost
- SYN scanning with the following :
sudo nmap -v -sS localhost
17. Analyse system LOG files - LogWatch.
- Logwatch is a customizable log analysis system. Logwatch parses through your system's logs and creates a report analyzing areas that you specify. Logwatch is easy to use and will work right out of the package on most systems.
- Open a Terminal and enter the following :
sudo apt-get install logwatch libdate-manip-perl
- To view logwatch output use less :
sudo logwatch | less
- To email a logwatch report for the past 7 days to an email address, enter the following and replace mail@domain.com with the required email. :
sudo logwatch --mailto mail@domain.com --output mail --format html --range 'between -7 days and today'
18. SELinux - Apparmor.
- National Security Agency (NSA) has taken Linux to the next level with the introduction of Security-Enhanced Linux (SELinux). SELinux takes the existing GNU/Linux operating system and extends it with kernel and user-space modifications to make it bullet-proof.
- More information can be found here. Ubuntu Server Guide - Apparmor
- It is installed by default since Ubuntu 7.04.
- Open a Terminal and enter the following :
sudo apt-get install apparmor apparmor-profiles
- Check to see if things are running :
sudo apparmor_status
19. Audit your system security - Tiger.
- Tiger is a security tool that can be use both as a security audit and intrusion detection system.
- Open a Terminal and enter the following :
sudo apt-get install tiger
sudo tiger
- All Tiger output can be found in the /var/log/tiger
- To view the tiger security reports, open a Terminal and enter the following :
sudo less /var/log/tiger/security.report.*
How to secure an Ubuntu 12.04 LTS server - Part 2 The GUI installer script
This guide is based on various community forum posts and webpages. Special thanks to all. All comments and improvements are very welcome as this is purely a personal experimental project at this point and must be considered a work in progress.
The Ubuntu Server Secure script:
- The Ubuntu Server Secure script is set of GUI security administration tools to harden and audit the security on an Ubuntu 12.04 LTS server by using a GUI shell script to install and configure various security features found in How to secure an Ubuntu 12.04 LTS server - Part 1 The Basics.
- This script was done as an experiment in using Zenity to create a interactive Gnome Gtk+ GUI installer.
- Zenity is a great tool for creating a simple yet powerful GUI user interface on top of bash like shell script very quickly.
Requirements:
- Ubuntu 12.04 LTS server with a standard LAMP stack installed.
- Unity or Gnome Desktop installed.
- Zenity installed. (Zenity installed by default in Ubuntu 12.04 LTS Desktop)
1. Ubuntu Server Secure - Screenshots
2. Ubuntu Server Secure - The Shell Script Code
- Below is the contents of the ubuntu-server-secure.sh file.
3. Ubuntu Server Secure - Log File
- Complete log can be found at: /var/log/uss_YYYY-MM-DD.log (replace YYYY-MM-DD with current date)
4. Ubuntu Server Secure - Installation Instructions
- Install zenity if not already installed by default on Ubuntu: sudo apt-get install zenity
- Download the Ubuntu Server Secure script from the links at the bottom of this page
- Change Directory to the downloaded file : cd /path/to/download
- To extract, open a terminal window and enter :
sudo tar -zxvf ubuntu-server-secure.tar.gz
cd ubuntu-server-secure
sudo chmod +x ubuntu-server-secure.sh
gksudo sh ubuntu-server-secure.sh


.png)