Monday, January 30, 2017

[Quick Tips: Ubuntu 16.04]: MacBuntu 16.10 Transformation Pack for Ubuntu 16.10 Yakkety

MacBuntu 16.10 Transformation Pack for Ubuntu 16.10 Yakkety

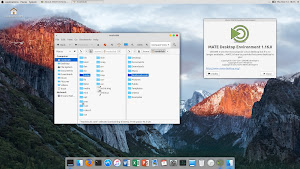
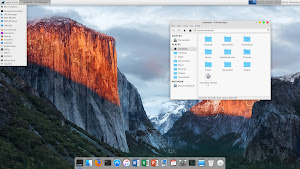
MacBuntu (Macbuntu Yosemite/El Capitan) transformation pack is ready to take off and land on your Ubuntu 16.10 Yakkety Yak. It offers two themes for GTK (which supports: Unity, Gnome, Cinnamon, Mate and Xfce), one theme for Gnome Shell, one for Cinnamon, two icon packs, and cursors. Unlike last time we are not sharing boot/splash for macbuntu and theme for lightdm-webkit because there are some issues within the Ubuntu 16.10. Slingscold which is known as launchpad, it does work on some desktops but it may don't work for some users and you may see blank launcher. We are using and recommending Plank dock with this pack because it is lightweight and works with all desktops without any issues. Also credit goes to Jared for helping us with this transformation pack. By following these instructions you can change look of your Ubuntu 16.10 Yakkety to look like Mac. In previous packs we used LightDM webkit theme which looks quite similar to Mac OS X login screen, this time we aren't offering, because we experienced a lot of issues after installing it (like: not able to login/blank screen). Also Bootscreen has some issues.
As we always recommend to transform your desktop by yourself, so you know what you are doing and can reverse it easily, we can make automatic or semi-automatic scripts but it will be only for one desktop and it won't be good idea that's why are not automating it. By offering this pack no hate or infringing behavior is intended, simply designed for those who don't want to use Mac or can't use Mac for any reason.
Note: If you encounter any bug in theme/icons/any stuff, report to us with screenshot or problem with details.

>> MacBuntu Pack For Ubuntu 16.04 Xenial Xerus/Linux Mint 18
>> MBuntu Pack For Ubuntu 14.04 Trusty Tahr/Linux Mint 17
>> MacBuntu Pack For Ubuntu 14.04 Trusty Tahr/Linux Mint 17
>> MacBuntu Pack For Ubuntu 12.04 Precise Pangolin/Linux Mint 13
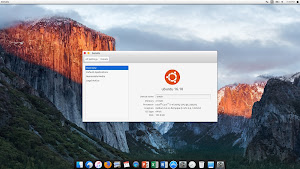
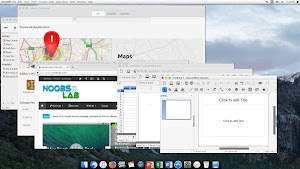
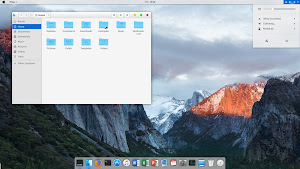
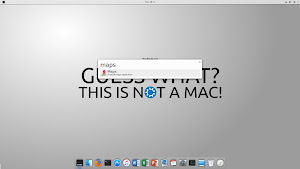
macbuntu 16.10 macbuntu yakkety

What's in this Version?
  • A PPA dedicated to Macbuntu packs.
  • Themes are better coded from scratch, looks shiny, smooth, fast
  • GTK themes supports Unity, Mate, Gnome, Xfce, Cinnamon
  • Theme for Gnome Shell, and one for Cinnamon
  • Icon huge update for 16.10
  • Four Plank dock themes
  • Latest Cursor theme

1: MacBuntu wallpapers

Download MacBuntu OS Wallpapers and extract to pictures directory.


2: MacBuntu OS Y Theme, Icons and cursors:

macbuntu themes

Enter these commands in terminal to get themes, icons and cursors.
After installation choose theme, icons and mac cursor from tweak tool.

To Uninstall themes, icons and cursors


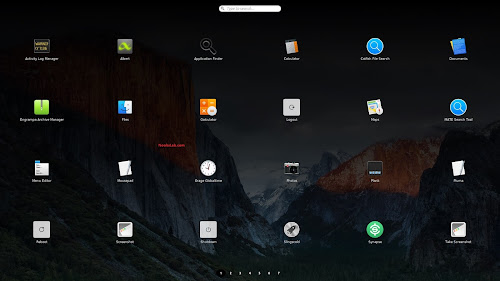
3: Slingscold (Alternative to Launchpad)

slingscold

To install Slingscold Launcher (Launchpad) in Ubuntu/Linux Mint open Terminal (Press Ctrl+Alt+T) and copy the following commands in the Terminal:


4: Albert Spotlight (Alternative to Mac Spotlight)

Albert alternative to OS-X spotlight created by Manuel, it offers pretty much same features like Spotlight or maybe better than Spotlight. It is a selection-based search system, which creates an index of all items and files on the system. It is designed to allow the user to quickly locate a wide variety of items on the computer, including documents, pictures, music, applications, and System Preferences. You can set custom hotkey and modify search criteria for albert.
albert

After installation you can open Albert from Menu/Dash, and first set hotkey to activate albert.


5: Plank Dock

This time we chose Plank it seems a best choice for this pack because it doesn't have any kind of issues, it is lightweight and we are providing themes with this pack for Plank dock.

First of all install Plank dock with following command then install Mac themes for Plank:

Install themes for Plank dock, enter following commands in terminal:
Press "Ctrl + Right Click" on the plank to access context menu.

Use these commands to remove Plank dock themes from your system:
Enter following command to remove Plank dock and themes:

Tip: To pin application to dock just open Application and right click on app icon then select 'Keep in dock'.


6: Replace 'Ubuntu Desktop' text with 'Mac' on the Panel


Enter following commands to change 'Ubuntu Desktop' text on the panel:
If you are using non-English version of Ubuntu then replace /en/ in the above command with your locale. For instance for German version /de/.

Revert back to 'Ubuntu Desktop' text, enter following commands in the Terminal:


7: Apple Logo in Launcher


Enter following commands to install Apple Logo:

If you want back Ubuntu logo enter following commands in terminal:


8: Tweak Tools to change Themes & Icons:

You can use these popular tools to change themes and icons in Ubuntu, Also you can change other settings from these tweak tools.

Enter following command to install tweak tools.


9: Install Monochrome icons for Libreoffice:

Human icons are default in LibreOffice which kind of look weird with this transformation pack, to make LibreOffice more elegant with monochrome icons follow these instructions.

Enter following commands to install monochrome icons for libreoffice.
After installation go to LibreOffice menu select "Tools" > "Options" > "LibreOffice" > "View" and select "Sifr" under "Icon size and style". See following screenshots


10: (Optional) Mac fonts:

Last time I received request about Mac fonts, so this time I am including them with this pack. So here are fonts for you.


You can change fonts from Unity-Tweak-Tool, Gnome-Tweak-Tool.

[Quick Tips: Offline Download Website]: Download Popular Open Source Websites To Use Them Offline

Download Popular Open Source Websites To Use Them Offline

Today, I have a wonderful news to all of you. Now, you can download popular open source websites to view them without Internet. Yes! I have stumbled upon a website called “RACHEL Offline” earlier this morning and I am glad to inform you that this site allows you to download all popular open source websites such as Wikipedia, TED Talks, Khan Academy, Project Gutenburg, African storybook, Mediline plus, 
Wikihow, Wikisource, Worldmap and much more. There is no charge or limit to download these sites. You can download all of them and use them without Internet in your Desktop, Laptop, Tablets and Smartphones.

How to download popular open source websites from Command line in Unix-like systems

Go to the Rachel modules download link given below. This link has all the open source website’s contents. Just download your preferred website with all its contents and use it without Internet. Cool, isn’t?


The recommended way to download them is to use rsync. They have included the rsync command to download the website in the respective download page. If you don’t know, how to download a website using rsync, just click on the respective website, copy/paste the rsync command in your Terminal. That’s it. It will download all the contents of the website in a folder in your current working directory.

For example, to download the TED talks website, I entered the following command in my Terminal.
rsync -Pavz rsync://dev.worldpossible.org/rachelmods/en-TED ./

The reason why you should use rsync command is it can pick up where it left off if there are any connection problems. So, you don’t have to start over from the beginning. Rsync should already be installed on any Unix-like systems, such as GNU/Linux and Mac OS X. Windows users can get rsync using Cygwin.

Don’t like the commandline way? No problem! You can download them via web or ftp. The download links are available on each module page. Just copy the download link and throw it to the download manager.
Once you downloaded the website, go to the folder where you downloaded it, right click on the Index.html file and open it with your favorite browser. It’s simple as that.

Now, you can browse through the website without Internet as the way you do while you have Internet. I have downloaded TED talks website and watched few videos. I wouldn’t say it’s fantastic, but some of them are useful! TED Talks website includes the lessons, speeches of popular leaders, speakers, entrepreneurs, CEOs, and spiritual gurus etc.

Here is TED Talks website in action.
Also, you can download all the compressed modules from the link below.

Purchase RACHEL Products

RACHEL team provides these modules in hardware devices. You can purchase these devices and use them on your home, office, School, College, Library and share the data to multiple devices wirelessly or over Ethernet. RACHEL provides the following devices at the time of writing this article.
  1. The RACHEL-Pi 3, powered by Raspberry Pi operating system.
  2. RACHEL-Plus Remote Deployment Device.
  3. RACHEL USB drive.
For more details, refer the RACHEL official website link given below.
I must admit that RACHEL Offline website is awesome. These guys have done a great job! Make use of them, and don’t forget to share this news with your family, friends, and colleagues.
Cheers!
Resource:

[Quick Tips: Large File Transfer]: How To Quickly Transfer Large Files Over Network In Linux And Unix

How To Quickly Transfer Large Files Over Network In Linux And Unix

Today, I had to reinstall my Ubuntu server where I regularly test different applications and softwares. My Ubuntu server has over 200 GB data, and I don’t want to lose it. I can transfer those data via scp, or setup NFS, FTP to copy files, but I am pretty sure it would take hours to transfer such big files. While searching for an alternative method, I came across the following method. We can quickly transfer large files between between two systems over Network using netcattar, and pv commands in Linux and Unix operating systems. Unlike other methods, I find it very fast and quick. For those who don’t know, Netcat is a simple Unix utility which reads and writes data across network connections, using TCP or UDP protocol. tar is a commandline archiving tool, and pv, pipe viewer, is used to monitor the progress of data.

Quickly Transfer Large Files Over Network Between Two Systems In Linux

Make sure you have installed netcat and pv on your systems. If they are not installed already, you can install them as shown below. The tar command is available by default on most Linux systems, so you don’t have to install it separately.

On Arch Linux and its derivatives:
sudo pacman -S netcat pv

On RHEL, CentOS, Fedora:
sudo yum install epel-release
sudo yum install nc pv
Or,
sudo dnf install nc pv

On Debian, Ubuntu, Linux Mint:
sudo apt-get install netcat pv

Now, to copy a large file, we do the following.

On the receiving node (destination system), run the following command as root user:
netcat -l -p 7000 | pv | tar x

On the sending node (source system), run this command as root user:
tar cf - * | pv | netcat 192.168.1.105 7000

Here, 192.168.1.105 is my destination system. tar cf – * will copy everything in the current working directory to the destination system, and the files will be extracted at the other end.

Note: On RHEL, CentOS systems, use “nc” instead of “netcat” as shown below. And, you need to add the port “7000” to the iptables / firewall-cmd on the target system.

After adding the port on target system, you can transfer the larger files as shown below.

On destination system:
nc -l -p 7000 | pv | tar x

On source system:
tar cf - * | pv | nc 192.168.1.105 7000

Also, You can specify a particular file like below.
tar cf - /home/sk/test.file | pv | netcat 192.168.1.105 7000

Please be mindful that both system should have netcat installed. Now, grab a cup of coffee. You’ll see that the files will be copied very quickly than the traditional methods like scp.

Also, you will not see any sign of the file transfer completion on both sides. These commands will keep running until you manually stop them. You need manually check the file sizes on both systems using “du -h <filename>” command. If the file size in destination system is same as in source system, then file transfer process is completed. Afterwords, you can quit the command by pressing CTRL+C.

Quickly Transfer Large Files Between Two Systems In Unix

On Unix operating systems, netcat is called as nc. So, to copy large files between systems over Ethernet, the command would be:

On destination system:
nc -l 7000 | pv | tar -xpf -

On source system:
tar -cf - * | pv | nc 192.168.1.105 7000

Again, these commands should be run as root user. And, both source and destination systems should have netcat and pv installed. Transferring large files over LAN using netcat and tar can indeed save a lot of time.


Disclaimer: There is no security in this method. Because, as you see in the above example, there is no authentication either side. All you need to know the destination system’s IP address. Transferring files using netcat is recommended only in protected networks. If you concern about security, I strongly suggest you to use scp command.

That’s it.

[Quick Tips: Limit CPU Usage]: How To Limit CPU Usage Of A Process In Linux

How To Limit CPU Usage Of A Process In Linux

Some times, a particular might consume more CPU usage, and affects the performance of the whole system. Since that particular process consumes more CPU, you couldn’t do other tasks. You need to wait for the particular process to finish before starting a new task. Luckily, this can be now solved by an useful utility called CPULimit. As the name implies, CPULimit limits the CPU usage of a process. This can be really useful to control the batch jobs, when you don’t want them to consume more CPU usage.

The main goal of CPULimit is prevent a process from running for more than a specified time ratio. It does not change the nice value or other scheduling priority settings, but the real CPU usage. Also, it is able to adapt itself to the overall system load, dynamically and quickly. It will work on most Unix-like distributions. In this brief guide, we will see how to limit the CPU usage of a process in Linux.

Limit CPU Usage Of A Process In Linux using CPULimit

Install CPULimit

CPULimit is available on most Unix-like distribution’s default repositories. You can install it using the default package managers in the respective Linux distribution as shown below.

On Arch Linux and its derivatives:
sudo pacman -S cpulimit

On Debian, Ubuntu, Linux Mint:
sudo apt-get install cpulimit

On RHEL, CentOS, Fedora:
Enable EPEL repository first.
sudo yum install epel-release
And then, install cpuclimit using command:
sudo yum install cpulimit
Or,
sudo dnf install cpulimit

On SUSE/openSUSE:
sudo zypper install cpulimit

Usage

Let us run a program that consumes more CPU usage. The following commands should be run as root user.

Create a file called highcpu.sh.
vi highcpu.sh

Add the following contents.
#!/bin/bash
while :; do :; done;

Save and close the file. This short program will loop endlessly and consumes maximum CPU usage. So, I recommend you to test it in a virtual machine.

Make this file executable:
chmod +x highcpu.sh

Then, run the process in the background using command:
./highcpu.sh &

Sample output:
[1] 2331
Here 2331 is PID of the above process.

To view how much CPU it consumes, use “top” command.
top

Sample output:
top - 17:16:34 up 10 min, 2 users, load average: 1.12, 0.53, 0.26
Tasks: 87 total, 4 running, 83 sleeping, 0 stopped, 0 zombie
%Cpu(s): 91.9 us, 2.7 sy, 5.4 ni, 0.0 id, 0.0 wa, 0.0 hi, 0.0 si, 0.0 st
KiB Mem : 630108 total, 274868 free, 85904 used, 269336 buff/cache
KiB Swap: 1343484 total, 1343484 free, 0 used. 428172 avail Mem

 PID USER PR NI VIRT RES SHR S %CPU %MEM TIME+ COMMAND 
 2331 root 20 0 113120 1184 1004 R 97.7 0.2 2:40.91 highcpu.sh 
 2412 root 39 19 244516 11020 4496 R 1.3 1.7 0:00.11 dnf 
 10 root 20 0 0 0 0 S 0.3 0.0 0:00.68 rcu_sched 
 1 root 20 0 43900 6480 3900 S 0.0 1.0 0:01.61 systemd 
 2 root 20 0 0 0 0 S 0.0 0.0 0:00.00 kthreadd 
 3 root 20 0 0 0 0 S 0.0 0.0 0:00.06 ksoftirqd/0 
 6 root 20 0 0 0 0 S 0.0 0.0 0:00.00 kworker/u2:0 
 7 root rt 0 0 0 0 S 0.0 0.0 0:00.00 migration/0 
 8 root 20 0 0 0 0 S 0.0 0.0 0:00.00 rcu_bh 
 9 root 20 0 0 0 0 S 0.0 0.0 0:00.00 rcuob/0 
 11 root 20 0 0 0 0 R 0.0 0.0 0:00.38 rcuos/0 
 12 root rt 0 0 0 0 S 0.0 0.0 0:00.02 watchdog/0 
 13 root 0 -20 0 0 0 S 0.0 0.0 0:00.00 khelper 
 14 root 20 0 0 0 0 S 0.0 0.0 0:00.00 kdevtmpfs 
 15 root 0 -20 0 0 0 S 0.0 0.0 0:00.00 netns 
 16 root 0 -20 0 0 0 S 0.0 0.0 0:00.00 perf 
 17 root 0 -20 0 0 0 S 0.0 0.0 0:00.00 writeb
As you see in the above output, highcpu.sh process consumes more than 97% CPU usage. Since it consumed more CPU usage, It is quite difficult to run other tasks. After a few minutes, you system might hang or freeze. This is where CPULimt comes in help/
Now, let us limit the CPU usage of this process using CPULimit tool. Say for example, we will limit this process by PID to 30% CPU.

To do so, run:
cpulimit -l 30 -p 2331 &
Here,
  • “-l 30” flag limits the process to 30%.
  • “-p 2331” is the PID of highcpu.sh
Now, let us again check the CPU usage of the above process using command:
top
Sample output:
top - 17:29:16 up 5 min, 1 user, load average: 0.61, 0.57, 0.27
Tasks: 86 total, 2 running, 83 sleeping, 1 stopped, 0 zombie
%Cpu(s): 7.2 us, 0.0 sy, 0.0 ni, 92.8 id, 0.0 wa, 0.0 hi, 0.0 si, 0.0 st
KiB Mem : 630108 total, 435348 free, 78052 used, 116708 buff/cache
KiB Swap: 1343484 total, 1343484 free, 0 used. 442040 avail Mem

PID USER PR NI VIRT RES SHR S %CPU %MEM TIME+ COMMAND 
 2331 root 20 0 113120 1180 1004 T 29.7 0.2 3:36.97 highcpu.sh 
 2334 root 9 -11 4324 692 572 S 1.7 0.1 0:00.47 cpulimit 
 1 root 20 0 43900 6480 3900 S 0.3 1.0 0:01.65 systemd 
 2 root 20 0 0 0 0 S 0.0 0.0 0:00.00 kthreadd 
 3 root 20 0 0 0 0 S 0.0 0.0 0:00.02 ksoftirqd/0 
 5 root 0 -20 0 0 0 S 0.0 0.0 0:00.00 kworker/0:0H 
 6 root 20 0 0 0 0 S 0.0 0.0 0:00.01 kworker/u2:0 
 7 root rt 0 0 0 0 S 0.0 0.0 0:00.00 migration/0 
 8 root 20 0 0 0 0 S 0.0 0.0 0:00.00 rcu_bh 
 9 root 20 0 0 0 0 S 0.0 0.0 0:00.00 rcuob/0 
 10 root 20 0 0 0 0 S 0.0 0.0 0:00.44 rcu_sched 
 11 root 20 0 0 0 0 R 0.0 0.0 0:00.37 rcuos/0 
 12 root rt 0 0 0 0 S 0.0 0.0 0:00.05 watchdog/0 
 13 root 0 -20 0 0 0 S 0.0 0.0 0:00.00 khelper 
 14 root 20 0 0 0 0 S 0.0 0.0 0:00.00 kdevtmpfs 
 15 root 0 -20 0 0 0 S 0.0 0.0 0:00.00 netns 
 16 root 0 -20 0 0 0 S 0.0 0.0 0:00.00 perf

As you see in the above output, the CPU usage of highcpu.sh has been dropped to 29.7%, which is very close to 30&%. Now, you can have more CPU resources to run other processes freely.

We have seen how to limit a process by PID. Alternatively, we can run the above command by specifying the name of the executable program file.

For example, the above command would be:
cpulimit -l 30 ./highcpu.sh &

Similarly, You can start any number processes in the background and limit their CPU usage as you wish.

You can bring the processes which are running in the background to foreground at any time using “fg” command:
fg

Sample output:
cpulimit -l 30 -p 2331

Conclusion

CPULimit can be useful while you are running a process that consumes more CPU usage. Next time If you notice a program consumes more CPU usage, just find PID of the process using “top” command and limit its CPU usage to a minimum value using CPULimit command as described above. You can also use this application to test how an application performs under low CPU usage.
Resource: 

[Quick Tips: Save Command to File]: How To Save Linux Command Output To An Image Or A File

How To Save Linux Command Output To An Image Or A File

Ever been in a situation where you have to send the output of a Linux command to your colleague or friend to get help? This simple Linux hack will definitely be useful to you. You can save a Linux command output to an image or a file and send it to the respective person who wants to review the output of a particular Linux commands. You don’t need to install any additional tools.  You need to install ImageMagick. This can be helpful if you need to send the output to a Technical support person or a Linux administrator.

Save Linux Command Output To An Image

Install ImageMagick tool first. In Ubuntu-like systems, you can install it a shown below.
sudo apt-get install imagemagick

In Arch Linux and its derivatives, run:
sudo pacman -S imagemagick

Now, To save a output of any Linux command to an image, just run the following command:
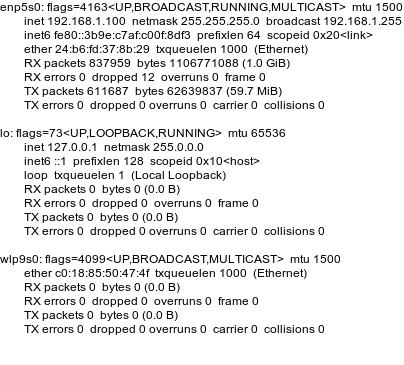
ifconfig | convert label:@- myipaddress.png

The above command will save the ifconfig command output to an Image and save it in the current working directory. Let us bread down the above command and see what each option does.
  • ifconfig will display the IP address of your Linux system.
  • convert command will save the output to an Image.
  • label:@- myipaddress.png will save the command output to an called myipaddress.png.
Here is the output of the above command in my Arch Linux.


Here is another one. I saved my Linux Kernel output to an Image.
uname -a | convert label:@- mylinuxkernel.png

Sample output:

What we have seen above, we have saved the command’s output in an Image. Also, we can save the output on an existing Image file. To do this, run:
convert -font -misc-fixed-*-*-*-*-*-*-*-*-*-*-*-* -fill black -draw "text 270,260 \" `ip addr` \"" Linux.jpg myipaddress.jpg

This command will print the output of “ip addr” command to an image called Linux.jpg and saves it with a new name “myipaddress.jpg”.

Here is the output of the above command:

Pretty easy, isn’t? You can save the output of any command and send it to anyone who can help you to fix your system.

Save Linux Command Output To A File

We know how to save a command’s output to/into a image. We can save the output of a Linux command to a file too.

For example, we can save the “ip addr” command’s output to a file called myipaddress.txt using command:
ip addr > myipaddress.txt

To verify it, view the text file using your favorite text viewers. Or, we can do using “cat” command like below.
cat myipaddress.txt

The following command will save my pacman.log to a file called mylogs.txt.
tail -f /var/log/pacman.log  > mylogs.txt

And, we can easily save the IP details using command:
ifconfig > mynetworkdetails.txt

That’s it. Now you know how to save any command’s output to an Image or a file without having to use any additional tools. Hope this helps. If you find this guide useful

[Quick Tips: Limit Users Access]: How To Limit User’s Access To The Linux System

How To Limit User’s Access To The Linux System

One of my Friend asked me how to allow an user to do only certain tasks, and execute certain commands. The user shouldn’t change the environment variables/paths, can’t visit to the other directories except his home directory, can’t switch to other users etc. The user can only be able to execute few commands assigned by the system administrator. Is that possible? Yes! This is where Restricted Shell comes in help. Using Restricted Shell, we can easily limit user’s access to the linux system. Once you put the users in restricted shell mode, they are allowed to execute only limited set of commands.

What is Restricted Shell?

Let me clarify what exactly Restricted Shell is. Don’t think it’s a separate shell such as Bash, Korn Shell. If you start any existing shell using rbash, –restricted, -r options, then It will become Restricted shell. Say for example, The Bourne shell can be started as a restricted shell with the command bsh -r, and the Korn shell with the command ksh -r.
The Restricted Shell will limit the users from executing most commands and from changing the current working directory. The Restricted Shell will impose the following restrictions to the users.
  • It will not allow you to execute cd command. That means you can’t go anywhere, just stay in the current working directory.
  • It will not allow you to modify the values of $PATH, $SHELL, $BASH_ENV, or $ENV environmental variables.
  • It will not allow you to execute a program that contains a /(slash) character. Say for example, you can’t run /usr/bin/uname or ./uname command. You can however execute uname command. It means that you are allowed to run the commands in the current path.
  • You can’t redirect the output using‘>’, ‘>|’, ‘<>’, ‘>&’, ‘&>’, and ‘>>’ redirection operators.
  • It will not allow you to get out of the restricted shell mode within scripts.
  • It will not allow you to Turn off restricted shell mode with ‘set +r’ or ‘set +o restricted’.
This can be very useful when a large number of users are using a shared system. So, If you want to allow the users to execute only specific commands, Restricted Shell is one way to do this.

Using Restricted Shell mode

First, create a symlink called rbash from Bash as shown below. The following commands should be run as root user.
ln -s /bin/bash /bin/rbash

Next, create an user called “ostechnix” with rbash as his/her default login shell.
useradd ostechnix -s /bin/rbash

Set password to the new user.
passwd ostechnix

Create a bin directory inside the home folder of the the new user.
mkdir /home/ostechnix/bin

Now, we need to specify which commands the user can run.

Here, I am going to let they user to run only “ls”, “mkdir”, and “ping” commands. You can assign as many as commands you wish.

To do so, run the following commands:
ln -s /bin/ls /home/ostechnix/bin/ls
ln -s /bin/mkdir /home/ostechnix/bin/mkdir
ln -s /bin/ping /home/ostechnix/bin/ping

Now, you understand why we created the “bin” directory. The users can’t run any commands except the above three commands.

Next, prevent the user from modifying .bash_profile.
chown root. /home/ostechnix/.bash_profile
chmod 755 /home/ostechnix/.bash_profile

Edit /home/ostechnix/.bash_profile file:
vi /home/ostechnix/.bash_profile

Modify the PATH variable like below.
PATH=$HOME/bin

Save and close the file by pressing ESC key followed by !q.

Now when the user logs in, the restricted shell(rbash) will run as the default login shell and read the .bash_profile, which will set PATH to $HOME/bin so that the user will only be able to run the ls, mkdir and ping commands. The restricted shell will not allow the user to change PATH, and the permissions on .bash_profile will not allow the user to alter the environment to bypass the restrictions during the next login session.

Verifying Rbash

Now, log out from root user and log in to the newly created user i.e ostechnix in our case.

Then, run some commands to check whether it works or not. For example, I want to clear the Terminal.

To do so, I ran:
clear

Sample output:
-rbash: clear: command not found
You can’t come use cd command to change to the different directory.
cd /root

Sample output:
-rbash: cd: restricted

You can’t redirect the output using > operator either.
cat > file.txt

Sample output:
-rbash: file.txt: restricted: cannot redirect output

The user “ostechnix” is allowed to use only the commands assigned by you(the system admin, of course). In our case, the user can execute ls, mkdir and ping commands.
 
ls
 
mkdir dir1
 
ping ostechnix.com

Apart from these three commands, the user can’t do anything. S/He is completely under your control. If you want to assign more commands to him/her, log in to the root user again and assign the commands as shown below.

For example, I want to allow him/her to execute rm command, so I ran the following command as root user.
ln -s /bin/mkdir /home/ostechnix/bin/rm

That’s all for today.

For more details, refer the man pages in the link given below.
Hope this helps. If you like guide

[Quick Tips: Sudo PROMPT]: How To Change The Sudo Prompt In Linux And Unix

How To Change The Sudo Prompt In Linux And Unix

There is an option to change the sudo prompt to something cool or funny. Whenever I use a sudo command, it will display “[sudo] password for …” statement. Let us consider the following example.
 
sudo pacman -Syyu

Sample output:
[sudo] password for sk:

As you see above, the default output is “[sudo] password for sk”. Well, It’s boring to see this each time. I just wanted to change the password prompt to something cool and funny. Here is how you can change the

sudo password prompt as you please.
 
sudo -p "Sir, Could You Please Enter Your password: " pacman -Syyu

The sudo prompt will now look like this:
 
Sir, Could You Please Enter Your password:

Here, -p flag will display the custom password prompt when you use sudo command. Really cool, isn’t it?

I am too lazy to type this sentence every time. Is there anyway to display this automatically when I am
sudoing? Yes! Here comes “alias” in help. Just add an alias to your .bashrc or .alias file like below.
 
alias sudo=’sudo -p “Sir, Could You Please Enter Your password: “‘
 
I don’t want to use alias. Good! You can do this by modifying the sudoers file.

To do so, run:
visudo
Add/modify the following line:
Defaults passprompt="Hey dude, Password Please?:"
It’s also possible to display an icon in sudo prompt. Say for example, to display a lock symbol, just enter the following from your Terminal.
export SUDO_PROMPT='[sudo] %p : '
This will display a lock symbol when you use any sudo command.

[sudo] sk :

You can use any other symbols with any custom message within quotes as shown above.

That’s it. Whenever you run sudo command, It will greet you however you please.
Want to impress your Girlfriend? Just change the sudo password prompt in her Linux box to something romantic. How about this?
export SUDO_PROMPT='Hello beautiful, Enter Your password:'
You should run the above command as root user. Whenever she use sudo command, she will be greeted with the following message:

Hello beautiful, Enter Your password:

She will be happy! Who doesn’t want compliments, huh?

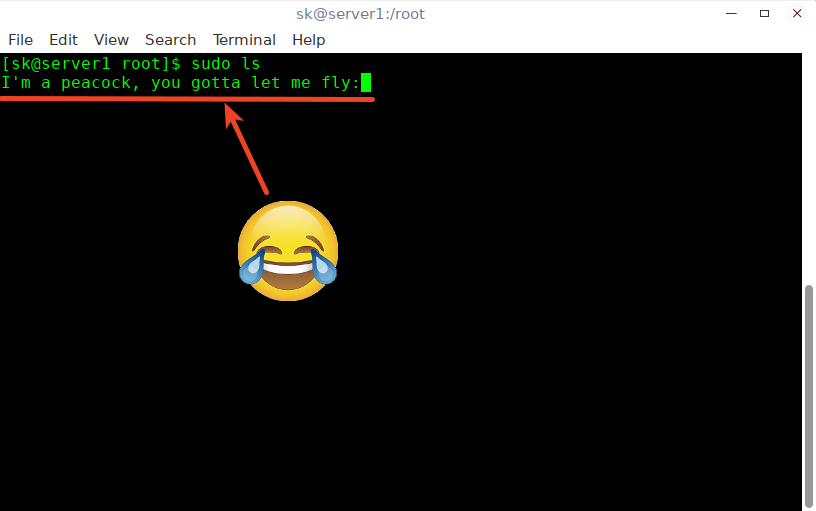
Look, what I have done to my sudo prompt. LOL!

Don’t do this on your production systems.
 

[Quick Tips: Password Complexities]: How To Check The Password Complexity In Linux

How To Check The Password Complexity In Linux

Now, how do we know if the generated password is strong? Good question, isn’t it? Indeed! This brief guide has the answer for you. Before going further, here is my suggestion to all those who wants to keep your system safe.
  • Never ever use the same password for different Email accounts, ssh/ftp/sftp logins. If a hacker managed to crack your password, he literally have access to all accounts. So, generate and use different unique password to each account.
  • A good password should be combination of letters, numbers, special characters.
  • Make sure your password has at least 12 or more characters. Check our guide how to force users to use strong password.
  • Don’t save your passwords online. Use good password manager or memorize them.
  • Consider two factor authentication if possible.
  • More importantly, Don’t use valid answers for security questions, eventually with enough data breaches, hackers will have all the answers. The common security questions are father’s maiden name, school name, favorite pet’s name, last name of first girlfriend/boyfriend, etc. Since much of the time these are stored in plain text on websites someone can gain access to many of your accounts by knowing these answers. Instead, put in mixed letters/numbers as answers and use a secure password manager to keep track of your answers. I came across this tip on Reddit. So I thought sharing it here would be helpful to someone.
Now, let us get into the topic. In this short tutorial, we will see how to check the password complexity in Linux from commandline.

Check The Password Complexity In Linux

There are plenty of tools and websites are available to test the password complexity. But, what we are going to discuss here is the easiest and effective method among them.

Install cracklib package if it is not installed already.

On Arch Linux and its derivatives, run:
sudo pacman -S cracklib

On RHEL, Fedora, CentOS:
sudo yum install cracklib
Or,
sudo dnf install cracklib

On Debian, Ubuntu, Linux Mint:
sudo apt-get install libcrack2

Now, It is time for some password complexity tests.

Let us start with a simple password.
echo "Welcome1" | cracklib-check

Sample output:
Welcome1: it is based on a dictionary word.

As you see in the above output, the given password is based on dictionary word, which is not recommended.

Let us see what will be the result if give a strong password.
echo "wXCHXlxuhrFrFMQLqik=9" | cracklib-check

Sample output:
wXCHXlxuhrFrFMQLqik=9: OK

Here is another one.
echo "sheew3aeReidir&*=" | cracklib-check

Sample output:
sheew3aeReidir&*=: OK

Great! These password are strong enough to use. Likewise, You can check the complexity of different passwords as described above.

[Quick tips: Allow/Deny user/ Group]: Allow Or Deny SSH Access To A Particular User Or Group In Linux

Allow Or Deny SSH Access To A Particular User Or Group In Linux

openSSH configuration file has two directives for both allowing and denying SSH access to a particular user(s) or a group.

Allow SSH Access to a user or group

First, we will see how to allow SSH access for a particular user, for example sk.
Please note that all commands should be run as root user.

Go to your remote server, and edit sshd_config file:
vi /etc/ssh/sshd_config

Add or edit the following line. Replace “sk” with your username.
AllowUsers sk

You can also specify more than one user as shown below.
AllowUsers sk ostechnix

To allow an entire group, say for example root, add/edit the following line:
AllowGroups root

Those who are in the “root” group are can able to ssh to the remote server.
Save and quit the SSH config file. Restart SSH service to take effect the changes.
systemctl restart sshd

Now, the users sk, ostechnix or all the users under the group “root” are allowed to ssh into your remote server. The other users (except sk, ostechnix and users of “root” group) can’t ssh to the remote server.

If you try to ssh in to the remote server using any one of non-allowed user, you will get the following message:
Permission denied, please try again.
Now, let us go ahead and see how to deny/disable ssh access to a particular user or group.

Deny SSH Access to a user or group

To disable or deny SSH access to any user or group, you need to add/edit the following directives in your remote server’s sshd_config file.
To deny SSH access to specific user called “sk”, edit sshd_config file:
vi /etc/ssh/sshd_config
Add/edit the following line in sshd_config file.
DenyUsers sk

Similarly, To deny SSH access to multiple users, specify the usernames with comma separated as shown below.
DenyUsers sk ostechnix

To deny SSH access to an entire group, add:
DenyGroups root

Save and quit the ssh config file. Restart ssh service to take effect the changes.
systemctl restart sshd

if you try to ssh to server using denied users, for example sk:
ssh sk@192.168.1.150

You will get the following message:
sk@192.168.1.150's password: 
Permission denied, please try again.
sk@192.168.1.150's password:

More importantly you should disable Root user login too. Root ssh access is considered a bad practice in terms of security.

To disable root ssh login, edit sshd_config file:
vi /etc/ssh/sshd_config

Find the following line, Uncomment it, and set the value to no.
PermitRootLogin no

Restart SSH service. Congrats! You have just disabled the ssh root login.